Templates


What are Templates?
Templates let you define a reusable device configuration and apply it to many devices at once. Instead of repeating setup on each device, you configure it once in a template and then apply that template whenever needed.
This approach helps you:
- Scale deployments faster.
- Keep configuration consistent across devices.
- Reduce manual errors and maintenance overhead.
Highlighted Template Features
Templates can include most cloud-managed configuration elements, including:
- Advanced settings.
- Custom code.
- Services.
- Loggers/CAN Logging.
- Triggers.
- Jobs.
- Geofences.
- Locations.
- Vehicle Groups.
Each configured item becomes part of your reusable template baseline.
Quick Start
Use this workflow for day-to-day template management:
- Create a template.
- Configure the template (settings + functional sections).
- Assign devices.
- Apply template.
Once applied, all selected devices will inherit the configuration defined in the template.
Step 1: Create a New Template
Create a template that will serve as your baseline configuration.
Steps:
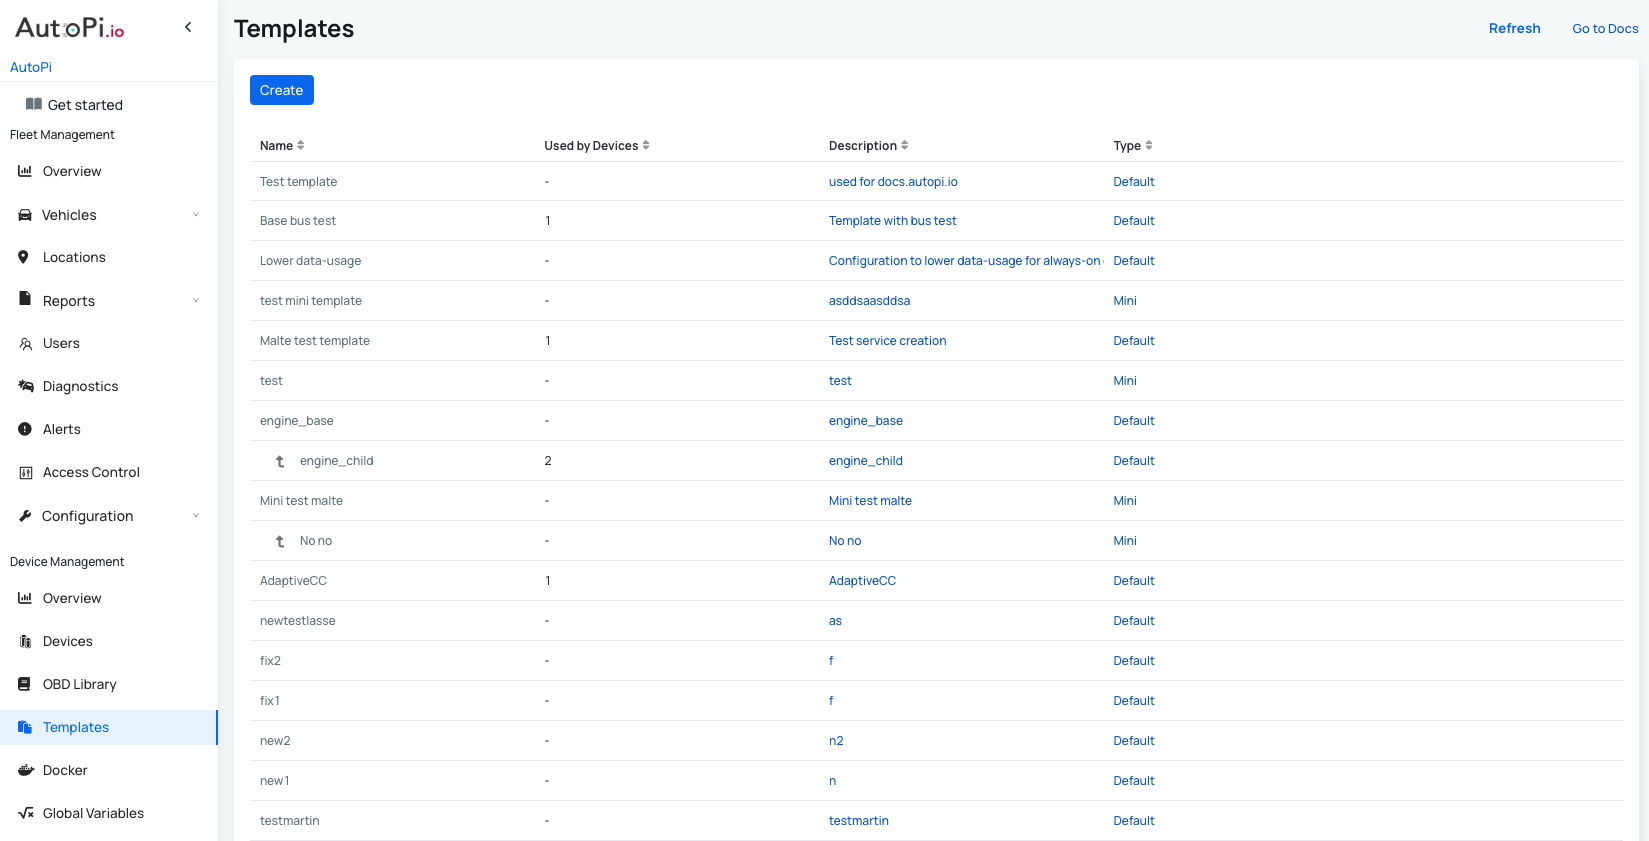
- Navigate to the Templates section.
- Click Create.
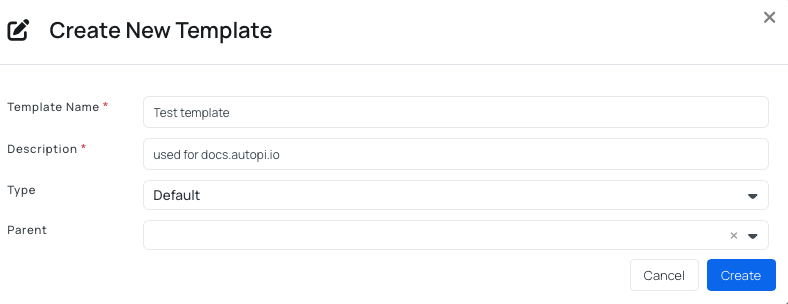
- Fill in:
- Template name: use a clear, descriptive name.
- Description: add context so the template is easy to identify.
- Type (optional): choose the correct device type:
- Default is meant to be used for AutoPi TMU CM4 and CAN-FD Pro devices.
- Mini is meant to be used for AutoPi Mini devices.
- Parent (optional): select a parent template to inherit its configuration.
- Click Create. The template will appear in the Templates table.
Step 2: Configure Template Settings
Open any template, then click Settings. This section controls the template identity and shared associations.
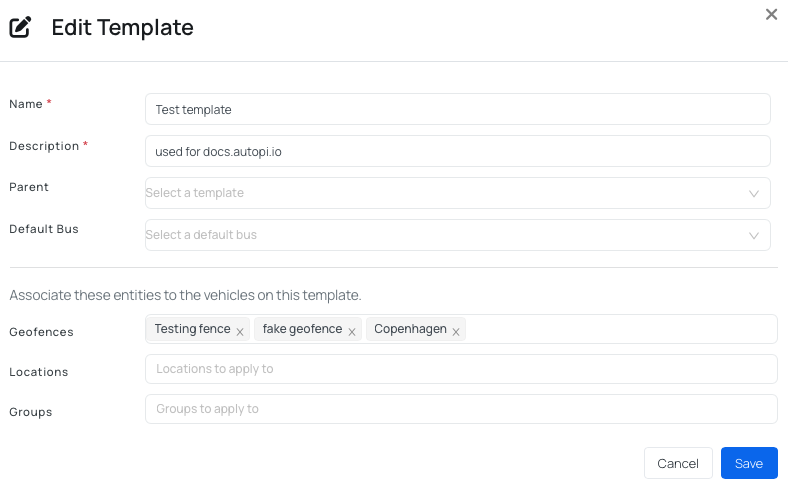
Available settings:
- Name: change the template name.
- Description: add or update a description.
- Parent (optional): choose another template as parent. This template becomes a child template and inherits parent configurations.
- Default bus (optional): select the bus that should be used as default on devices in this template.
- Geofences (optional): associate fleet geofences with the template.
- Locations (optional): associate locations with the template.
- Groups (optional): associate vehicle groups with the template.
Click Save to apply the changes.
Step 3: Define Functional Configuration
After the Settings section is configured, define the behavior you want all assigned devices to inherit.
Templates support most options available on individual devices, while excluding highly device-specific options to preserve reusability.
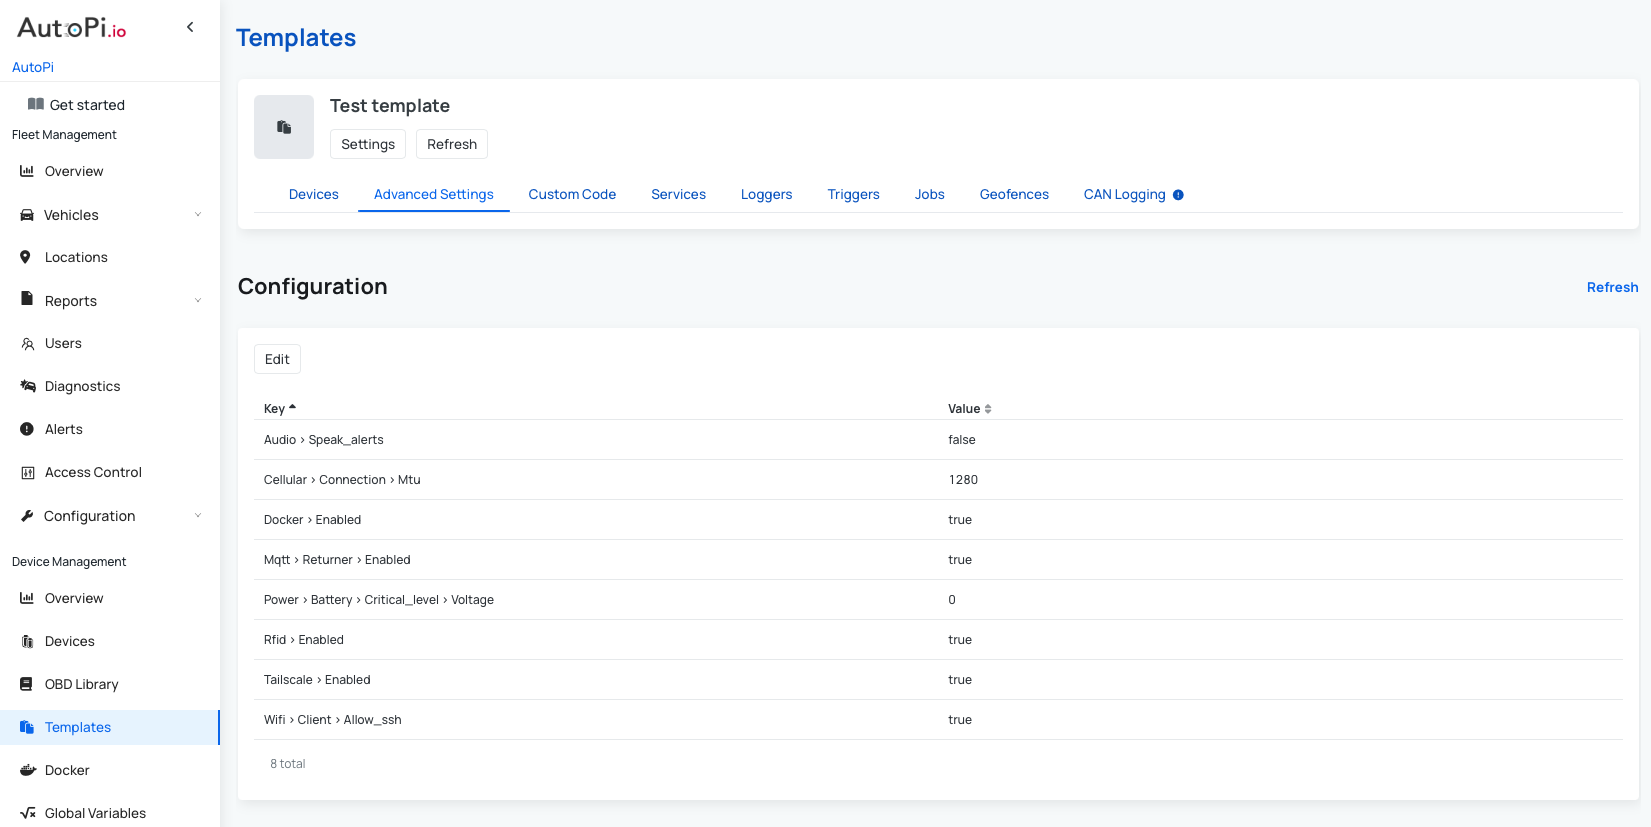
Advanced Settings
Most advanced settings can be configured on templates.
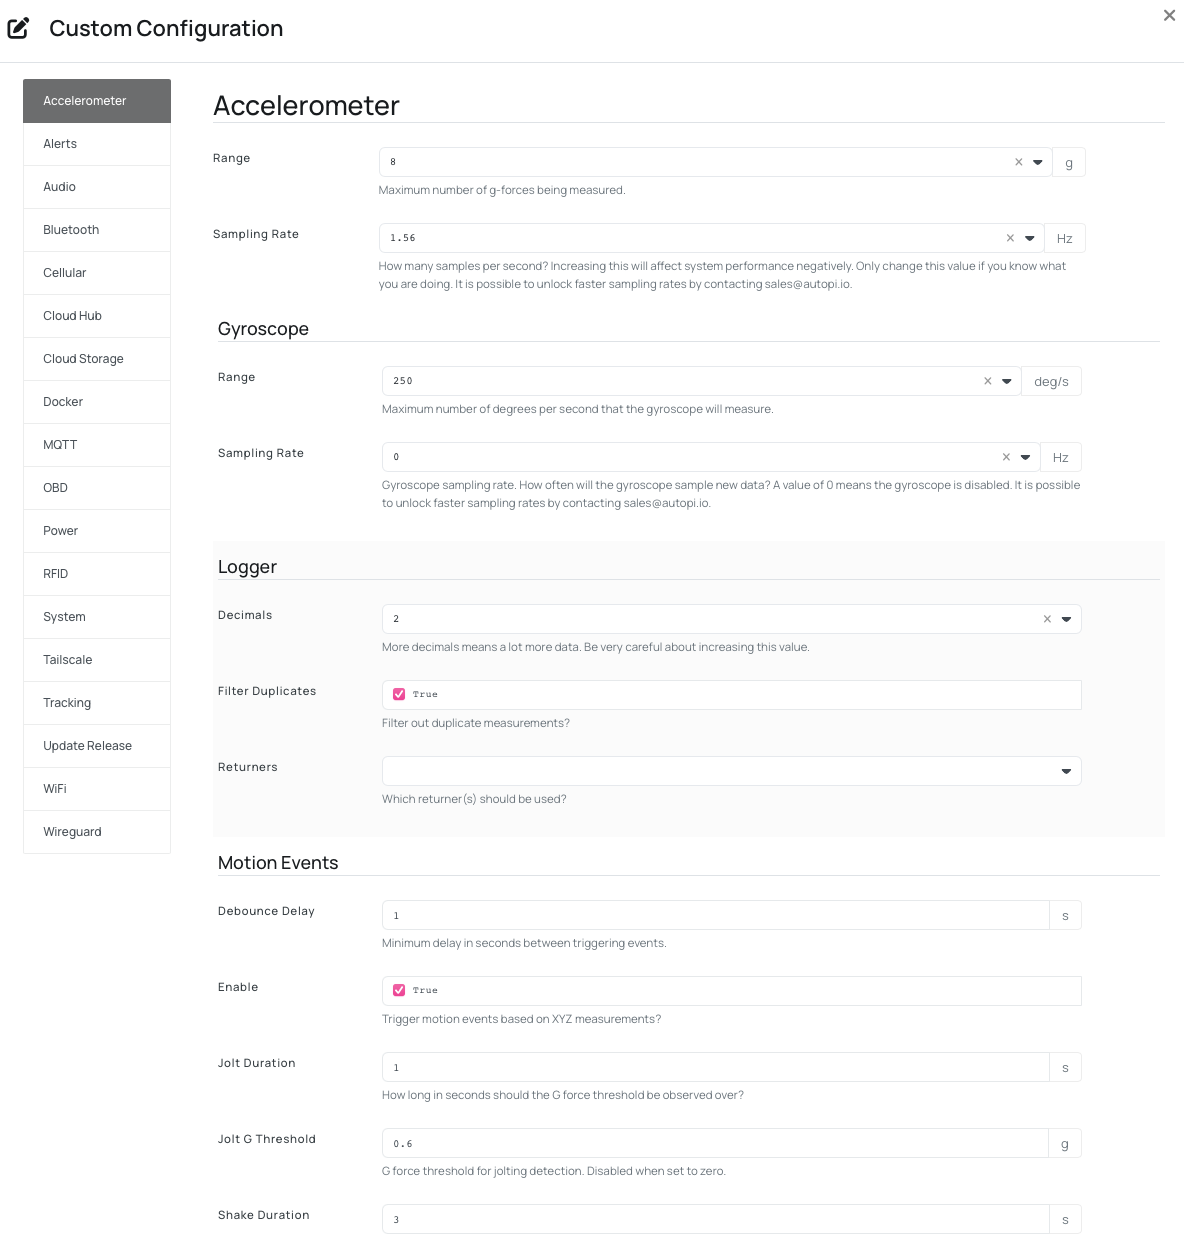
The configuration table shows all key/value pairs currently associated with the template. To update settings:
- Click Edit to open the advanced settings UI.
- Make your changes.
- Click Save.
To learn more about individual settings, refer to the relevant guides:
- For AutoPi Mini devices: Advanced settings for Mini
- For AutoPi TMU CM4 devices: Advanced settings for TMU CM4
Custom Code
Custom modules are created in templates similarly to individual devices.
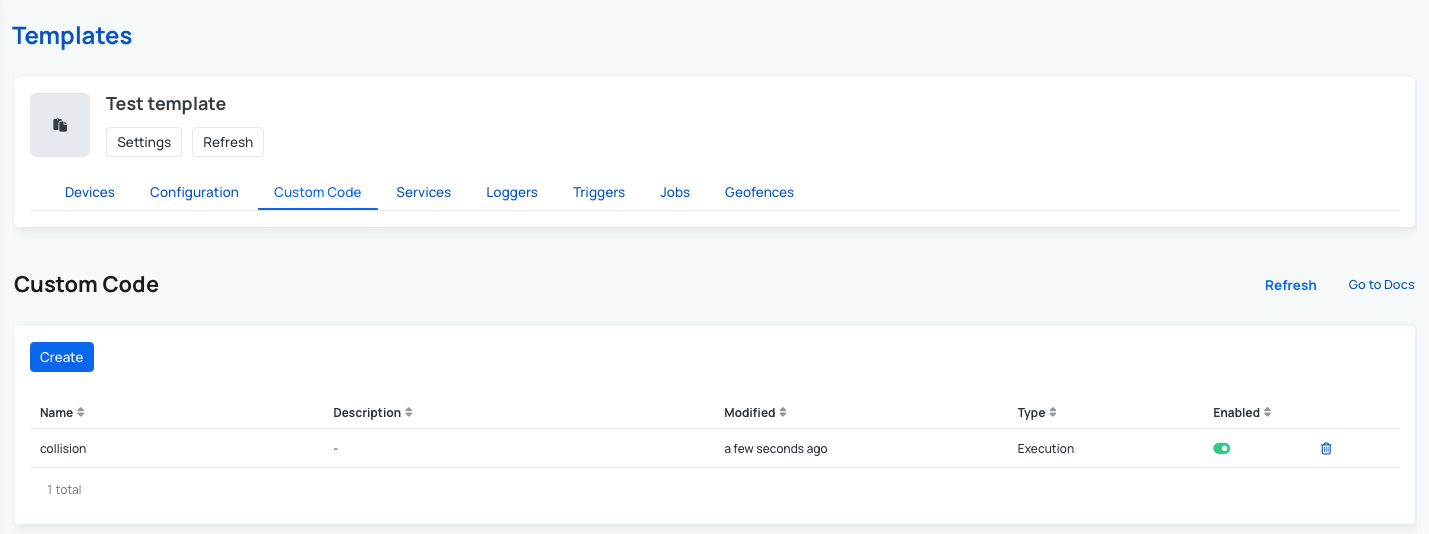
When creating a custom module of type Service, a corresponding custom service is automatically created and associated with the same template.
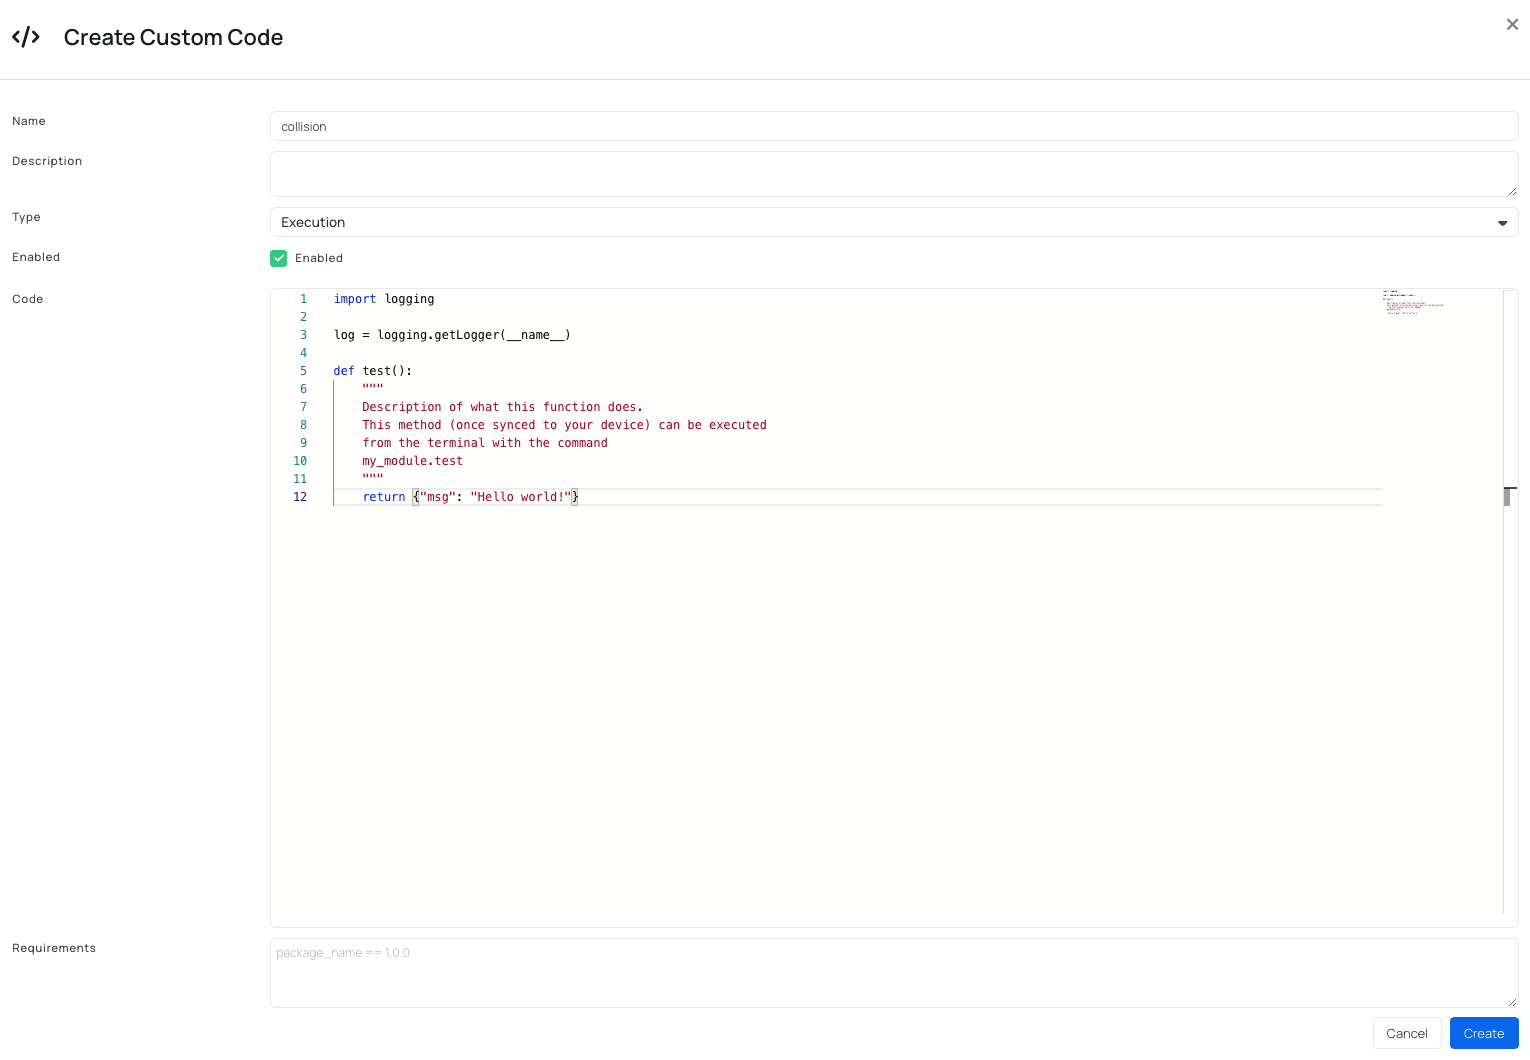
To learn more about how to create a custom code, refer to the relevant guide: Custom Code.
Services
Services (managers) are background processes running on the device and supervised by Salt Minion.
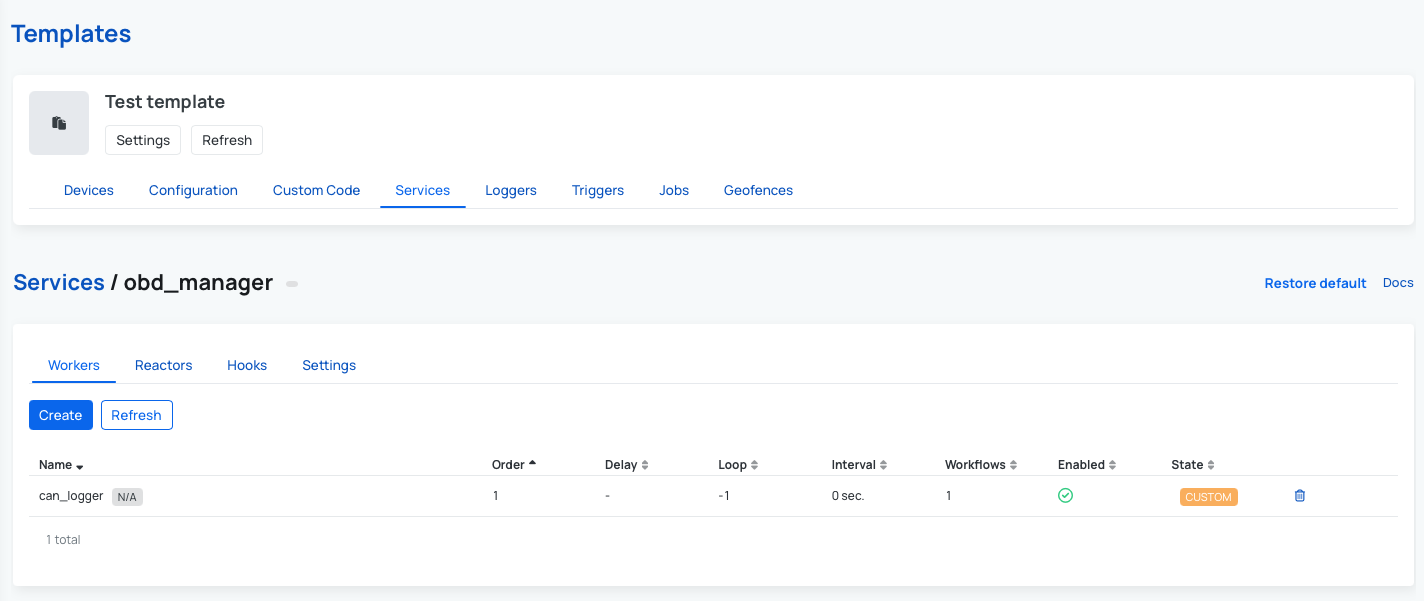
Default AutoPi services provide the interface between Core software and hardware components. For example, obd_manager handles communication with the STN chip. Templates also support custom services, including required Python packages.
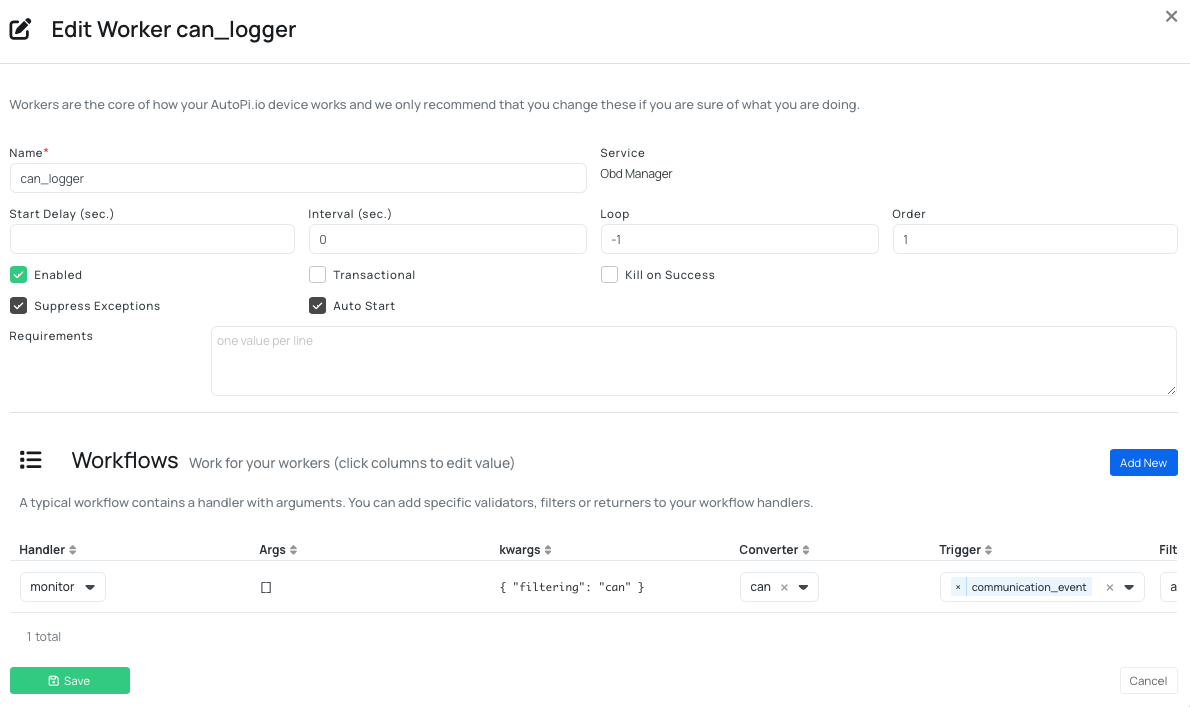
To override a default service (for example obd_manager) through a template, create a custom service with the same name.
To learn more about individual services, refer to the relevant guides:
Loggers
Logging setup is device-specific. Use the correct flow for your device type.
- AutoPi TMU CM4 (Loggers tab):
- Template logger creation is intended for TMU CM4 workflows.
- Creating a logger in a template also creates a bus associated with that template.
- Before creating template loggers, prepare CAN Messages, CAN Signals, or PIDs in OBD Library/My Library.
- AutoPi Mini:
- Mini uses a different logger layout as the device above, focused on predefined parameters and trigger modes.
- Follow the Mini logger flow in Loggers.
- AutoPi CAN-FD Pro:
- CAN-FD Pro uses a separate CAN Logging tab, not the standard logger flow.
- Configure channels, filters, decoders, and outputs in the CAN Logging workflow.
- See Loggers for the device-specific overview or User Guide for Pro device.
If you want to learn more about about different device types flows and their comparison, check out this guide: Loggers.
AutoPi TMU CM4
For TMU CM4 template loggers, you can create:
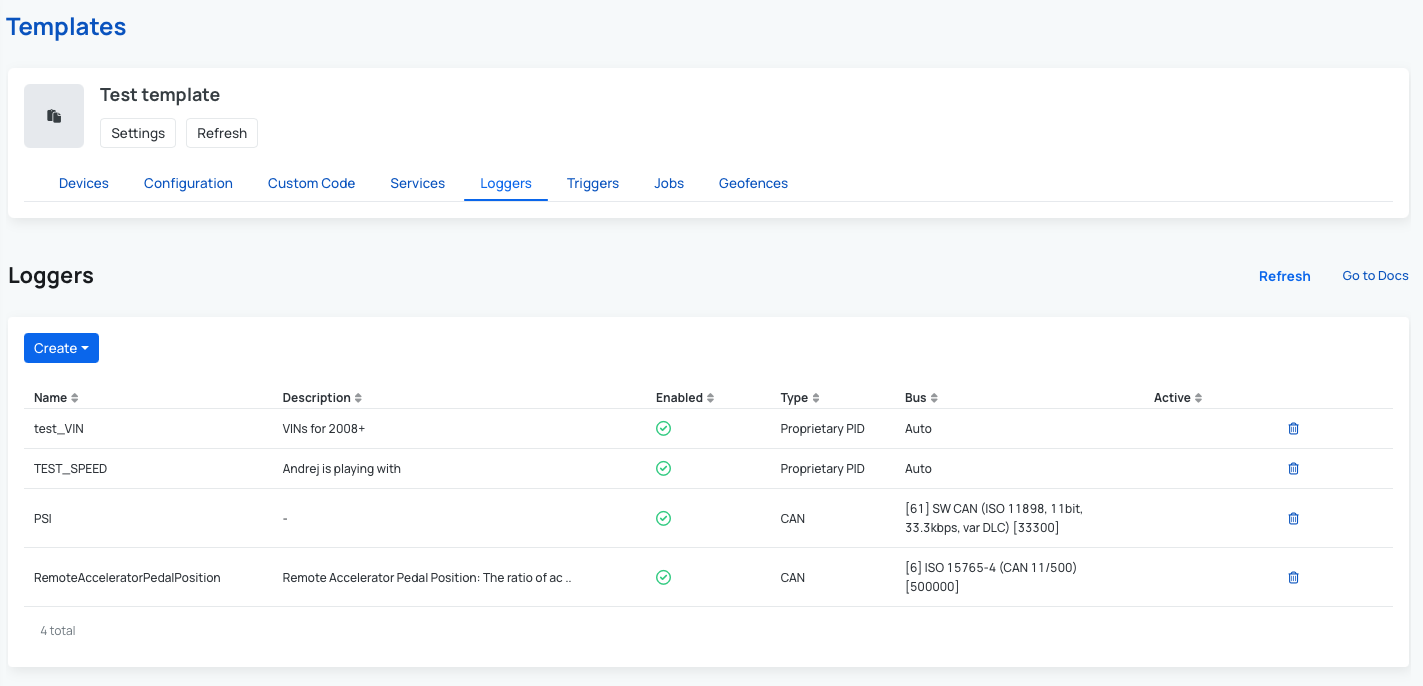
Before creating template loggers, prepare CAN Messages, CAN Signals, or PIDs in OBD Library/My Library. If you want to learn more about the whole process check out this guide: Create Loggers for AutoPi TMU CM4.
AutoPi Mini
For AutoPi Mini templates, logger setup uses the Mini logger layout with parameter-based configuration.
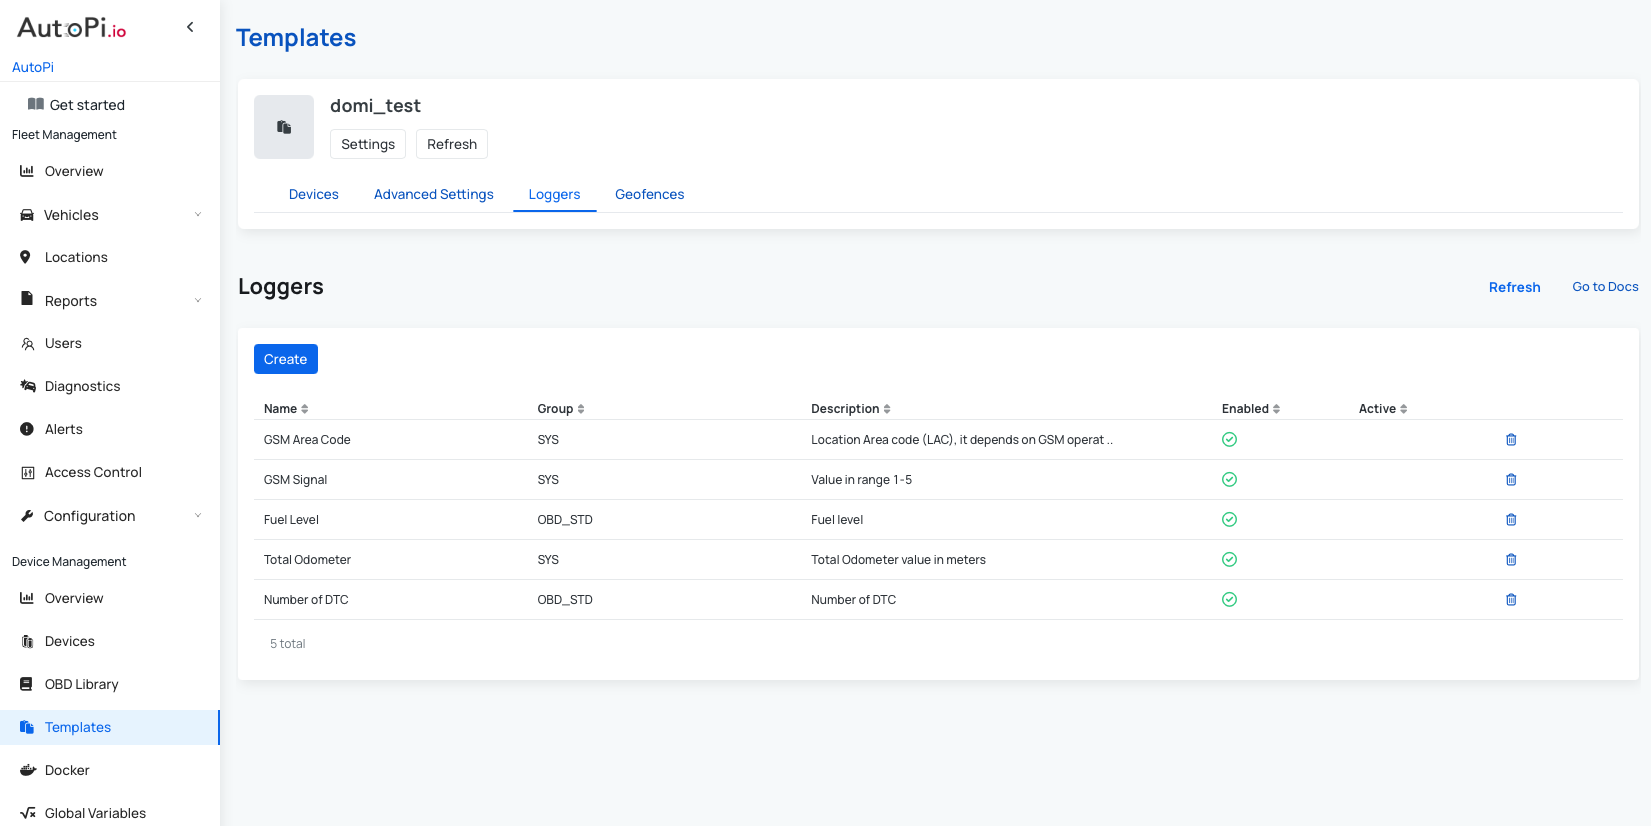
To create a new logger:
- Open a template of type Mini.
- Go to the Loggers page.
- Click Create.
- Configure the logger:
- Select the logger from the Parameter dropdown.
- Set whether the logger should be Enabled.
- Choose the trigger mode: Periodic monitoring or Event on.
- Click Save.
Repeat this process to add as many loggers as needed for your Mini deployment.
AutoPi CAN-FD Pro
For AutoPi CAN-FD Pro templates, logging is managed through the CAN Logging tab, not the standard Loggers page used by AutoPi TMU CM4 and AutoPi Mini.
This tab is available only for Pro device templates. If CAN Logging configuration is applied to other device types, those Pro-specific settings are ignored during template apply.
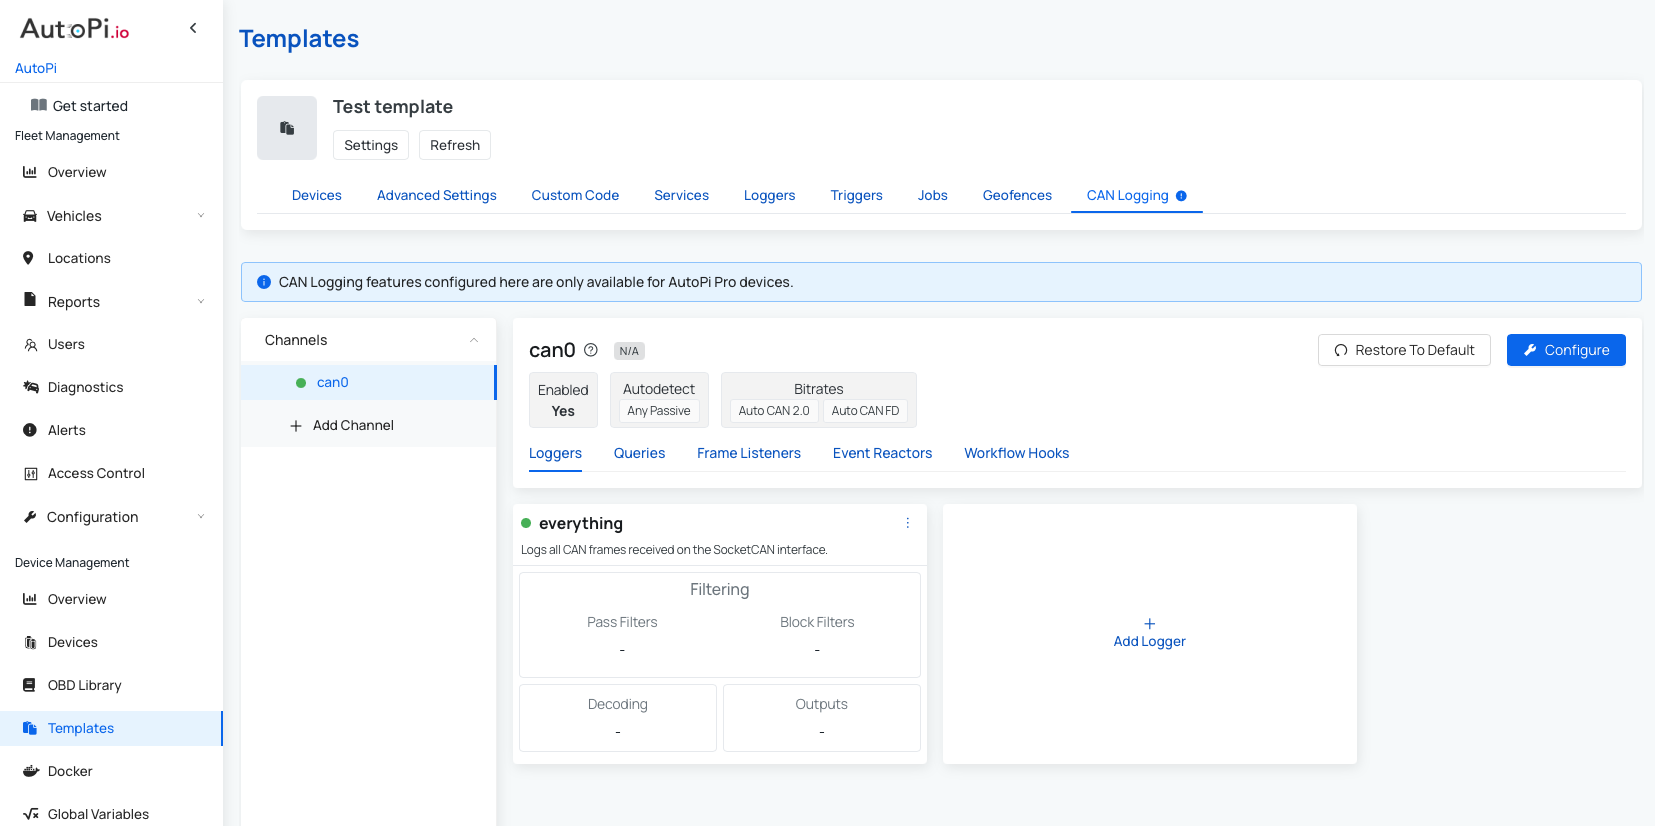
In the CAN Logging tab, you can configure:
- Channels: add or edit channel definitions.
- Loggers: add or edit loggers.
- Queries: add or edit queries.
- Frame Listeners: add or edit frame listeners.
- Event Reactors: add or edit event reactors.
- Workflow Hooks: add or edit workflow hooks.
Because CAN-FD Pro logging includes many advanced capabilities, use the User Guide to ensure a correct end-to-end setup.
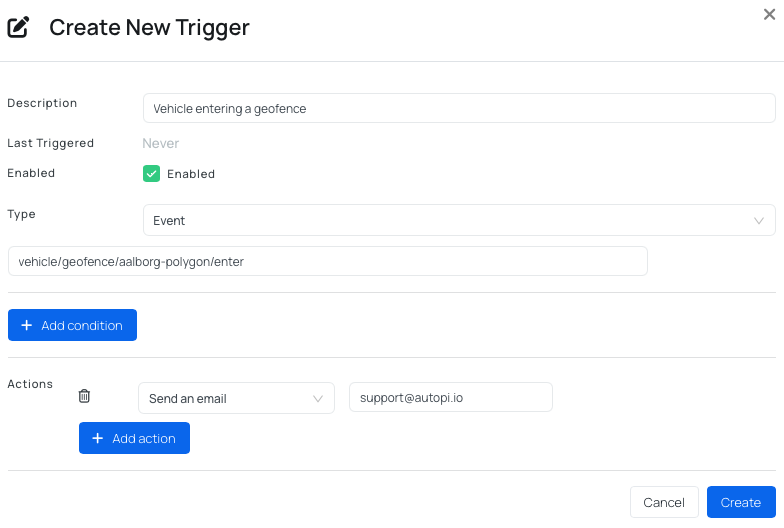
Triggers
Triggers send notifications when specific events or signals occur on a device. Conditions can be added so triggers fire only when defined criteria are met.
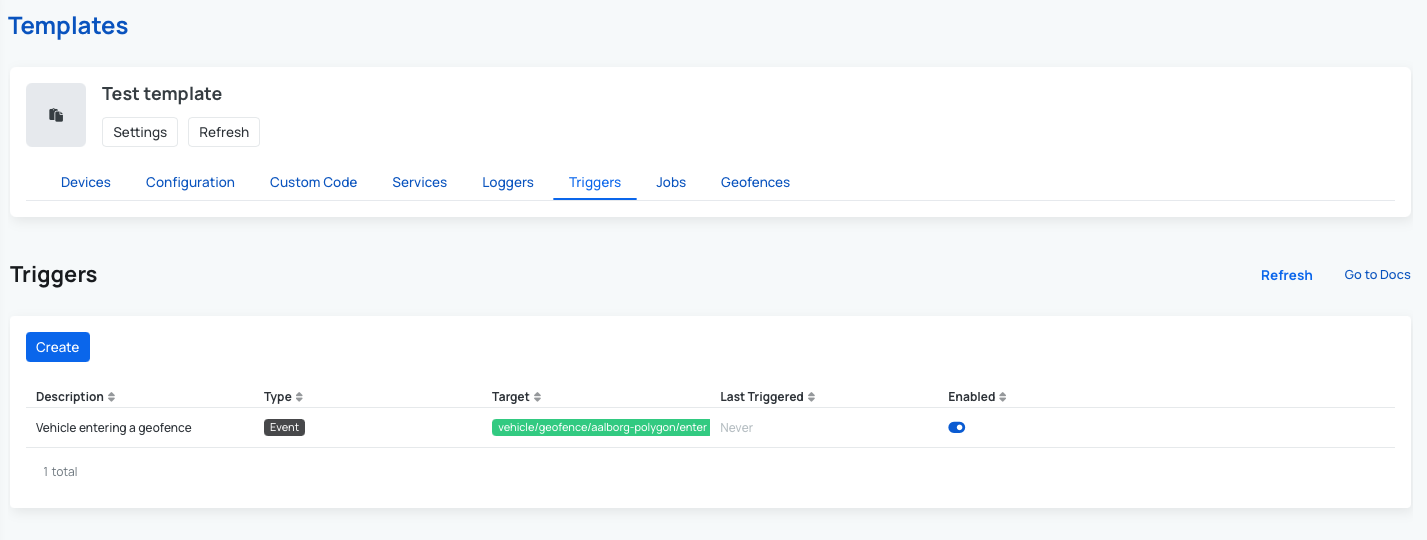
When a device reports data to cloud, the system evaluates trigger rules based on event tag or signal name, plus any defined conditions.
Supported trigger actions include:
- Send an email.
- Send webhook request.
- Create an alert.
Example of setting up a new trigger:
To learn more about individual settings, refer to the relevant guide: A Guide to Triggers.
Jobs
Jobs allow you to schedule commands to run on devices. Results can be uploaded to AutoPi Cloud or external systems using returners.
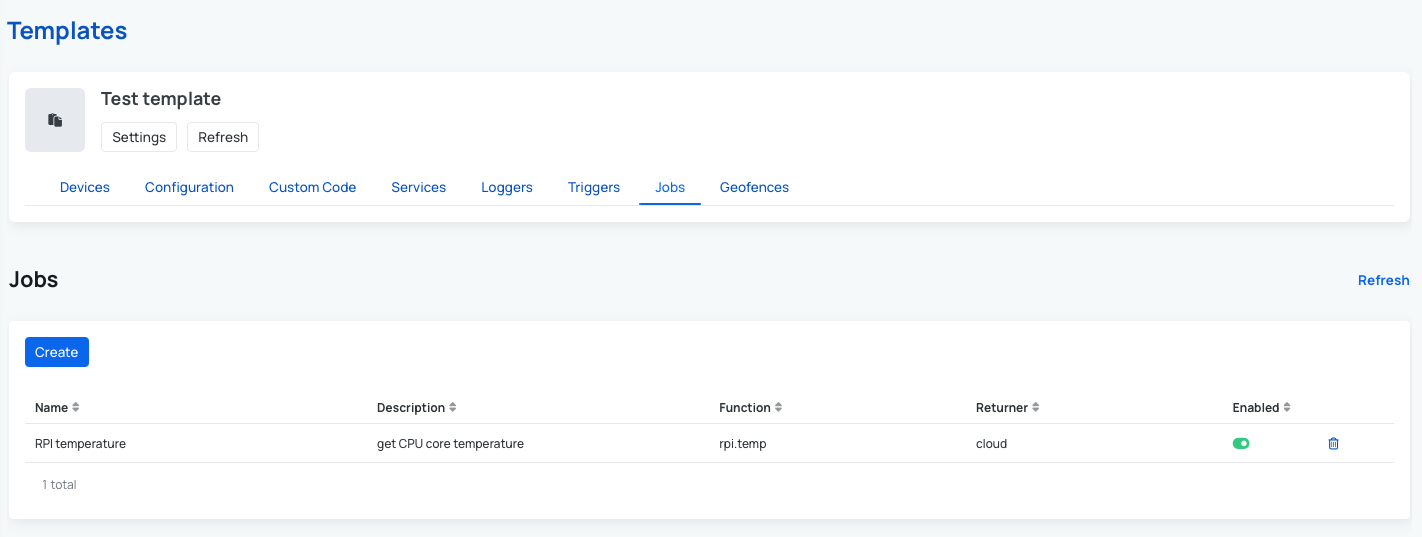
Example of the Job for getting CPU core temperature:

To learn more about individual settings, refer to the relevant guide: A Guide to Jobs.
Geofences
Templates currently support both device geofences and fleet geofences. Fleet geofences are included in the Settings under template, you can read more here: Use Fleet Geofences with Templates.
Device geofences allow you to define geographic areas and receive notifications when a vehicle enters or exits those areas. Geofences can be defined as a polygon shape, or a point with a radius.
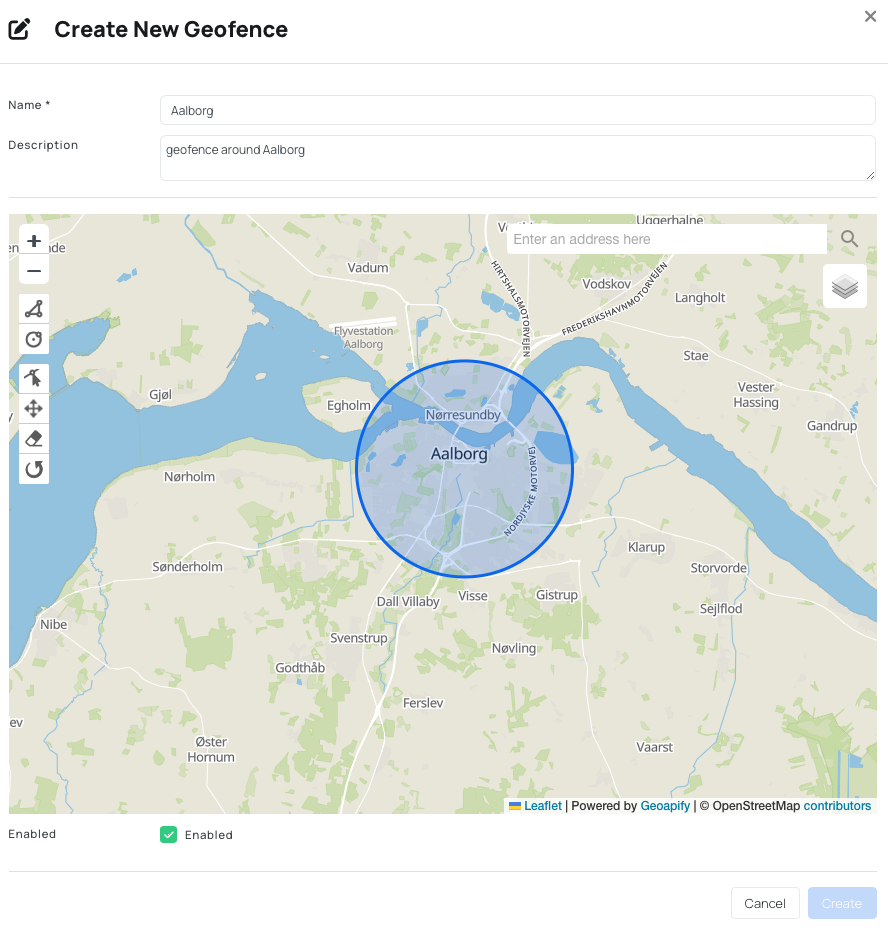
To learn more about individual settings, refer to the relevant guide: A Guide to Device Geofences.
Step 4: Assign Devices and Apply Template
Once the template is configured, assign devices and apply changes.
- Navigate to the Templates table.
- Open the template and go to the Devices page.
- Click Add and select devices to assign.
- After assigning devices, click Apply template (upper-right corner) and choose one of the following:
- Apply all async.
- Apply all async + all descendants.
After apply completes, assigned devices receive the full template configuration.
How to Work with Templates Efficiently
The main value of templates is operational efficiency at scale:
- Configure once in the template.
- Add as many devices as needed.
- Apply the template to push all configured functionality in one workflow.
This avoids repeating manual setup on each device and helps keep fleet behavior consistent over time.
Recommended operating model:
- Keep template configuration as the source of truth.
- Minimize manual per-device changes after template assignment.
- Reapply template whenever shared configuration is updated.
- Use parent/child templates to inherit common baseline settings and specialize only where needed.
For reproducible results, keep device-level configuration as clean as possible and limit manual changes on devices that use templates. This reduces conflicts between manual updates and template-applied configuration.
 Buy AutoPi device
 Compare all AutoPi devices
 Contact our sales team