Geofences

Note: This functionality is only available for devices that had Device Geofences set up in the past.
For new setups, we recommend using Fleet Geofences, which provide improved functionality and easier management.
Create a Device Geofence
Geofences allow you to define a specific area on a map and receive notifications when a vehicle enters or exits that area. A geofence can be defined as either:
- A polygon (custom shape).
- A circle (point with radius).
Steps to Create a Device Geofence
- Navigate to Device → Geofence tab.
- Click Create.
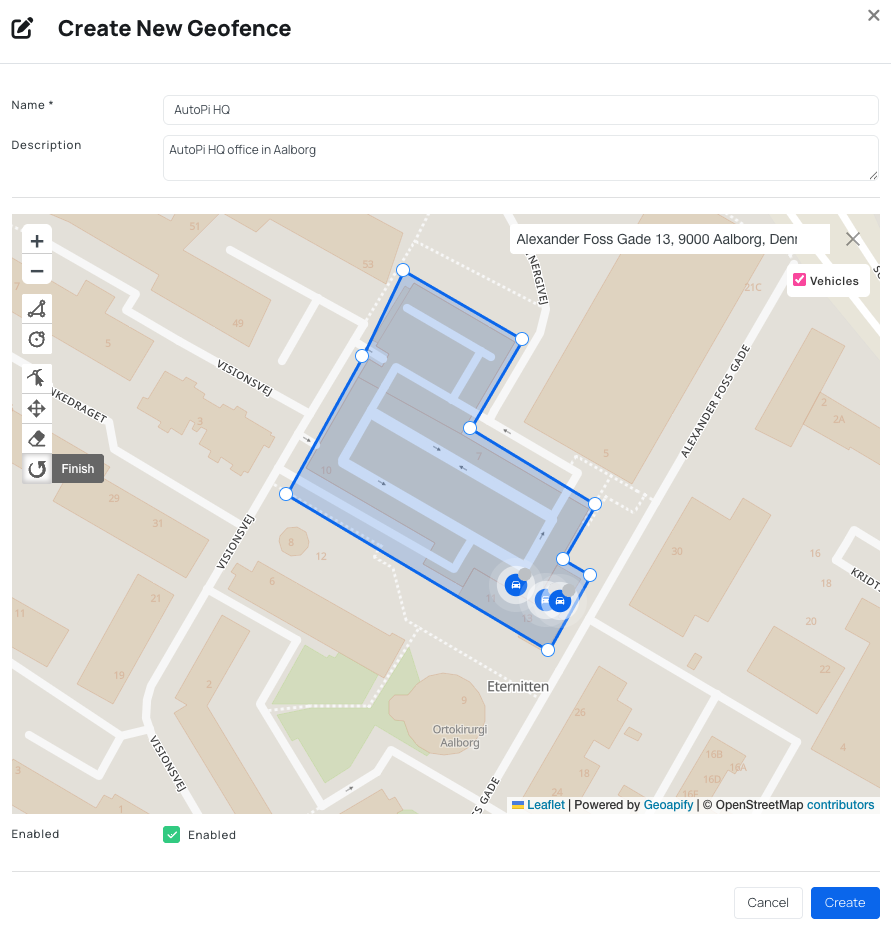
- Fill out the following:
Basic Information
- Name – name of your geofence.
- Description (optional) – additional details
Define the Geofence Area
- Use the search bar to locate a specific address.
- Enable vehicle position to draw more precisely.
- Use zoom controls (+ / -) to adjust the map view.
- Draw the geofence using:
- Circle.
- Polygon.
- Adjust the shape using:
- Edit layers – modify points.
- Drag layers – move the geofence.
- Rotate layers – rotate the shape of the geofence.
- Remove layers – delete the geofence.
Settings
- Enabled – toggle the geofence on or off.
How Device Geofences Work
Once created, the geofence is synchronized to the device. The device evaluates its position and triggers events based on geofence state.
Event Types
1. Wake-Up State Check
When the device wakes up, it reports whether it is inside or outside each geofence:
vehicle/geofence/GEOFENCE_NAME/insidevehicle/geofence/GEOFENCE_NAME/outside
2. Enter / Exit Events
When a new position is logged:
- The device checks if the geofence state has changed.
- If 3 consecutive positions confirm the change, an event is triggered:
vehicle/geofence/GEOFENCE_NAME/entervehicle/geofence/GEOFENCE_NAME/exit
These events are sent to the AutoPi Cloud, where they can be used for monitoring and automation.
Use Geofences with Templates
Device geofences are typically assigned to a single device. To apply the same geofence to multiple devices, use Templates.
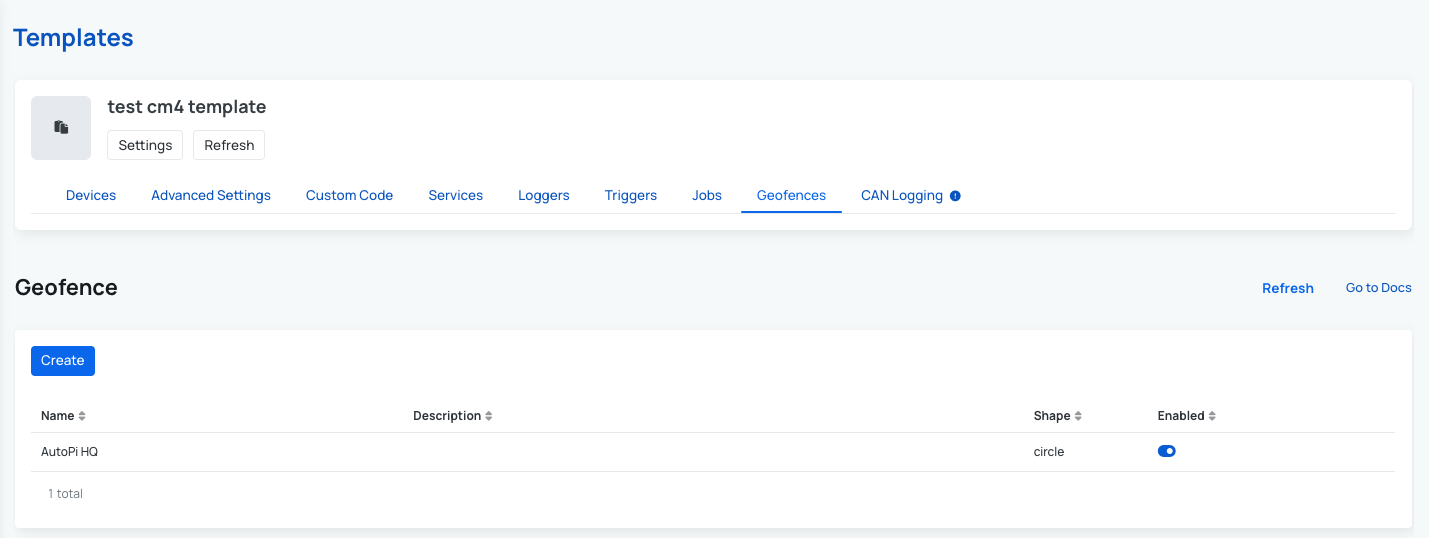
Steps
- Navigate to Templates.
- Select a template or Create a new one.
- Open the Geofences tab.
- Click Create.
- Configure the geofence (same as above).
- Assign devices and apply the template.
This allows you to deploy geofences across multiple devices efficiently.
Use Device Geofences with Triggers
Geofence events can be used together with Triggers to automate actions.
Example Use Case
- Notify by email when a vehicle enters a restricted area:
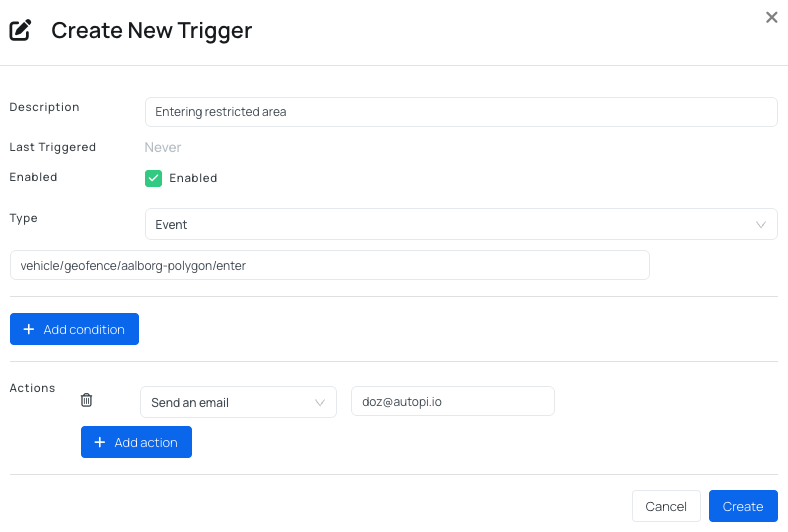
How It Works
- Geofence events appear under Device → Events.
- You can create a Trigger based on:
vehicle/geofence/*/entervehicle/geofence/*/exit
Possible Actions
- Send email notifications.
- Trigger webhook requests.
- Send an alert on AutoPi Cloud.
Recommendation: For improved usability and fleet-wide management, consider using Fleet Geofences, which provide a more scalable and user-friendly approach.
 Buy AutoPi device
 Compare all AutoPi devices
 Contact our sales team