Custom Code


The Custom Code feature in the AutoPi Cloud allows you to extend the functionality of your device by writing your own Python code. It enables full control over how data is processed, how services behave, and how the device interacts with hardware and external systems.
Custom Code runs directly on the device and integrates with the AutoPi Core platform, including services, workers, hooks, and triggers.
Overview
Custom Code enables you to:
- Create custom logic using Python.
- Extend or modify existing AutoPi services.
- Process CAN / OBD / GPS data.
- Trigger actions based on conditions.
- Build fully custom workflows on the device.
It is the foundation for advanced customization and integration on AutoPi devices.
AutoPi devices support executing custom commands and modules directly from the AutoPi cloud or Rest API, allowing programmatic control of device behavior.
Interface Overview
Navigate to: Device → Custom Code.
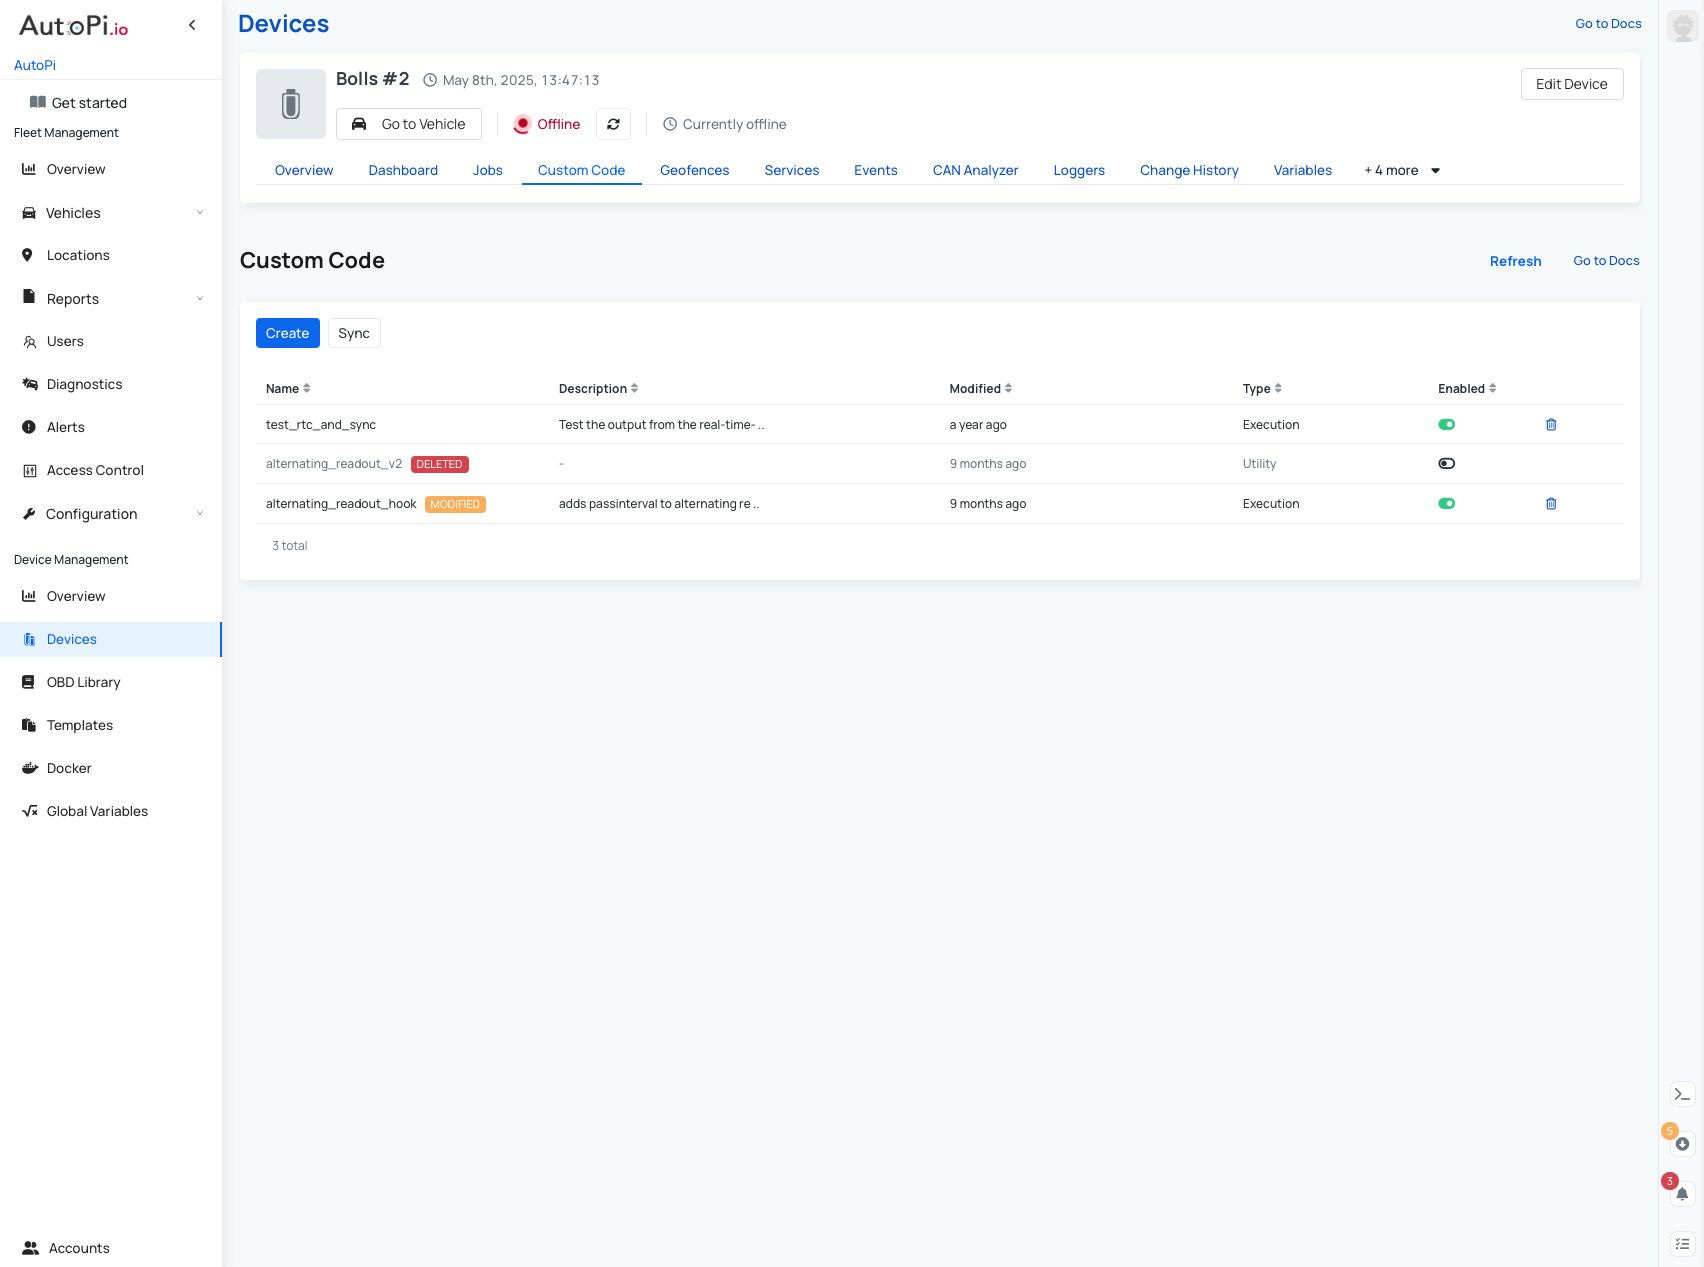
The page lists all custom modules configured on the device.
| Field | Description |
|---|---|
| Name | Module name |
| Description | Optional description |
| Modified | Last updated timestamp |
| Type | Module type (Execution, Service, etc.) |
| Enabled | Whether the module is active |
What is a Custom Module?
A custom module is a Python file that defines one or more functions that can be used by the AutoPi system.
Modules can be used in:
- Services - read more here: Create Custom Services.
- Workers - read more here: Create Custom Workers.
- Hooks - read more here: Create Custom Hooks.
- Triggers - read more here: Triggers.
- Direct command execution - using AutoPi cloud and its Terminal.
Module Types
Execution
Used for:
- Standalone functions.
- Hooks and triggers.
- Data processing.
Example use cases:
- Transform CAN data.
- Validate incoming data.
- Trigger events.
Service
Used for:
- Long-running processes.
- Background logic.
A service typically includes a start() function that runs continuously.
Custom services run alongside built-in services on the device.
Creating Custom Code
Step-by-step
- Go to Device → Custom Code.
- Click Create.
- Configure:
- Name.
- Description (optional).
- Type (Execution or Service)
- Enabled (or disabled).
- Add Python code.
- Specify requirements (optional).
- Click Save.
- Click Sync to deploy to the device.
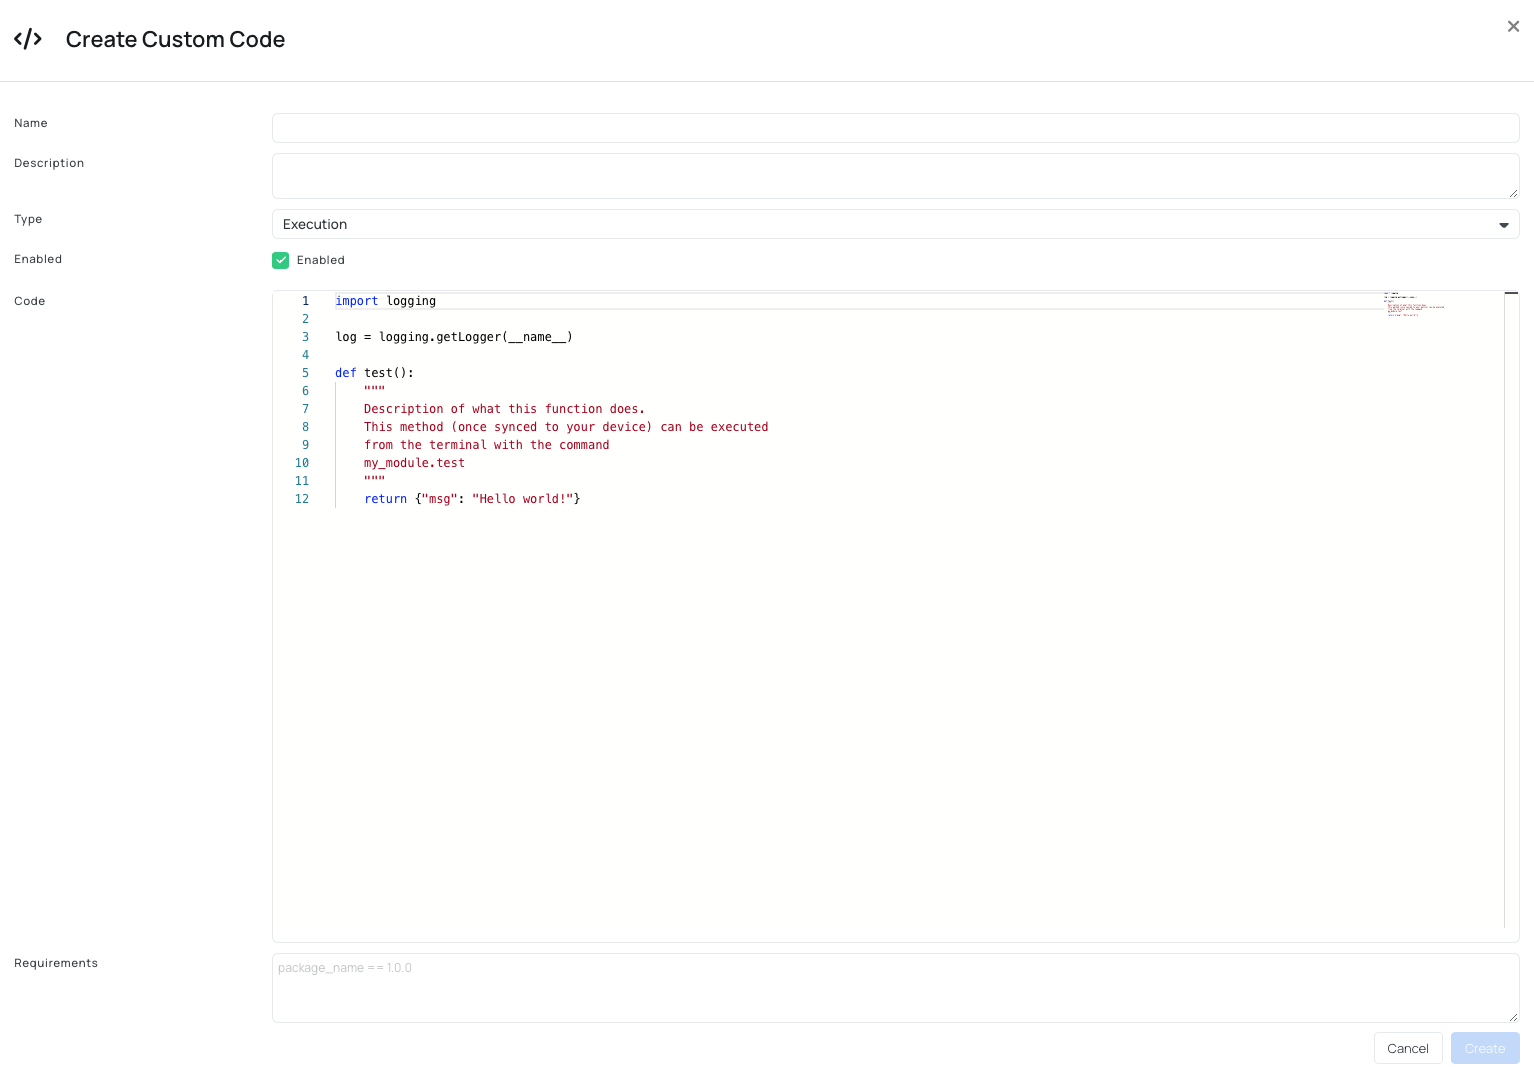
Note: If the device is offline, changes will sync automatically when it reconnects.
Example: Simple Execution Module
import logging

log = logging.getLogger(__name__)

def log_message():
    log.info("Custom code executed successfully")

This function can be called from:
* Jobs
* Services
* Terminal


## Example: Custom Service
```python
import logging
import time

log = logging.getLogger(__name__)

def start(**settings):
    log.info("Starting custom service")

    while True:
        log.info("Running background task")
        time.sleep(5)
This creates a continuously running process on the device.
Using Custom Code
Custom modules can be integrated into different parts of the system:
-
Jobs Example:
my_module.log_message -
Services & Workers - use custom logic inside workflows to process data or trigger actions.
-
Hooks - allow custom processing of data inside service workflows. Hooks are integrated into service pipelines and can control execution flow.
- Receive data from previous step.
- Modify or filter it.
- Return processed result.
-
Triggers - triggers react to data conditions, for example:
- Play sound when speed exceeds threshold.
- Emit event when value changes.
Passing Settings
You can pass configuration into your module using JSON settings. Example:
{
  "threshold": 50
}
Access inside code:
def start(**settings):
    threshold = settings.get("threshold", 50)
PIP Dependencies
Custom modules support external Python dependencies. Use standard requirements.txt format:
requests==2.31.0
Dependencies are installed on the device when synced.
Typical Use Cases
- Data Processing:
- filter CAN messages.
- transform raw data into structured format.
- Event Handling:
- trigger alerts based on thresholds.
- emit events for cloud processing.
- Automation:
- combine multiple commands into workflows.
- create device-side logic independent of cloud.
- Integration:
- send data to external APIs.
- interface with third-party systems.
Summary
Custom Code allows you to:
- Extend AutoPi functionality using Python.
- Build custom services and workflows.
- Process and react to vehicle data in real time.
- Integrate with external systems.
It is the core feature for advanced and scalable customization of AutoPi devices.
Best Practices
- Keep modules focused and simple.
- Use logging for debugging.
- Test functions manually before integrating.
- Avoid blocking operations unless using services.
- Restart services after changes if required. Custom services may require restarting the salt-minion process to take effect.
Common Issues
- Code not running:
- Module not synced.
- Device offline.
- Service not restarted.
- Import errors:
- Missing dependencies.
- Incorrect requirements format.
- High CPU usage:
- Infinite loops without delay.
- Heavy processing in execution modules.
Best Practice Workflow
- Write and test code locally (simple function).
- Create module in Custom Code.
- Sync to device.
- Test via terminal or job.
- Integrate into services or workflows.
- Monitor logs and refine.
 Buy AutoPi device
 Compare all AutoPi devices
 Contact our sales team