Docker
What Is Docker Support on AutoPi?
AutoPi devices and the AutoPi Cloud natively support running Docker containers directly on the device. This enables you to package applications, scripts, or services into standardized container images and deploy them to AutoPi devices remotely from the cloud — without requiring physical access to the hardware.
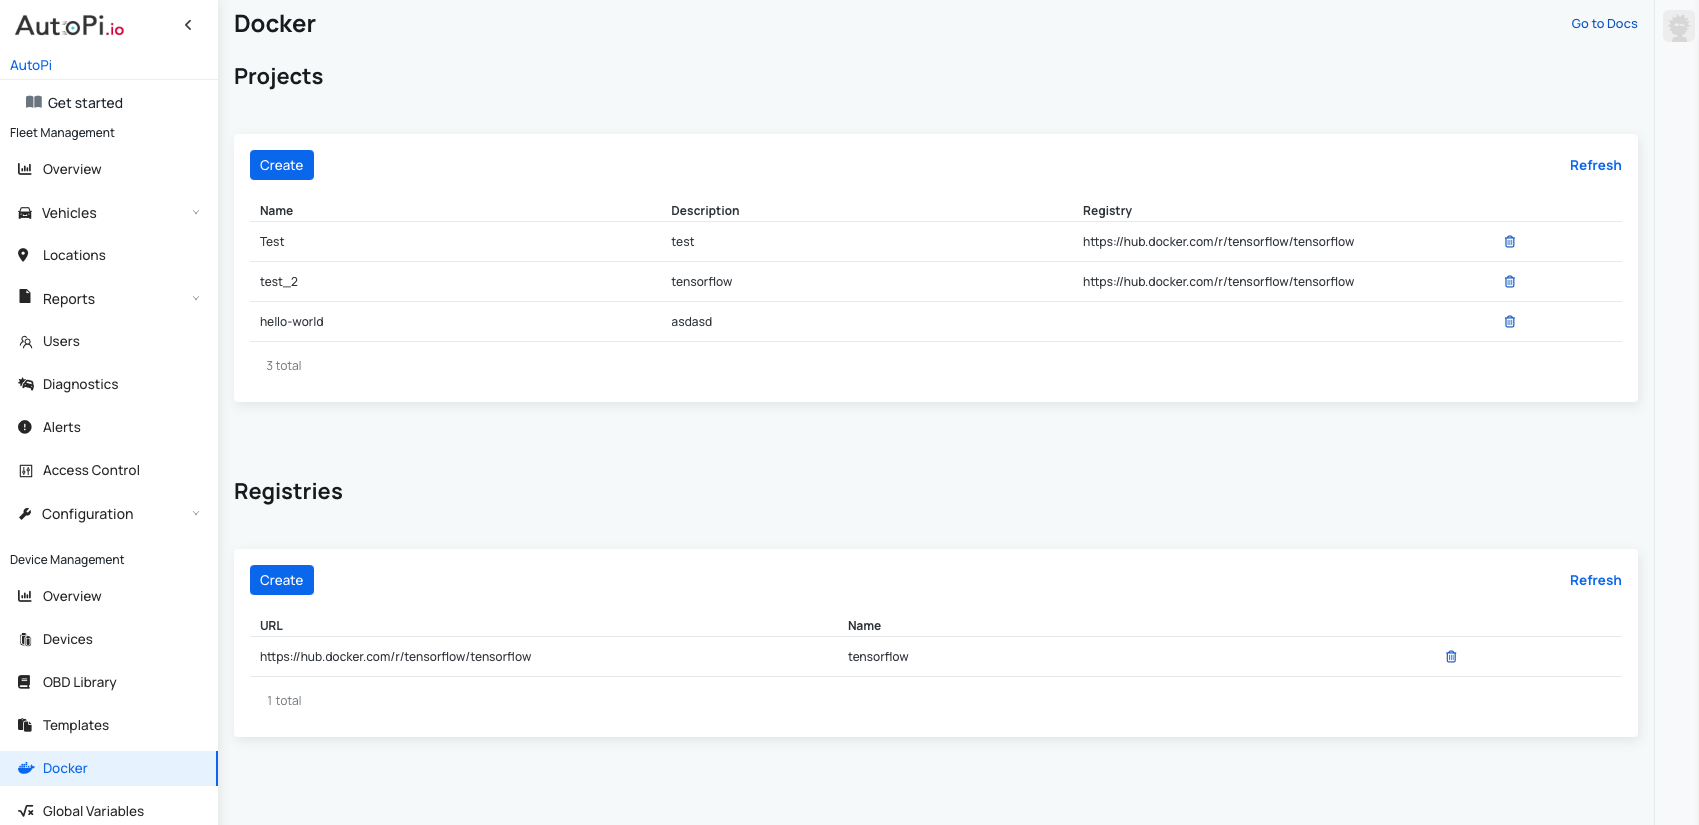
The AutoPi Cloud acts as the central control plane for container management. It handles registries (image storage), projects (application grouping), and releases (deployment versions), automatically coordinating image delivery and container startup across one or more devices.
Why Run Docker on an AutoPi Device?
AutoPi devices function as edge computers installed in vehicles, continuously collecting real-time data from vehicle systems (CAN bus, GPS, OBD-II, sensors) while maintaining network connectivity. Running Docker containers alongside the AutoPi core software enables you to:
| Benefit | Description |
|---|---|
| Edge processing | Run computations directly on the vehicle rather than transmitting all raw data to the cloud, reducing bandwidth consumption and latency. |
| Custom integrations | Deploy any software stack without modifying the AutoPi core system. |
| Independent updates | Update your application container independently of the AutoPi firmware. |
| Isolation | Containers are isolated from the host system, reducing the risk of dependency conflicts. |
| Reproducibility | The same container image runs identically on every device in your fleet. |
How It Works
The deployment flow is built around three core concepts in the AutoPi Cloud:
Registry stores your container images and provides authentication credentials that devices use to securely pull images at deployment time.
Project groups related application releases together, serving as a logical container for all versions of your application within AutoPi Cloud. You must create a project before you can create any releases.
Release defines the specific deployment configuration: which container image to run, what version tag to use, environment variables, network mode, restart policies, and other runtime settings. Each new application version corresponds to a new release.
Deployment occurs when you create a release. The AutoPi Cloud automatically delivers the release configuration to all associated devices. Devices apply the release at their next idle window (typically before entering sleep mode), which includes logging into the registry, pulling the image, stopping previous containers, and starting updated ones. You can also trigger immediate deployment using the state.sls docker.release command without waiting for the next idle window.
Prerequisites
Before deploying a Docker container to your AutoPi device, ensure the following requirements are met:
-
Docker add-on is available on your account - docker support is a functionality only avaiable for Account Administrators, you can read more about modifying user permissions here: Permission Groups. Contact the AutoPi sales team at sales@autopi.io to get more information.
-
Docker is enabled in Advanced Settings - in the AutoPi Cloud, navigate to Advanced Settings → Docker and confirm that Docker is enabled for each device you intend to use.
Hardware Requirements
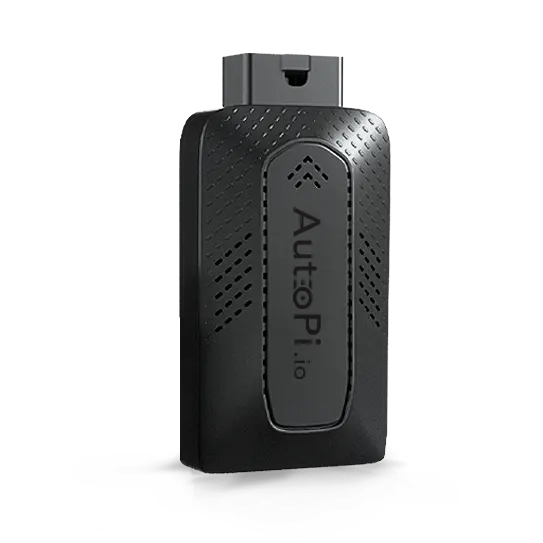
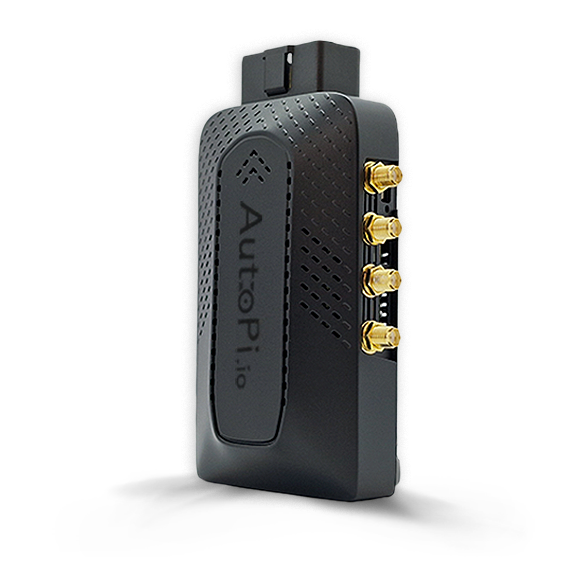
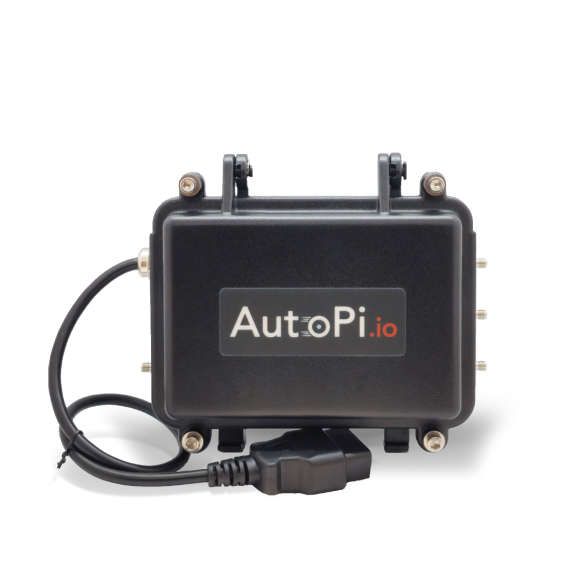
Docker support is available on the following AutoPi devices:
Deploying a Docker Container
Step 1: Build and Push Your Image
Begin by creating a Dockerfile for your application, you can read more here: Build Dockerfile. Since the AutoPi TMU CM4 and CAN-FD Pro devices run on ARM64 architecture, you must use an ARM-compatible base image to ensure your container runs properly on the device.
Example Dockerfile
# Dockerfile
# Target: ARM64 (AutoPi TMU CM4 / CAN-FD Pro)
FROM --platform=linux/arm64 python:3.11-slim-bookworm

# Install any system dependencies your application needs
RUN apt-get update && apt-get install -y --no-install-recommends \
    curl \
    && rm -rf /var/lib/apt/lists/*

# Install Python dependencies
COPY requirements.txt .
RUN pip install --no-cache-dir -r requirements.txt

# Copy application source
WORKDIR /app
COPY app.py .

# Start the application
CMD ["python", "app.py"]
After creating your Dockerfile, build the image and push it to your container registry. If you are building on an x86/x64 machine, use Docker's buildx tool to cross-compile for ARM64 architecture:
# Cross-compile for ARM64 from any host (recommended)
docker buildx create --use
docker buildx build --platform linux/arm64 -t my-registry/my-image:1.0.0 --push .

# Or, if building directly on an ARM machine:
docker build -t my-registry/my-image:1.0.0 .
docker login my-registry
docker push my-registry/my-image:1.0.0
Step 2: Create a Registry in AutoPi Cloud
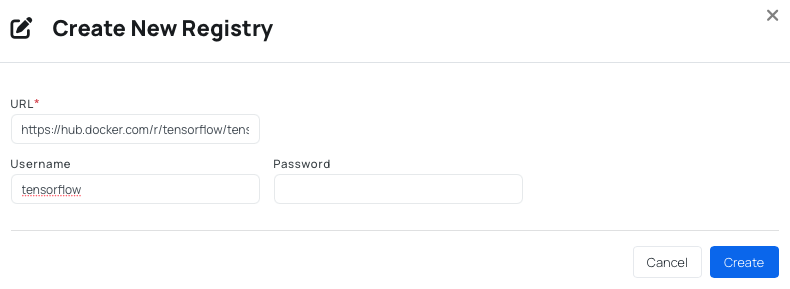
Create a registry entry in AutoPi Cloud to enable devices to securely authenticate with your container registry and pull images during deployment. When you configure a registry entry, devices automatically authenticate using the stored credentials each time they start up or pull a new image.
Using the AutoPi Cloud UI:
Navigate to Docker in the AutoPi Cloud and create a new registry. Configure these settings:
- Registry URL — the address of your container registry (e.g.,
docker.io,gcr.io, or your private registry URL) - Authentication credentials — username and password or access token for private registries
- Registry type — specify which registry service you are using
Using the API:
POST /docker/registries/
If your image is hosted in a private registry, the registry must be referenced when creating the release container definition.
Step 3: Create a Project
Create a project to organize all releases of your application. A project acts as a logical container for managing application versions and their associated devices. You must create at least one project before you can create any releases.
Using the AutoPi Cloud UI:
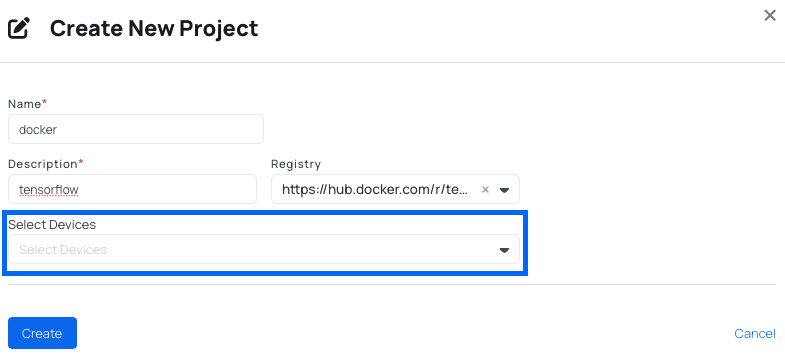
Navigate to Docker in the AutoPi Cloud and create a new project. Configure:
- Name — a descriptive name for your application
- Description — optional details about the project's purpose
- Associated registry — select the registry where your container images are stored
- Devices — select which AutoPi devices should be part of this project
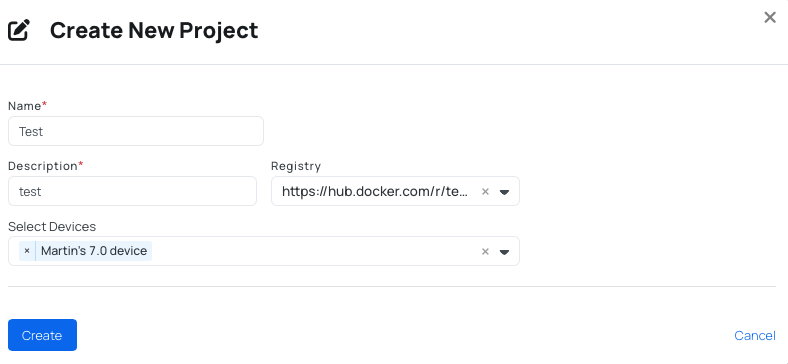
Devices must have Docker enabled in Advanced Settings before they can be added to a project.
Using the API:
POST /docker/projects/
Step 4: Create a Release
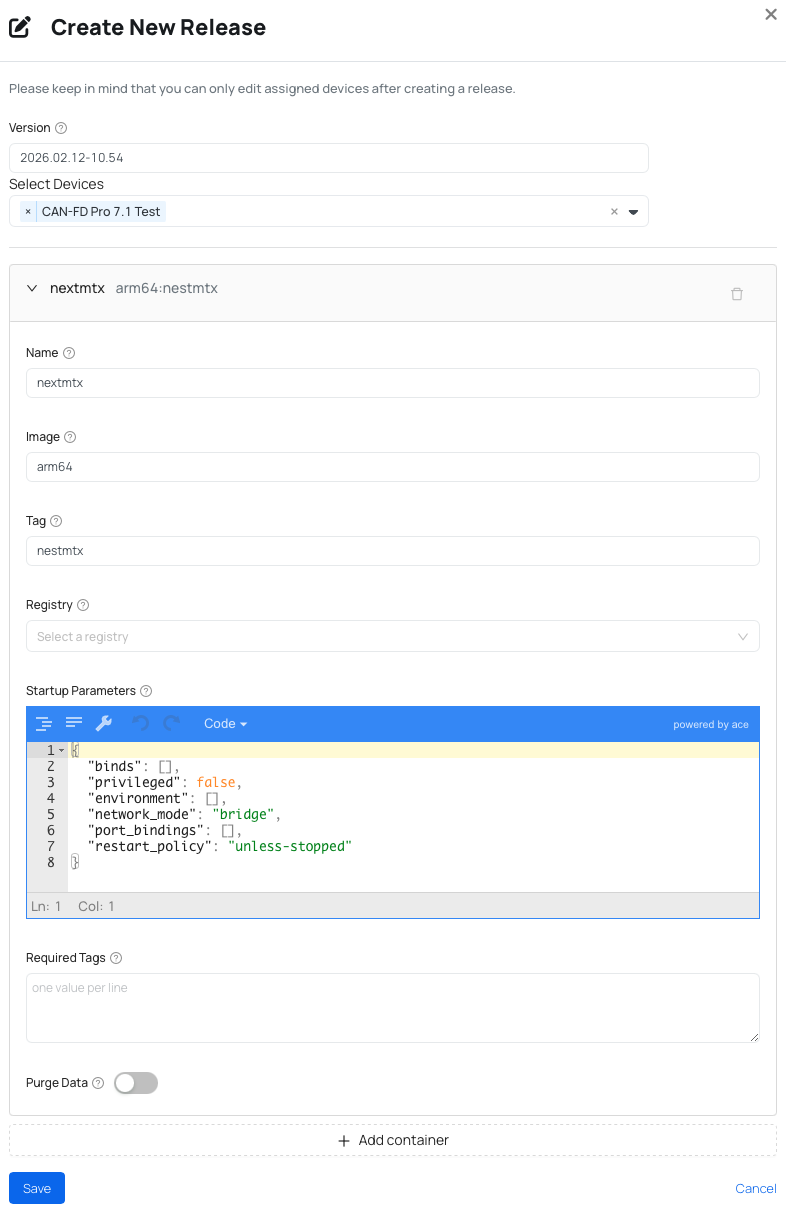
Create a release to define a specific version of your container deployment. A release specifies which container image to run, its version, runtime configuration (environment variables, network mode, restart policy), and which devices should receive this deployment.
Using the AutoPi Cloud UI:
From your project, navigate to the Releases section and click Create.
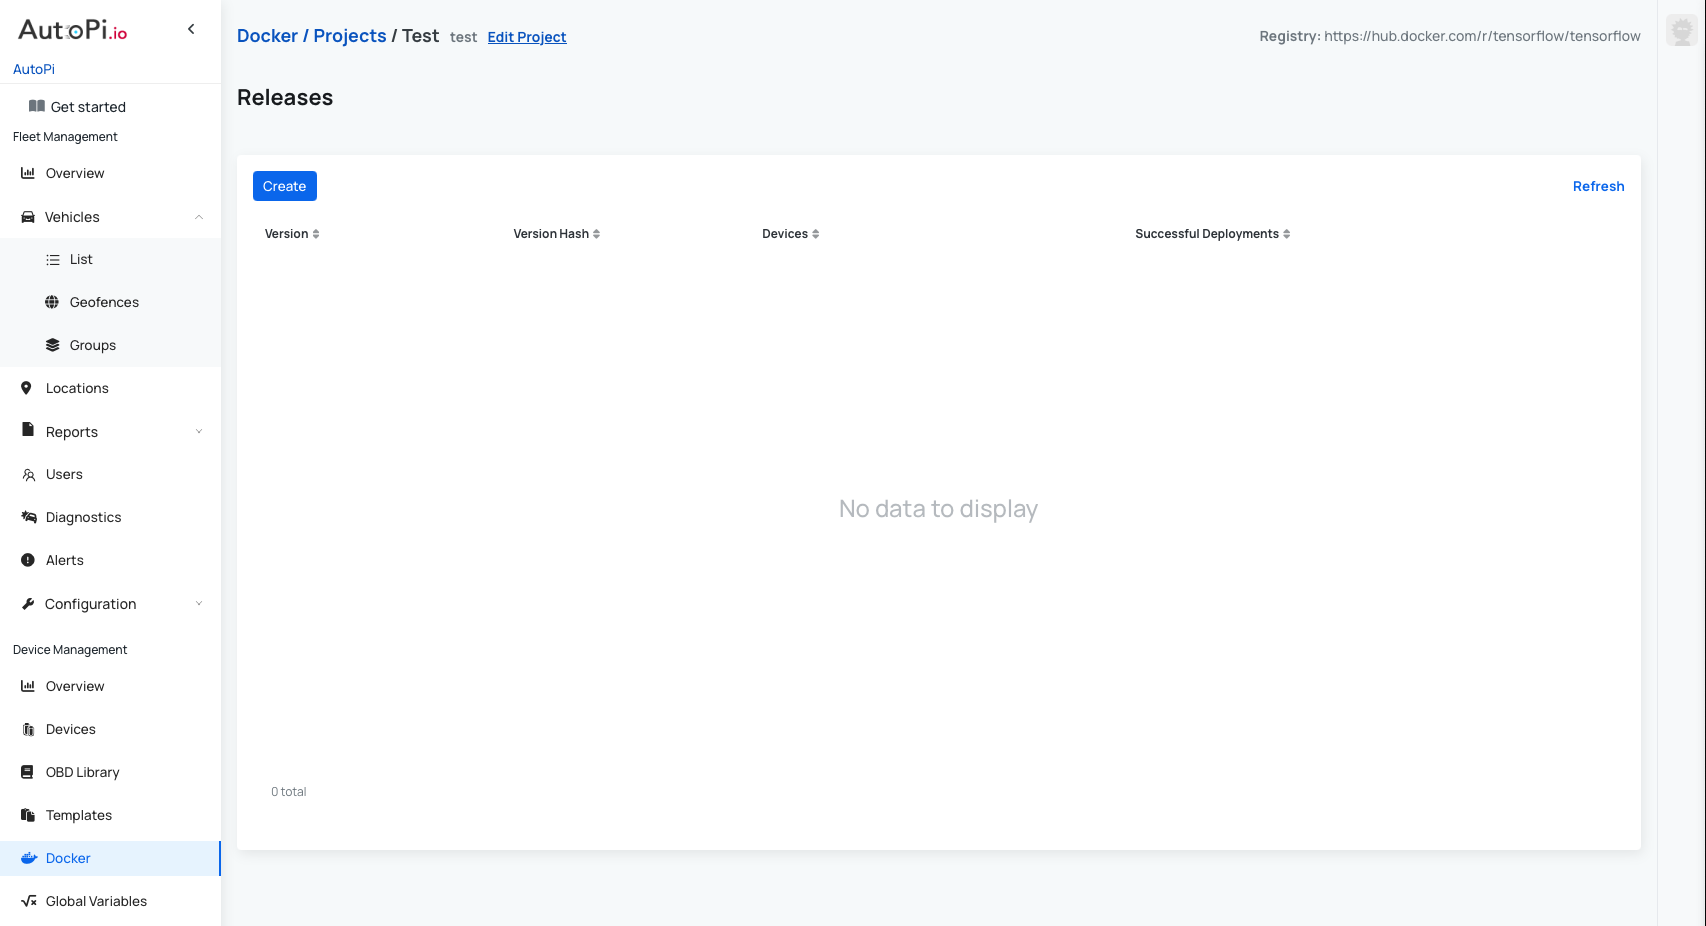
Configure these required fields:
- Version — a semantic version string (e.g.
1.0.0) to track different releases - Devices — select which devices in your project should receive this release
- Container settings — specify the container image name, version tag, registry reference, and runtime parameters
Using the API:
POST /docker/projects/{project_pk}/releases/
Example Release Payload
{
  "version": "1.0.0",
  "devices": ["<device_id>"],
  "containers": [
    {
      "name": "my-service",
      "image": "my-registry/my-image",
      "tag": "latest",
      "startup_parameters": {
        "privileged": false,
        "network_mode": "host",
        "restart_policy": "always",
        "environment": [
          "ENV_VAR=value"
        ]
      },
      "purge_data": false
    }
  ],
  "remove_containers": []
}
Release payload fields:
| Field | Required | Description |
|---|---|---|
version | Yes | A semantic version string (e.g., 1.0.0) to identify this release. |
devices | Yes | Array of device IDs that should receive this release. |
containers | Yes | Array of container definitions, each specifying image name, tag, registry, and startup parameters. |
remove_containers | No | Array of container names to stop and remove from devices before applying the new release. Containers are removed on successful deployment; on failure, they are restarted. |
version_hash | Readonly | Auto-generated identifier for this release version, used for API references. |
successful_deployments | Readonly | Read-only array showing which devices have successfully deployed this release. |
Step 5: Apply the Release
After you create a release, the AutoPi Cloud automatically distributes it to all associated devices. Devices apply the release at their next idle window (typically just before entering sleep mode). During this process, the device:
- Authenticates with the configured container registry
- Pulls the specified container image
- Stops and removes any previous instances of the container
- Starts the updated container with the configured parameters
Immediate deployment: To apply a release without waiting for the next idle window, execute this command on the target device:
state.sls docker.release
This command triggers immediate deployment and can be executed via the AutoPi Cloud terminal or API.
Container Runtime Configuration
Each container is configured through the startup_parameters field in your release definition. These settings control how the container behaves when it starts and while it runs. The following configuration options are supported:
| Parameter | Description |
|---|---|
network_mode | Network mode for the container (host, bridge, etc.). Set to host if the container needs to access hardware interfaces such as the CAN bus or GPS sockets. |
restart_policy | Container restart behavior: always (restart on any exit), on-failure (restart only on error), or no (do not restart). |
environment | Array of environment variables in KEY=VALUE format that the container can access. |
privileged | Set to true only if the container requires elevated host-level permissions. Use sparingly for security reasons. |
volumes | Array of volume mounts from the host filesystem into the container (e.g., /host/path:/container/path:ro). |
Example Use Cases
1. MQTT Data Bridge
Use case: Forward vehicle data to a custom MQTT broker in real-time without modifying AutoPi's return system.
Description: This lightweight container reads vehicle data from AutoPi and publishes it to your MQTT broker, enabling real-time data streaming to external systems.
Configuration:
{
  "version": "1.0.0",
  "containers": [
    {
      "name": "mqtt-bridge",
      "image": "my-registry/mqtt-bridge",
      "tag": "latest",
      "startup_parameters": {
        "network_mode": "host",
        "restart_policy": "always",
        "environment": [
          "BROKER_HOST=broker.example.com",
          "BROKER_PORT=1883",
          "TOPIC_PREFIX=fleet/vehicle-1"
        ]
      }
    }
  ]
}
Key configuration: Set network_mode: host to allow the container to access AutoPi's local network interfaces (CAN bus, GPS socket) directly without additional network setup. Set restart_policy: always to ensure the bridge reconnects automatically if there are temporary network issues.
2. AI / ML Edge Inference
Use case: Run machine learning models directly on the device for real-time anomaly detection, predictive maintenance, or signal analysis.
Description: This container runs a pre-trained TensorFlow Lite or ONNX model on vehicle sensor data without sending raw data to the cloud, enabling low-latency inference at the edge.
Configuration:
{
  "version": "2.0.0",
  "containers": [
    {
      "name": "anomaly-detector",
      "image": "my-registry/anomaly-detector",
      "tag": "v2.1",
      "startup_parameters": {
        "network_mode": "host",
        "restart_policy": "on-failure",
        "environment": [
          "MODEL_PATH=/models/anomaly_v2.tflite",
          "CONFIDENCE_THRESHOLD=0.85"
        ]
      }
    }
  ]
}
The container reads vehicle data from a local socket or shared volume where AutoPi writes data, performs inference using the ML model, and optionally publishes results. This approach keeps computation at the edge, reducing latency and bandwidth requirements.
3. Custom Data Processing Pipeline
Use case: Transform and enrich raw vehicle data before sending it to a backend system.
Description: This container runs a custom service (Python, Node.js, etc.) that processes raw CAN/OBD-II data—filtering, aggregating, or enriching it—before forwarding to your backend API.
Configuration:
{
  "version": "1.2.0",
  "containers": [
    {
      "name": "data-processor",
      "image": "my-registry/data-processor",
      "tag": "1.2",
      "startup_parameters": {
        "network_mode": "host",
        "restart_policy": "always",
        "environment": [
          "UPSTREAM_API=https://api.example.com/ingest",
          "API_KEY=<your-api-key>",
          "FILTER_SIGNALS=rpm,speed,throttle"
        ]
      }
    }
  ]
}
4. Fleet-Wide Simultaneous Deployment
Use case: Deploy the same container image across multiple devices in your fleet with consistent configuration.
Description: Because releases are associated with a project that can encompass multiple devices, you can efficiently roll out the same container to your entire fleet at once, ensuring consistency across all devices.
Using the AutoPi Cloud UI:
-
Add all target devices to your project:
-
Create a release and specify all target devices. Once created, trigger immediate deployment across all devices:
state.sls docker.release
Using the REST API:
Create a release via the API:
POST /docker/projects/{project_pk}/releases/
Include all target device IDs in the devices field of the request body. The release will be distributed and deployed to each device at their next idle window, or immediately if you execute the command above.
5. End-to-End Example: BLE Data Streaming from a Raspberry Pi Container
Use case: Enable wireless data streaming to mobile apps, in-vehicle displays, or head-up units without cloud connectivity.
Description: This complete example demonstrates building and deploying a container on an AutoPi TMU CM4 that reads vehicle data from AutoPi and broadcasts it over Bluetooth Low Energy (BLE). This is ideal for in-vehicle dashboards, head-up displays, or mobile app integrations that need real-time wireless access to vehicle data.
Data Flow
Step 1: Write the Dockerfile
The AutoPi TMU CM4 runs on ARM64 architecture. Use an ARM-compatible base image. The example below uses python:3.11-slim-bookworm with bluepy for BLE communication and a lightweight loop that reads a shared data file written by the AutoPi core.
# Dockerfile
# Target: ARM64 (Raspberry Pi CM4 / AutoPi TMU CM4)
FROM --platform=linux/arm64 python:3.11-slim-bookworm

# Install system dependencies for BLE (BlueZ) and build tools
RUN apt-get update && apt-get install -y --no-install-recommends \
    bluez \
    bluetooth \
    libglib2.0-dev \
    gcc \
    && rm -rf /var/lib/apt/lists/*

# Install Python dependencies
RUN pip install --no-cache-dir bluepy

# Copy application code
WORKDIR /app
COPY ble_streamer.py .

# Run the BLE streamer on container start
CMD ["python", "ble_streamer.py"]
Step 2: Write the BLE Streamer Application
Create ble_streamer.py in the same directory as your Dockerfile. This script reads vehicle data that AutoPi writes to a shared volume and broadcasts it over BLE as a GATT service, making it accessible to BLE clients.
# ble_streamer.py
import json
import time
import subprocess
import os

# Path to the shared data file written by the AutoPi core
DATA_FILE = "/data/vehicle_state.json"

# BLE advertisement interval in seconds
POLL_INTERVAL = 1.0


def read_vehicle_data():
    """Read the latest vehicle state from the shared data file."""
    if not os.path.exists(DATA_FILE):
        return None
    with open(DATA_FILE, "r") as f:
        return json.load(f)


def advertise_over_ble(data: dict):
    """
    Broadcast a compact JSON payload over BLE using bluetoothctl.
    In production, replace this with a full GATT server implementation
    using a library such as bluezdbus or bleak (server mode).
    """
    payload = json.dumps({
        "rpm": data.get("rpm", 0),
        "speed": data.get("speed", 0),
        "throttle": data.get("throttle", 0),
    })
    # Output to stdout — visible in container logs via AutoPi Cloud's Device → Logs page
    print(f"[BLE] Broadcasting: {payload}", flush=True)

    # Example: trigger a BLE advertisement using hciconfig / hcitool
    # Replace with your GATT server logic as needed
    subprocess.run(
        ["hcitool", "-i", "hci0", "cmd", "0x08", "0x0008", payload.encode().hex()],
        capture_output=True
    )


def main():
    print("BLE vehicle data streamer starting...", flush=True)
    while True:
        data = read_vehicle_data()
        if data:
            advertise_over_ble(data)
        else:
            print("[BLE] Waiting for vehicle data...", flush=True)
        time.sleep(POLL_INTERVAL)


if __name__ == "__main__":
    main()
Step 3: Build and Push the Image
Build your container image and push it to your registry. Use Docker's buildx feature to cross-compile for ARM64 from any host machine (including x86 systems):
# Enable multi-platform builds (one-time setup)
docker buildx create --use

# Build for ARM64 and push directly to your registry
docker buildx build \
  --platform linux/arm64 \
  -t my-registry/ble-streamer:1.0.0 \
  --push \
  .
If building directly on the CM4 device itself or another ARM machine, a standard build works:
docker build -t my-registry/ble-streamer:1.0.0 .
docker push my-registry/ble-streamer:1.0.0
Step 4: Create the Registry in AutoPi Cloud
In the AutoPi Cloud, navigate to Docker → Registries and create a new registry entry. Point it to your container registry and provide authentication credentials (if required). This enables devices to authenticate and pull the image during deployment.
Step 5: Create a Project and Release
In the AutoPi Cloud, navigate to Docker → Projects, create a new project, and then add a release with this configuration:
{
  "version": "1.0.0",
  "devices": ["<your-device-id>"],
  "containers": [
    {
      "name": "ble-streamer",
      "image": "my-registry/ble-streamer",
      "tag": "1.0.0",
      "startup_parameters": {
        "privileged": true,
        "network_mode": "host",
        "restart_policy": "always",
        "environment": [
          "DATA_FILE=/data/vehicle_state.json",
          "POLL_INTERVAL=1.0"
        ],
        "volumes": [
          "/var/autopi/data:/data:ro"
        ]
      },
      "purge_data": false
    }
  ]
}
Key configuration notes:
| Parameter | Value | Reason |
|---|---|---|
privileged | true | Required to access BLE hardware via BlueZ on the host system. |
network_mode | host | Allows the container to access the host's Bluetooth adapter (hci0) and other network interfaces directly. |
restart_policy | always | Automatically restarts the BLE streamer if the container exits unexpectedly, maintaining continuous availability. |
volumes | /var/autopi/data:/data:ro | Mounts the directory where AutoPi writes vehicle data, accessible as read-only inside the container. |
Important: The exact path AutoPi uses to write shared data depends on your device configuration. Adjust the volumes mount path to match your actual data location. Alternatively, create a custom returner or service to write vehicle data to a known location on the host filesystem.
Step 6: Apply the Release
Once you save the release, AutoPi Cloud automatically delivers it to the target device. The device applies it at the next idle window. To deploy immediately without waiting, execute this command via the AutoPi Cloud terminal or API:
state.sls docker.release
After successful deployment, the container will:
- Start and initialize.
- Mount the shared vehicle data volume.
- Initialize the BLE interface.
- Begin broadcasting vehicle data to BLE clients.
Verification: Check device's logs to confirm the container started successfully and is broadcasting data. Check out this guide: AutoPi Logs.
Troubleshooting
Container fails to start
Problem: The container exits immediately after deployment.
Solutions:
- Check container logs in device's logs to identify the error message. Check out this guide to retrieve logs: AutoPi Logs.
- Verify the container image and tag exist in your registry and are spelled correctly.
- Confirm the image is built for ARM64 architecture (not x86/x64).
- Check that
network_modeconfiguration does not conflict with other running services.
Image cannot be pulled
Problem: Device cannot download the container image from the registry.
Solutions:
- Verify the device has network connectivity and can reach the registry URL.
- Confirm the image is publicly accessible, or that authentication credentials are correctly configured in the registry entry.
- Double-check the registry URL, image name, and tag for typos.
- For private registries, ensure the credentials stored in AutoPi Cloud have pull permissions.
Container keeps restarting
Problem: The container starts but immediately exits, causing repeated restart attempts.
Solutions:
- Review application logs inside the container to identify the root cause.
- Verify all required environment variables are set correctly in the release configuration.
- Temporarily change
restart_policytoon-failureto prevent infinite restart loops while debugging. - Check that required dependencies and configuration files are present in the container image.
Permission issues
Problem: Container cannot access required resources or files.
Solutions:
- Only set
privileged: trueif the application explicitly requires elevated host-level permissions. This should be a last resort. - Verify that required volume mount paths exist on the host device filesystem.
- Ensure the container's user (usually root or the image's default user) has permission to access mounted volumes.
- Check the application's documentation for specific file or directory permission requirements.
Networking problems
Problem: Container cannot communicate with hardware interfaces or external services.
Solutions:
- Set
network_mode: hostif the container needs direct access to hardware interfaces (CAN bus, GPS sockets, serial ports). - Check for port number conflicts with other services already running on the device.
- Verify the container's network configuration matches your application requirements.
- Test external connectivity from inside the container using basic tools like
pingorcurl.
Next Steps
Now that you understand Docker fundamentals on AutoPi, explore these additional resources:
- Setting Up Docker on Your Device — a complete step-by-step walkthrough with UI screenshots for registry, project, and release creation.
- AutoPi Cloud Documentation — learn more about device management, logging, and monitoring.
- Docker Best Practices — industry-standard guidance for building production-ready containers.
For questions or assistance, contact the AutoPi support team at support@autopi.io.
 Shop AutoPi devices
 Compare devices
 Contact sales
 Contact support