Reflashing Your Device


This guide explains how to reflash your AutoPi device with a fresh AutoPi OS image. Reflashing is useful for recovery and troubleshooting, but it changes low-level device software and should be performed carefully. Before you begin, confirm your device version, use the correct image, and follow each step in order to reduce the risk of configuration issues or data loss.
Only use this guide if you are comfortable working directly with device firmware. Reflashing should not be performed on a fully operational production device unless necessary. If you are unsure about any step, contact our Support team before proceeding.
The reflashing process varies slightly depending on your AutoPi hardware version and host operating system. The steps in this guide were verified on Pop!_OS 6.1 (Debian-based) and Windows 10.
Reflashing Quick Start Summary:
- Download the AutoPi OS image.
- Set up Balena Etcher (or an alternative tool).
- Connect the device storage media:
- Pre-CM4 devices (versions 3.0-6.3)
- CM4 devices (version 7.x+)
- Flash the image.
- (Optional) Ensure your device is connecting to the correct environment.
- Complete initial device setup.
- Update your device from the Cloud.
1. Download the AutoPi OS Image
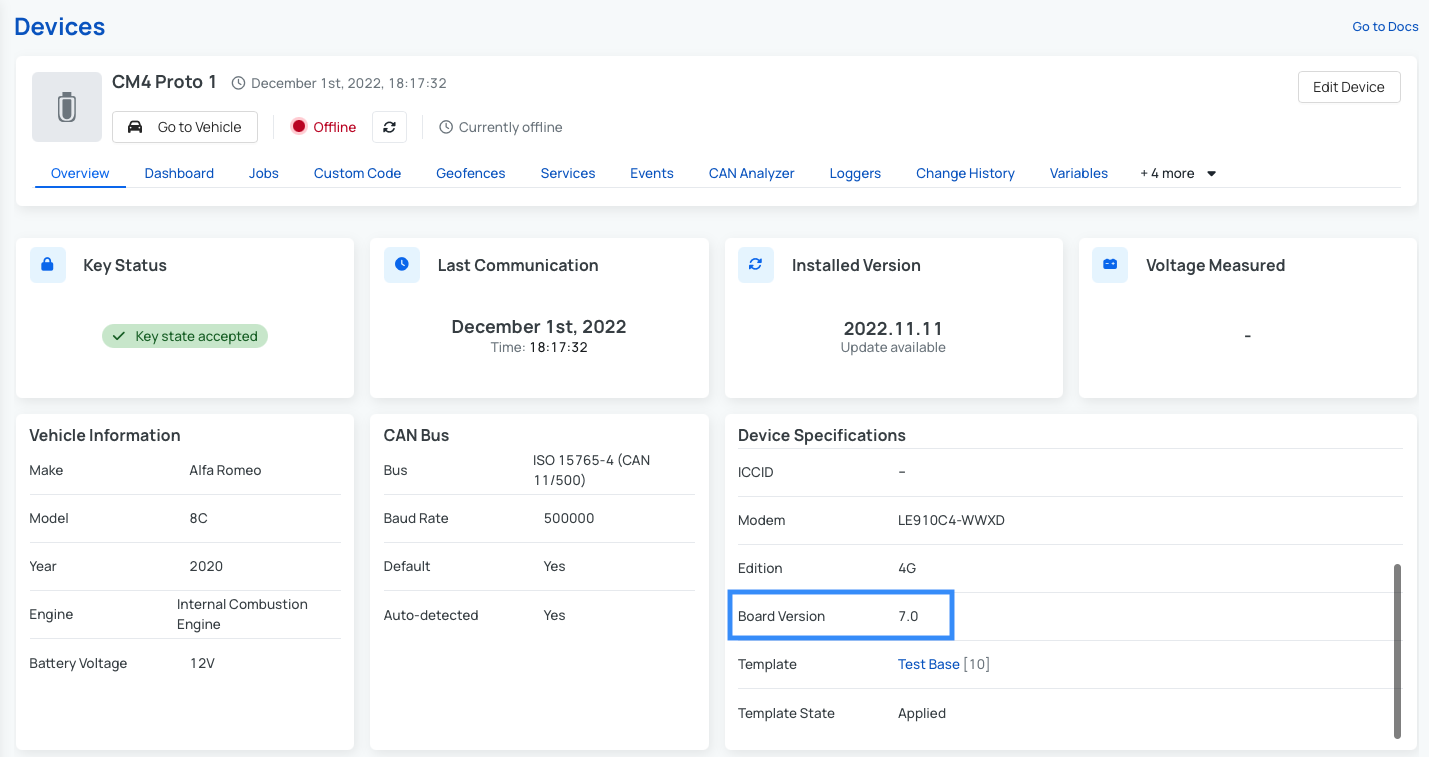
Make sure you select the correct image for your device. In the AutoPi Cloud, find your board version under Device > Overview > Device Specifications > Board Version:
After confirming your board version, download the matching image from the table below:
You may also check the autopi-core releases page for a newer board-version-compatible image.
2. Set Up Balena Etcher (or an Alternative)
We recommend Etcher because it can flash the compressed .gz image directly.
- On Windows, install Etcher through the standard
.exeinstaller. - On Linux, follow the instructions in Balena's Etcher repository. If the first command fails, run
sudo apt updateand try again.Note for Linux users - on Linux, this guide uses the Balena package repository and a package manager install, but an
.AppImageis also available on Balena's website.
3. Connect the Device Storage Media
AutoPi devices come in two types based on board version, each with a different storage setup. Follow the subsection that matches your device's board version (determined in Step 1):
- Pre-CM4 devices (Board Versions 3.0-6.3): use an internal SD card.
- CM4 devices (Board Version 7.x+): use onboard eMMC flash storage.
3.a. Pre-CM4 Devices (Board Versions 3.0-6.3)
Pre-CM4 devices use an internal SD card with AutoPi Core preinstalled.
- Open the device enclosure and remove the SD card.
- If needed, follow Upgrade/Replace Your Raspberry Pi Computer for disassembly guidance.
- Insert the SD card into an SD card reader and connect it to your computer.
- Navigate to next step: 4. Flash the device.
3.b. TMU CM4 Devices (Board Version 7.x+)
CM4 devices do not use an SD card. The operating system is stored on onboard eMMC flash, so setup differs from pre-CM4 devices.
Note: altough possible to do on a Windows machine, it's highly recommended to use Linux instead, as the utility for accessing the Raspberry Pi's flash memory s easier to set up and is more stable on Linux.
You must:
- Set up
rpibooton your host computer using Windows or Linux. - Put the device into EMMC FLASHING state.
- Connect the device to your computer over micro-USB.
Step 1: Set Up rpiboot
rpiboot is a Raspberry Pi utility that enables read/write access to the CM4 flash chip. Most of this setup is one-time per host computer.
Set Up rpiboot on Windows
- Download the rpiboot installer
- Complete the installation.
- Then run
rpibootfrom the Start menu.
Note: For more details, see the complete guide: Raspberry Pi Windows installer documentation. When that documentation refers to jumper cables, on AutoPi hardware this corresponds to changing device state using the side button.
Set up rpiboot on Linux
- Follow the setup steps in the Raspberry Pi usbboot documentation.
- Once
rpibootis running, your computer will start waiting for a connected CM4 device.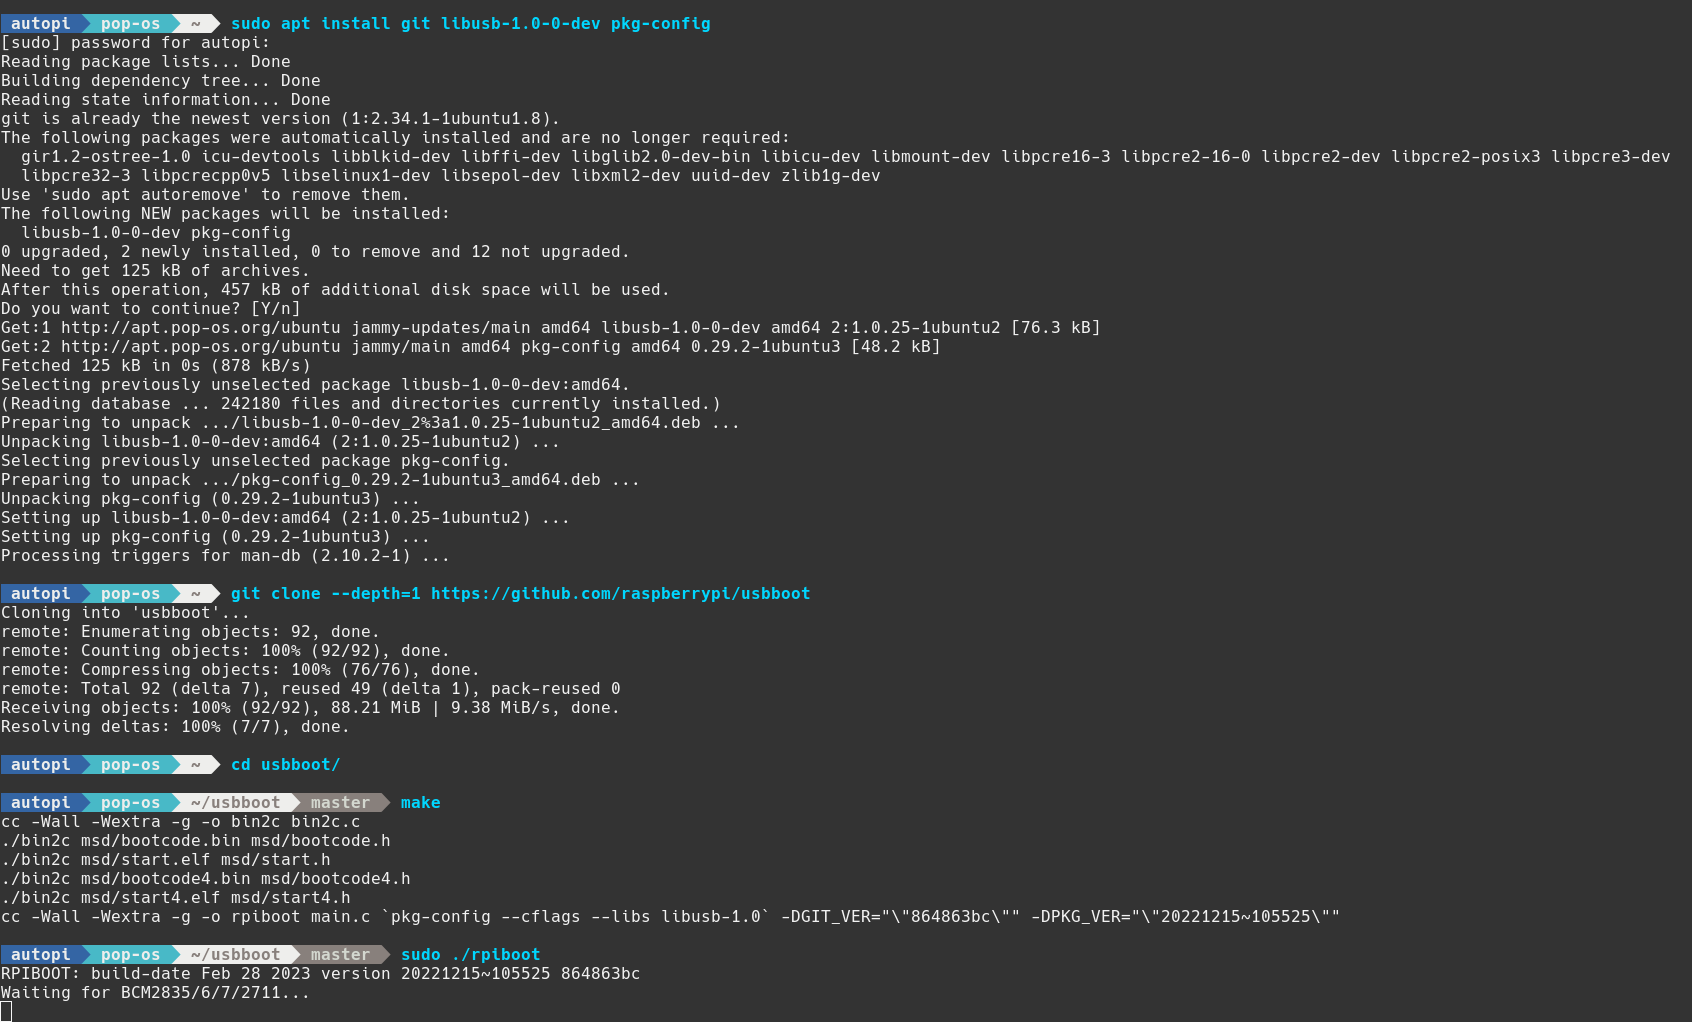
Step 2: Put the Device Into EMMC FLASHING State
The device must be powered on from a vehicle or external power supply with adapter cable. Do not use the micro-USB port for power.
Note: For button location and full state transition details, see AutoPi TMU CM4 LED and button behavior.
Quick sequence:
- If the device was just powered on, wait for the blue LED to become solid.
- Short-press the side button (located in one of the holes on the side of the device) to initiate a gentle shutdown.
- Wait until the LED becomes dim (hibernation).
- Long-press once to enter USER SETUP (slow blink, about 1 blink/second).
- Long-press again to enter EMMC FLASHING (rapid blink).
Step 3: Connect the Device With a Micro-USB Cable
Do not use the rear USB Type-A ports for flashing.
With rpiboot running and the device in EMMC FLASHING state:
- Connect the micro-USB end to the side micro-USB port on the device.
- Connect the other end to your computer.
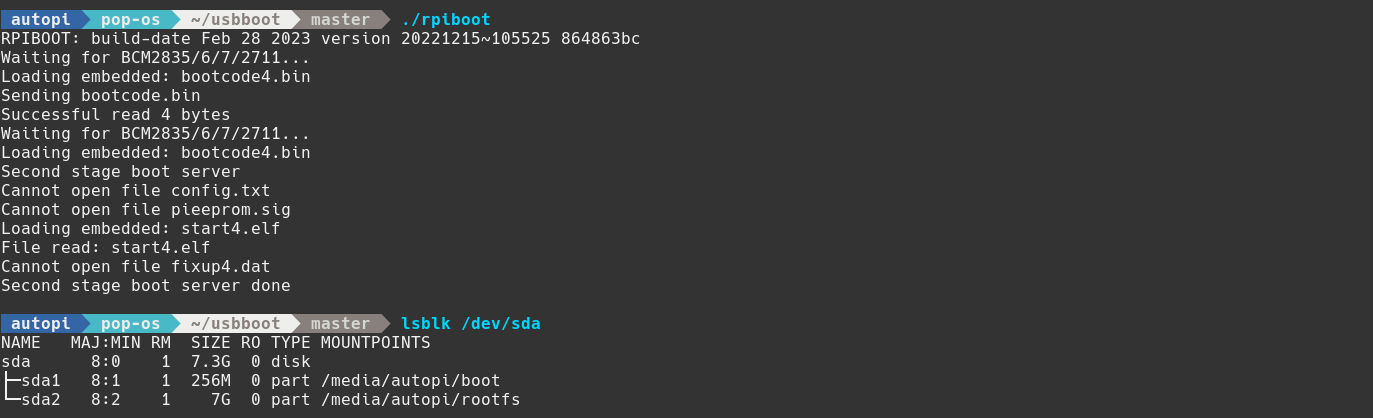
- Wait for
rpibootto detect the device and expose partitions (if present).
At this point, you can access the internal file system through mounted drives. On Windows, at least one partition should appear in File Explorer. On Linux, typical mount points are /media/<user>/boot and /media/<user>/rootfs:
4. Flash the Device
Flashing steps
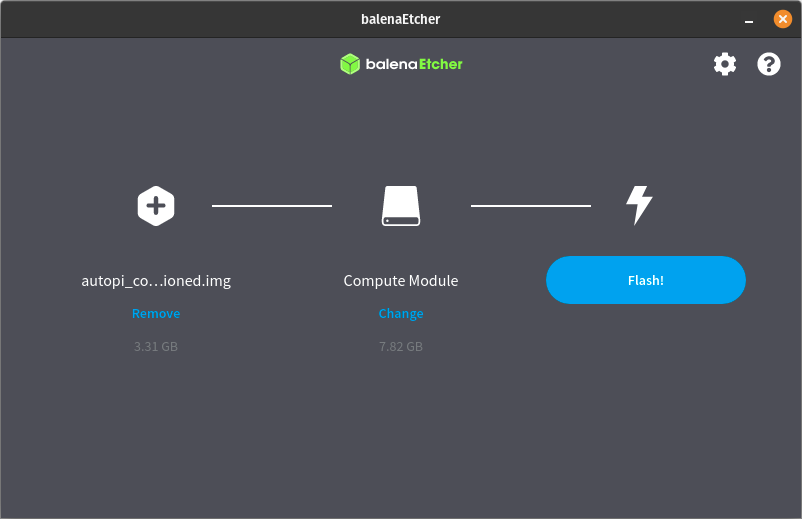
In Balena Etcher (or your preferred tool):
- Select the image downloaded in Step 1.
- Select the correct target storage device.
- Start flashing and wait for completion.
If flashing fails on the first attempt, retry once before troubleshooting further.
Do not remove power while the device is running or booting. The safest time to disconnect power is immediately after unmounting storage.
After flashing
- Unmount the storage device.
- For pre-CM4 devices: remove the SD card from the reader and reinstall it in the device.
- For TMU CM4 devices: disconnect the USB cable, press the button to return to hibernation, then short-press to boot.
5. Optional: Ensure Your Device is Connecting to the Correct Environment
Complete this step only if your company uses a dedicated AutoPi environment.
If your portal URL is not my.autopi.io (for example, my_company.autopi.io), follow Move to a Dedicated Environment.
6. Set Up the Device
After reflashing, complete device connectivity and key acceptance in AutoPi Cloud.
6.1. Bring the Device Online and Configure APN
- Power on the device and confirm internet connectivity. See Verify Connectivity in Getting Started Guide.
- If you use an AutoPi-provided SIM, configure APN:
- Follow Setup APN in Getting Started Guide.
- Use APN string:
nxt20.net(AutoPi SIM cards).
- Sign in to my.autopi.io.
6.2. Accept the Device Key
The device's encryption key requires acceptance in Cloud before it can authenticate.
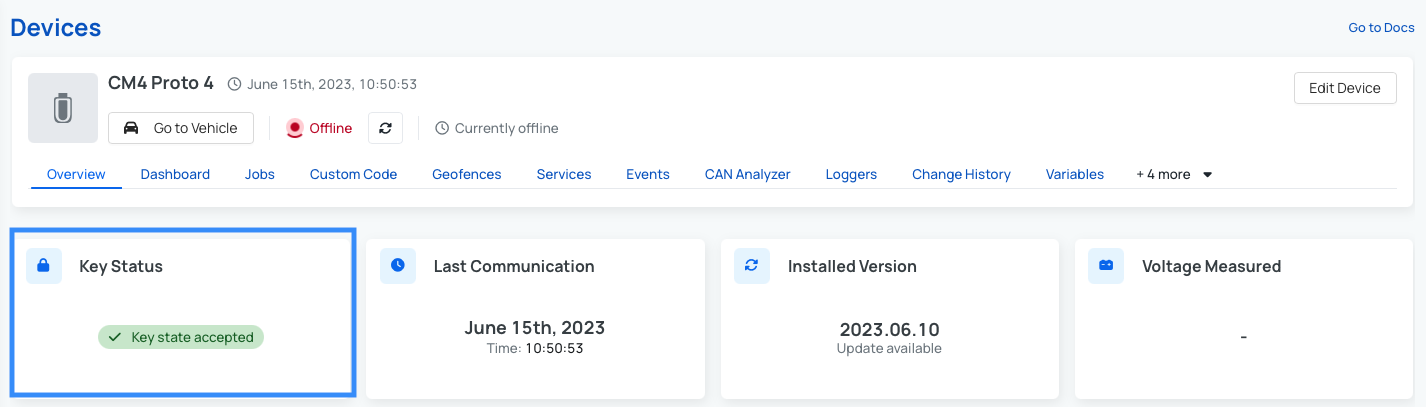
Finding the Key Status:
- Open the device page. The Key Status widget shows the current state:

Accepting the Key:
- Click Edit device (top-right corner).
- Locate the Key state field. It will display Your key is not accepted:
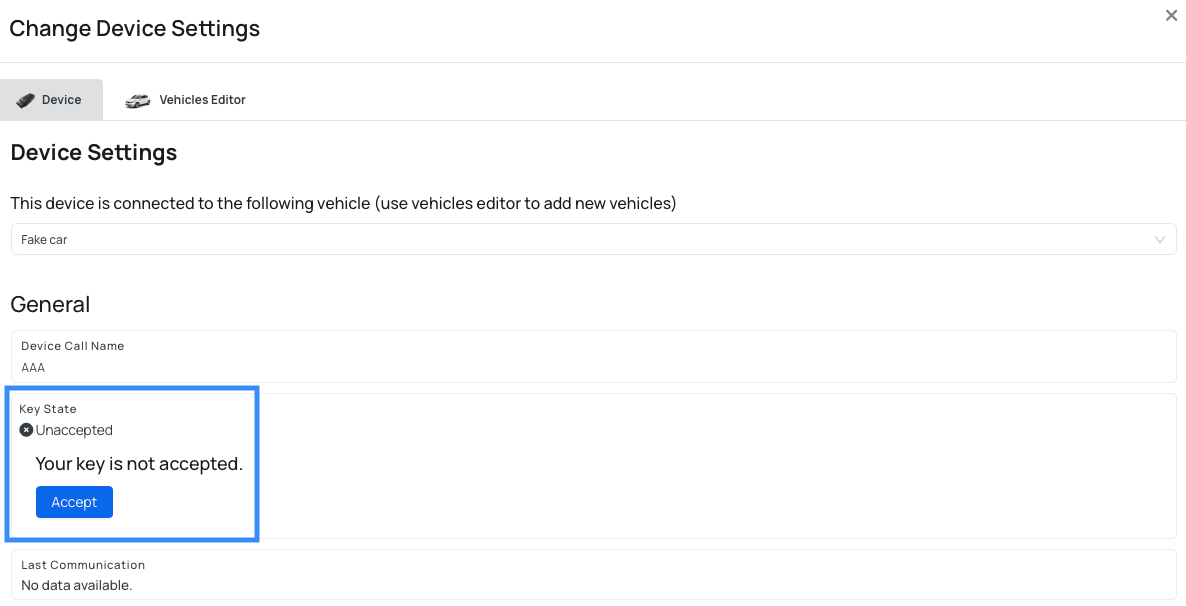
- Click Accept.
- Click Save to apply the change.
Verification:
The Key state will update to accepted and device overview now shows:
6.3. Configure Wi-Fi Hotspot
When the device comes online for the first time, the Wi-Fi hotspot is configured as:
- SSID: AutoPi-Initial
- Password: autopi2018
For security reasons, change the hotspot password immediately: Devices > [your device] > Advanced settings > WIFI > Hotspot
7. Finalize by Updating the Device
After reflashing, update the device from AutoPi Cloud > Software Updates page. This ensures all configuration values are reapplied (including Wi-Fi settings) and that the correct authentication token is in place for data upload.
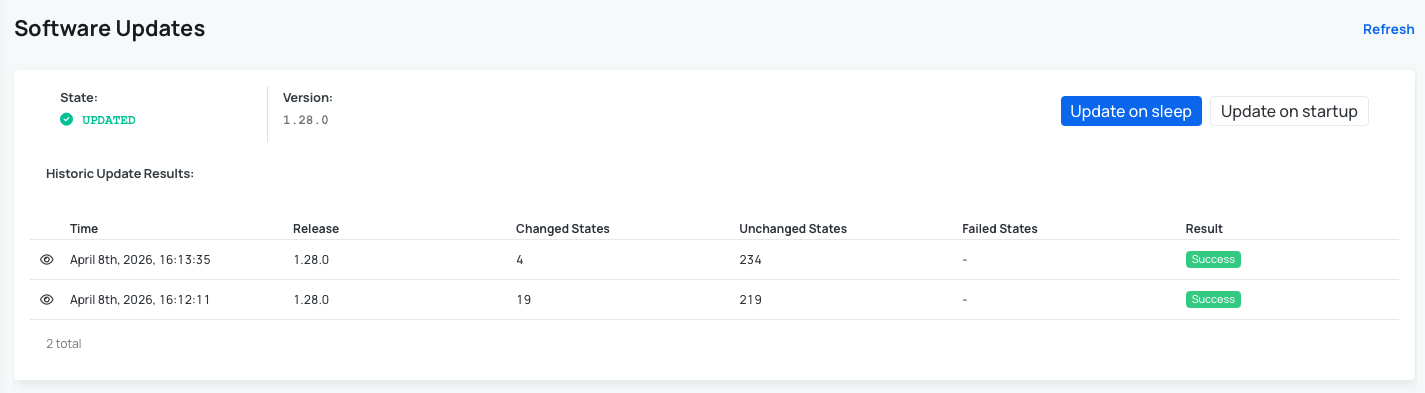
To confirm the update completed successfully:
- Open Software Updates in AutoPi Cloud.
- Open your latest release attempt.
- Verify that a success result is shown for that attempt, as in the example below:
For more information, see also: How to update your device.
If the update initially fails after reflashing, let the device run for a few minutes. The device will retry the update automatically, and it can succeed after a short stabilization period.
 Buy AutoPi device
 Compare all AutoPi devices
 Contact our sales team