RFID Reader Integration


This guide explains how to integrate a USB RFID reader with your AutoPi device and configure RFID-based access tracking in AutoPi Cloud.
With this setup, drivers or operators scan an RFID card or chip before using a vehicle. AutoPi Cloud then records the authentication attempt in Access Control and System Events, giving you clear visibility into who used which vehicle, when, and for how long.
Typical benefits include:
- Better vehicle accountability.
- Easier investigation by linking incidents to specific drivers or operators.
- More accurate tracking of working hours based on scan history.
Connect the RFID reader over USB and use a model that behaves as a keyboard input device (HID). Other reader types may work, but HID readers are the officially verified option.
Quickstart
Follow these steps for a fast setup:
- Enable RFID in Device > Advanced Settings > RFID.
- Add the reader Vendor ID and Product ID.
- (Optional) Configure the
rfid_managerservice. - (Optional) Configure a worker and reactor.
- Assign RFID tokens to users.
- Assign drivers to vehicles.
- Scan cards and monitor Access Control and Events.
Step 1: Enable RFID in Advanced Settings

- Open your device in AutoPi Cloud.
- Go to Device > Advanced Settings > RFID.
- Configure the fields below and save.
Advanced Settings Field Reference
- Authorized token regexes: a list of regex patterns used to match RFID tokens. Example:
* - Authorized tokens: a list of RFID authentication tokens in
timestamp,duration,rfidformat. Example:2021-11-23T09:50:00,7200,0011252203 - Enabled: turns RFID functionality on or off. When enabled,
rfid_managerbecomes available in Services. - Keep login context: if enabled, RFID tokens used for login are saved and the device tracks login status.
- Reader Vendor Product Id: the
vendor_id:product_ididentifier of your RFID reader.
If RFID does not appear in Advanced Settings, contact support@autopi.io. The feature can be enabled for your account at no additional cost.
Step 2: Find Vendor ID and Product ID
- Connect the RFID reader to the device over USB and power on the device.
- Run the command below:
usbutil.devices
- Find your RFID reader in the output and note the vendor and product values.
- Enter the values in Advanced Settings as vendor_id:product_id (for example, 2c7c:0125).
- Save settings. The device will synchronize settings and restart.
Step 3: Configure the RFID Manager Service (Optional)
The core service for RFID handling is rfid_manager. It becomes available under Services after RFID is enabled in Advanced Settings.
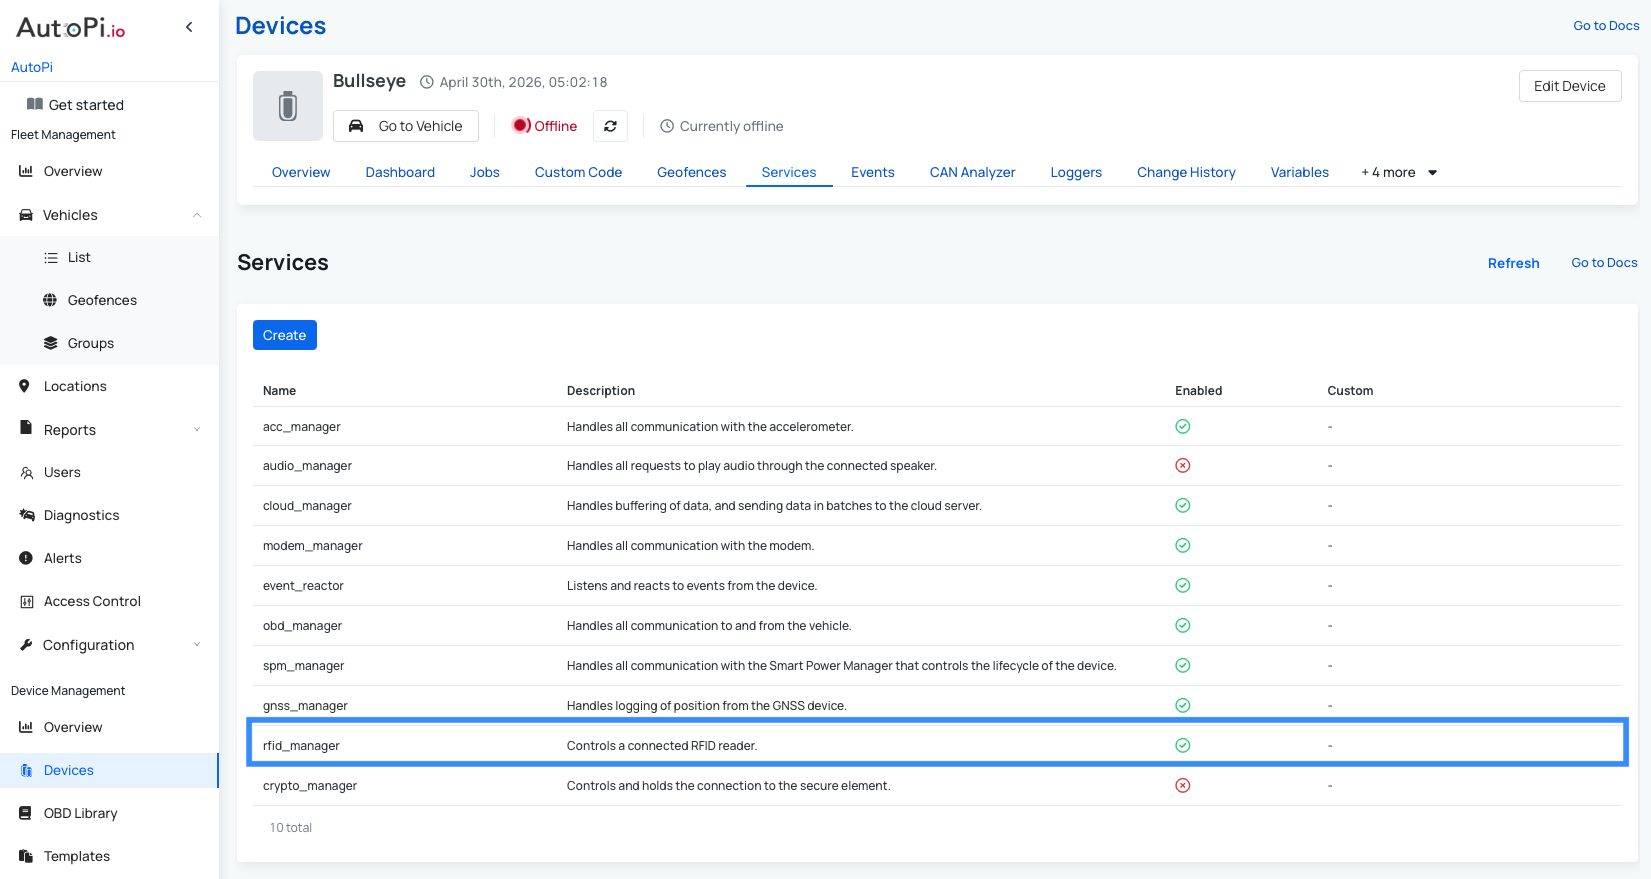
You can extend this service with workers, reactors, hooks, and custom settings. For full command coverage, see RFID Manager documentation.
Step 4: Worker and Reactor Configuration (Optional)
The worker and reactor are enabled by default when you activate RFID in Advanced Settings. In most cases, you do not need to perform any additional configuration.
However, if the worker and reactor are not present, or if you want to customize them to fit your use case, follow the instructions below.
Create Worker
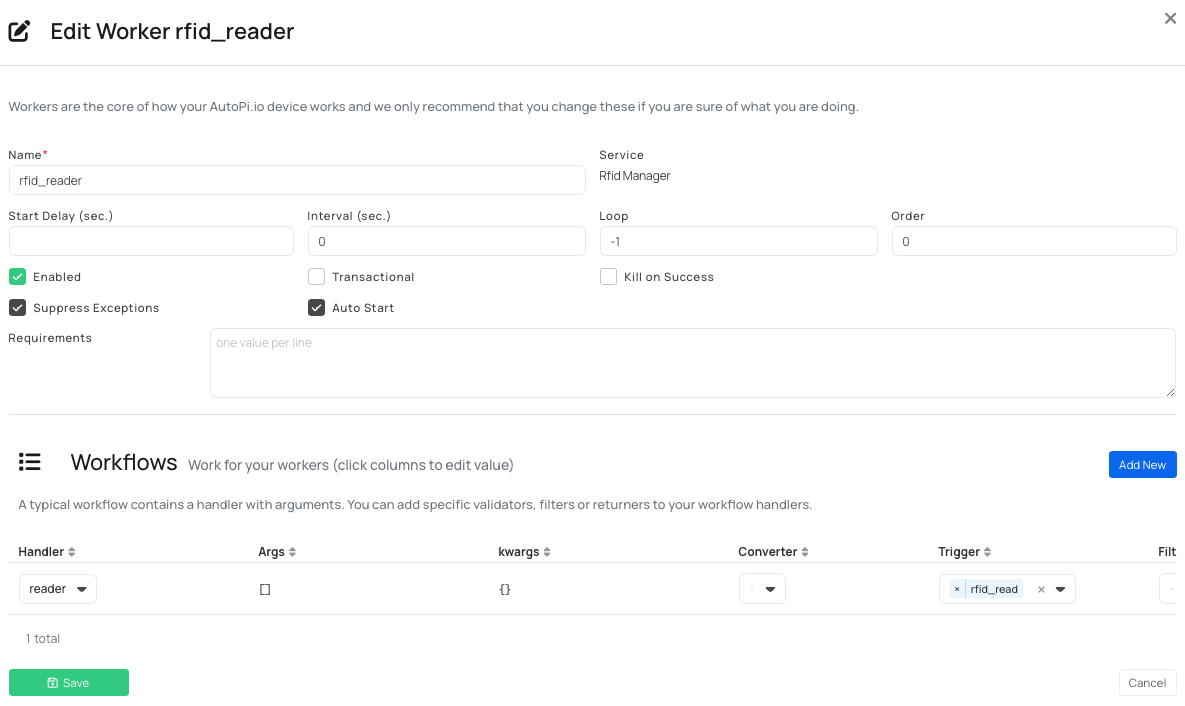
- Go to Device > Services >
rfid_manager. - Open the Workers tab and select Create.
- Configure the worker with these values:
- Name: rfid_reader
- Interval: 0
- Loop: -1
- Handler: reader
- Trigger: rfid_read
- Save.
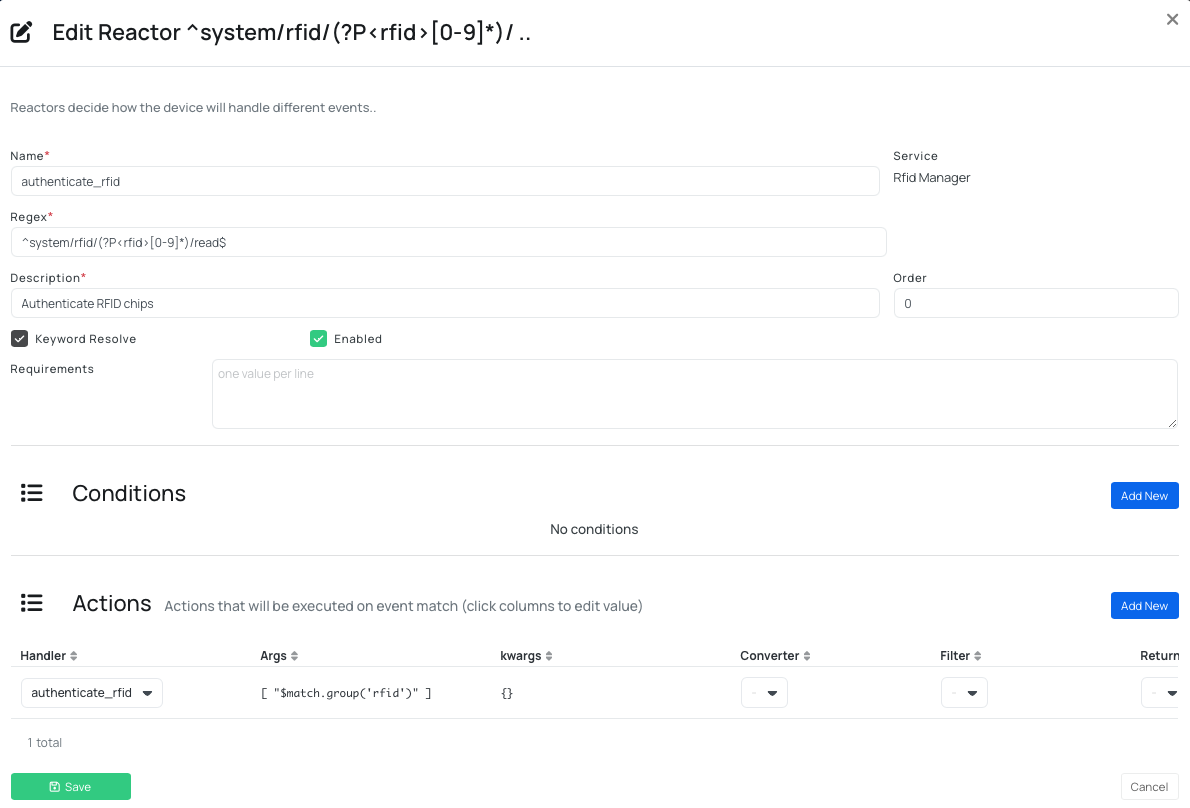
Create Reactor
-
In
rfid_manager, open the Reactors tab and select Create. -
Configure the reactor with these values:
- Name:
authenticate_rfid - Regex:
^system/rfid/(?P<rfid>[0-9]*)/read$ - Description: Authenticate RFID chip/card
- Handler:
authenticate_rfid - Args:
[
  "$match.group('rfid')"
]
- Name:
-
Save.
You can edit both the worker and reactor at any time to adjust them for your specific use case or requirements.
Step 5: Assign RFID Tokens to Users
Each user can have one or more RFID tokens.
- Go to Users.
- Open a user profile.
- Scroll to RFID Tokens.
- Add one or more tokens and save.
Only administrators with account_administrator permission can assign tokens.
You can also create users without email addresses. These users cannot sign in to AutoPi Cloud, but you can still link RFID tokens and track activity.
Step 6: Assign Drivers to Vehicles
Each vehicle can have multiple assigned drivers.
- Go to Vehicles.
- Select one or more vehicles.
- Click on Assign drivers.
- Choose one or more drivers.
- Save.
Note: the Assign drivers button appears only after at least one vehicle is selected.
To review all vehicles assigned to a specific driver, open Users > select the user and check the Assigned Vehicles tab.
Access Control Overview
The Access Control page provides a complete history of RFID access attempts.
It includes:
- User name: who attempted access.
- Token used: which RFID token was scanned.
- Timestamp: when the attempt happened.
- Vehicle: which vehicle was accessed.
- Status: approved, rejected, or logged out.
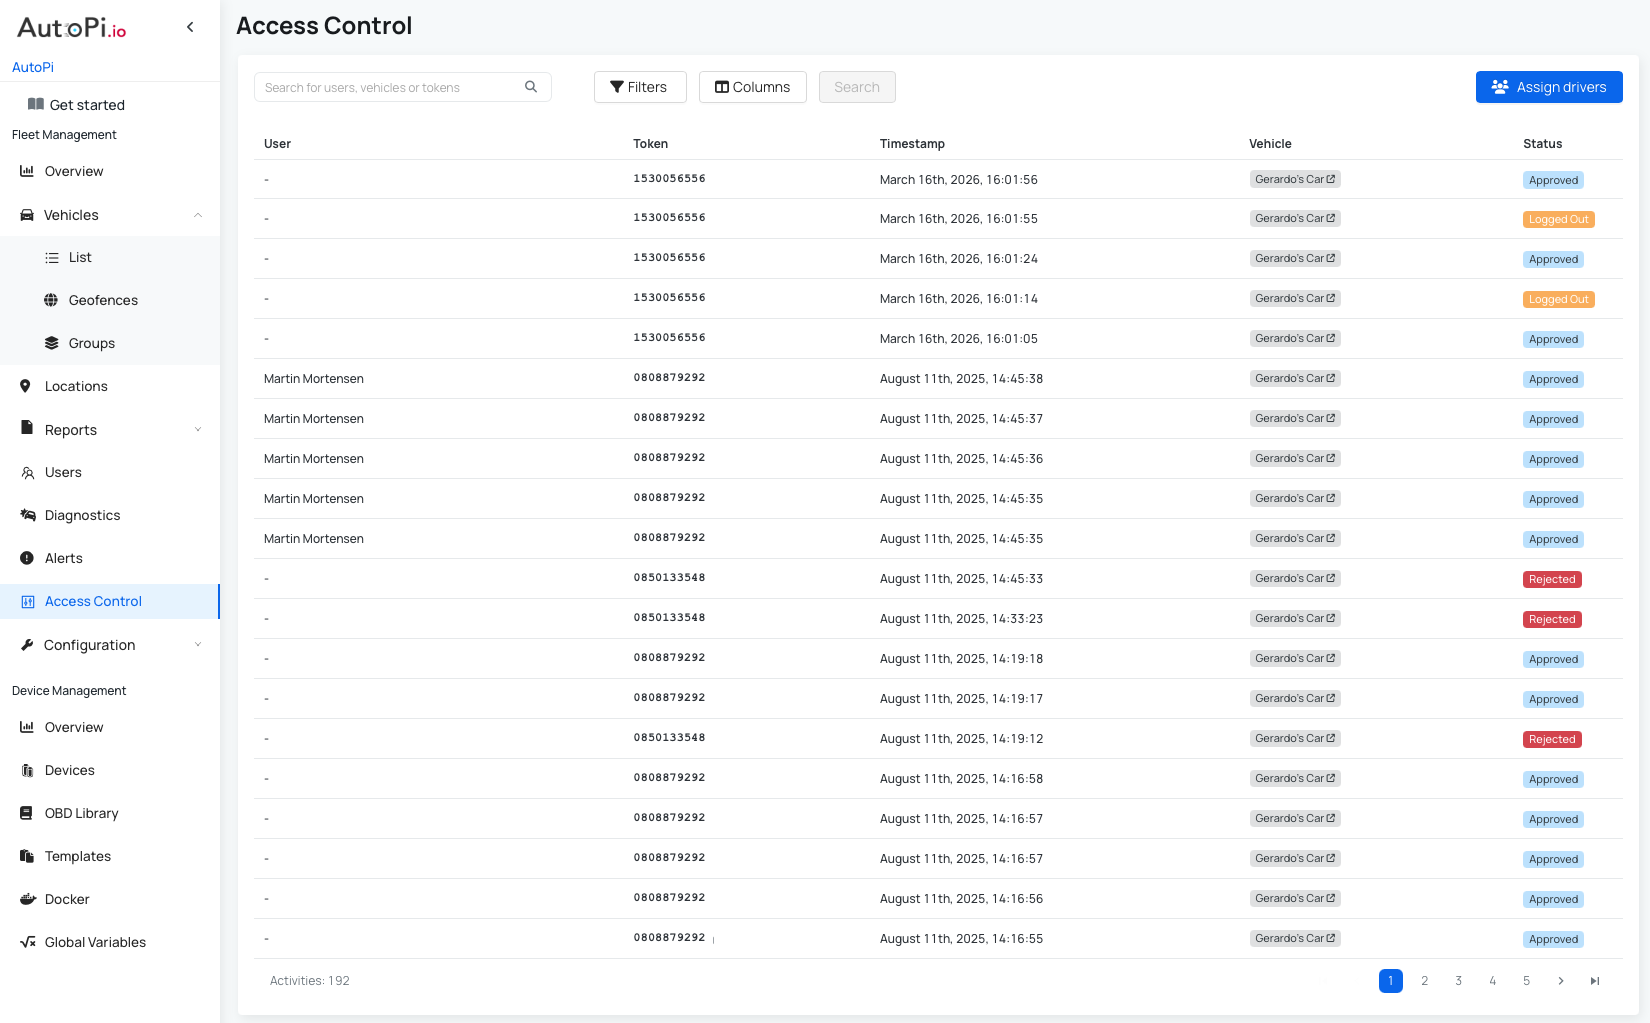
You can also assign drivers to vehicles directly from this page. Also each vehicle can have multiple assigned drivers.
RFID Events
Each card scan generates system events that you can review under System Events.
Event topics:
system/rfid/<rfid_token>/read: a new RFID token was read.system/rfid/<rfid_token>/rejected: a scanned token was rejected.system/rfid/<rfid_token>/authenticated: a scanned token was authenticated.
Example from the Events tab in AutoPi Cloud:
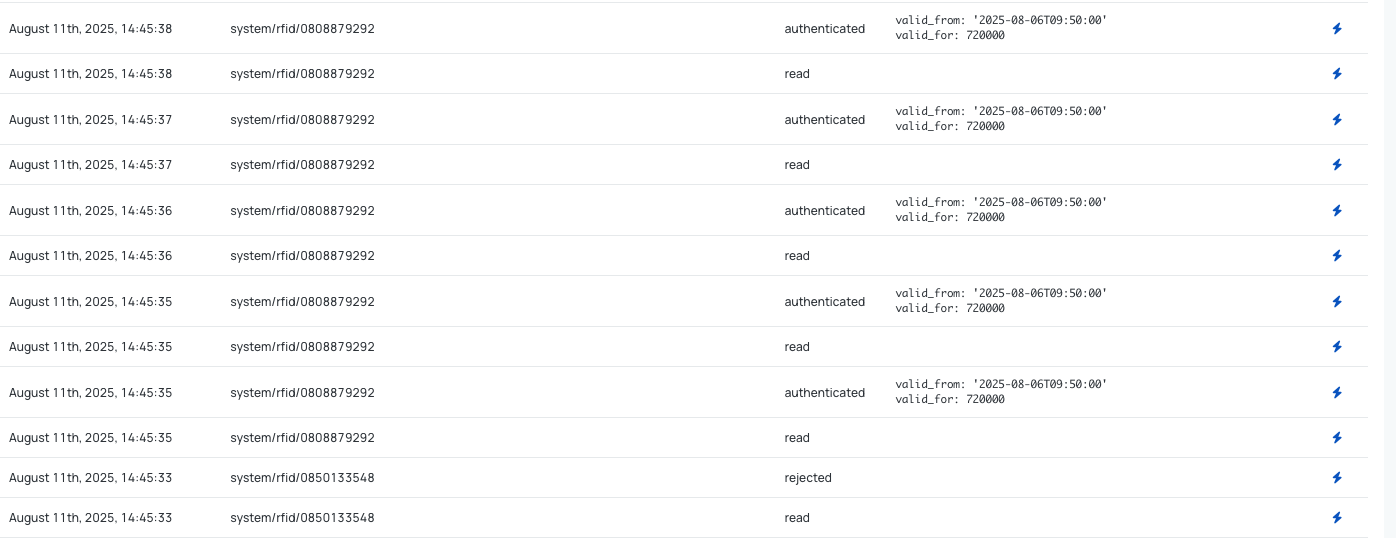
Tip: If you are unsure about the Token ID of the rfid card/chip, you can scan it and in the events tab, you will be able to see the ID of this card.
Next steps:
- If your account does not include one or more RFID features shown in this guide and you would like to enable them, please contact AutoPi support@autopi.io.
- If you need assistance selecting a compatible RFID reader, contact AutoPi support for recommendations on tested and supported RFID hardware.
- You can create custom triggers based on RFID events. For example, when a token is rejected, AutoPi can automatically trigger actions such as sending an email notification, logging the event, activating an alert, or notifying a fleet administrator. This allows you to immediately detect and respond to unauthorized access attempts. Read more about custom triggers in this guide: Custom Triggers.
- Use the AutoPi template feature to save RFID-related configurations and quickly apply them to new devices across your fleet. This simplifies deployment and ensures consistent configuration management. Read more in this guide: Templates.
Benefits of Using RFID Readers with AutoPi Devices
Integrating RFID readers with AutoPi devices enables a wide range of security, fleet management, and operational use cases, including:
- Driver identification — ensure that only authorized drivers can start or operate a vehicle.
- Access control — prevent unauthorized vehicle usage by requiring valid RFID authentication.
- Fleet accountability — track which driver used a specific vehicle and when.
- Theft prevention — receive immediate alerts if unauthorized RFID tokens are used or access attempts are rejected.
- Equipment and Asset tracking — use RFID tags to identify trailers, tools, or attached equipment.
- Simplified Fleet deployment — apply RFID configurations through templates for faster rollout across multiple vehicles.
RFID integration provides an additional layer of security and automation while improving visibility and operational control across your vehicle fleet.
 Buy AutoPi device
 Compare all AutoPi devices
 Contact our sales team