Setting Up Docker on Your Device


For an introduction to what Docker support is, why to use it, and example use cases, see Docker on AutoPi before following this setup guide.
Overview
This guide explains how to set up Docker on your AutoPi device and deploy containers through the AutoPi Cloud. It also covers registries, projects, releases, optional features, runtime configuration, and troubleshooting.
AutoPi devices support running Docker containers directly on the unit. This enables you to deploy applications such as:
- AI/ML services
- Custom scripts or backend services
- Data processing pipelines
- Communication bridges or MQTT processors
The deployment flow works like this:
- Build and store your container in a Docker registry.
- Group your container builds in an AutoPi project.
- Create a release that defines how the container should run.
- Deploy the release to your AutoPi device.
Understanding Registries, Projects, and Releases
The CRUD endpoints all return “201 Created” or “200 OK” when an entity is created or modified, and the body of the response will contain the created or modified entity. The DELETE method will return “204 No content” on success.
Docker Registries
A registry should be created to allow the device to authenticate against a custom docker registry. The model contains the url and credentials for the custom docker registry. When added, devices will automatically log in to the registry if not already logged in, on startup, and thereby be ready to pull images.
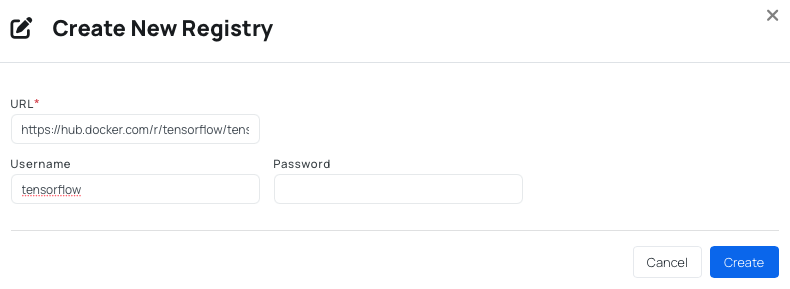
Create Docker Registries
- Using AutoPi Cloud
-
When creating a registry in the AutoPi Cloud, you can configure:
- Authentication (if needed)
- Registry type
- Additional metadata
- Optional features supported by the image
- Using API endpoint
-
You can also create a registry by using this API endpoint: Docker_registries_create
POST /docker/registries/
If the image should be pulled through a custom registry, the registry needs to be referenced when creating the container.
Projects
A project groups all releases of your application, think of it as your application's home inside AutoPi. The project endpoint is a wrapper for releases, so to create any releases you must first create a project.
A project can contain:
- Development releases
- Production releases
- Multiple container versions
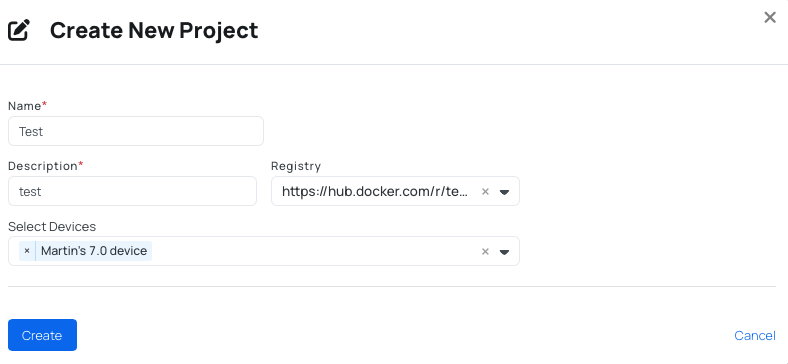
Create Projects
- Using AutoPi Cloud
-
When creating a project in the AutoPi Cloud, you can configure:
- Name
- Description
- Registry
- Selection of Devices
 note
noteWhen including your AutoPi devices, make sure you have the Docker enabled in the advanced settings.
- Using API endpoint
-
You can also create a project by using our API endpoint: Project_create
POST /docker/projects/
Releases
A release represents a specific version of your container deployment. The release endpoint is used to create new releases, and contains a list of containers each with metadata and runtime properties for that specific container.
A release defines:
- The image name and tag
- Startup parameters
- Networking mode
- Restart behavior
- Environment variables
Every time you push a new Docker image, you can create a new release pointing to that version.
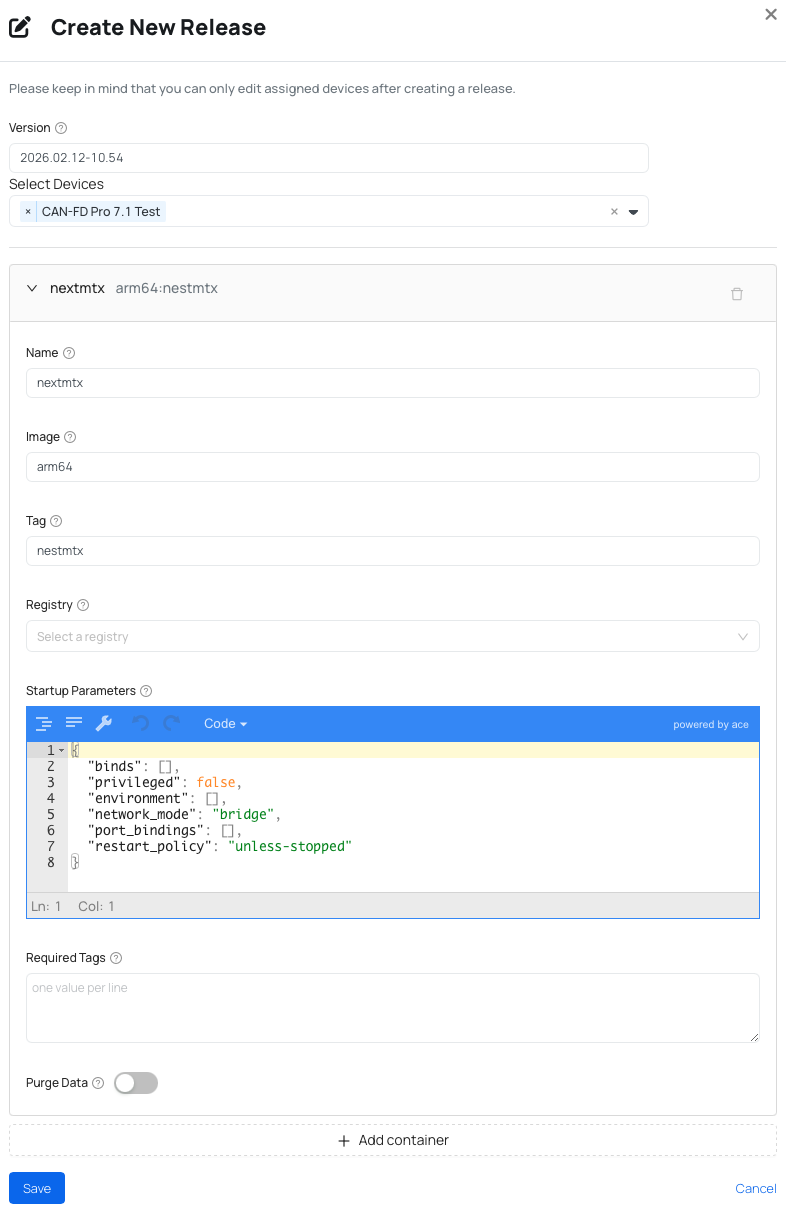
Create Releases
- Using AutoPi Cloud
- When creating a release in the AutoPi Cloud, you can configure:
- Version
- Device selection
- Containers - Name, Tag, Image, Registry, Startup parameters, Purge data
- Using API endpoint
-
You can also create a registry by using our API endpoint: Release_create
POST /docker/projects/{project_pk}/releases/
Applying release
After a release is created, each device associated to the release will receive the release information, and the release will be applied the next time the device is about to go to sleep, as the device in that situation is considered to be idle. Logging in to registries, removing images, pulling new images, starting containers etc.
The release can also be triggered by executing the following command via the execute endpoint on the devices you want to deploy to.
state.sls docker.release
Optional Features (Advanced)
Some Docker images include additional features for performance or hardware acceleration, such as:
- GPU acceleration
- CPU instruction optimizations
- Debug builds
- Extra Python packages
You can configure these when setting up the registry or release, depending on the image.
Reference example: Tensorflow example
Container Runtime Configuration
AutoPi allows customizing the container at runtime, including:
- Environment variables
- Network mode (
host,bridge, etc.) - Restart policy
- Privileges
- Volumes
For example configurations, see: Tensorflow example
Deploying a Docker Container to Your AutoPi Device
Before you start implementing a Docker container on your AutoPi device, make sure the following requirements are completed:
-
Docker add-on is enabled
Docker support is an optional add-on that needs to be enabled for your Customer's account. Contact our sales team at sales@autopi.io to enable this functionality on your account. -
Docker is enabled in advanced settings
In the AutoPi Cloud, navigate to: Advanced Settings → Docker. Ensure that Docker is enabled for the device you want to use.
1. Build and Push Your Docker Image
docker build -t my-registry/my-image:latest
docker login my-registry
docker push my-registry/my-image:latest
2. Create a Release in AutoPi Cloud
Steps to create a new release:
- Navigate to Docker page and create or select an already existing Project; this will navigate you to a new page called Releases.
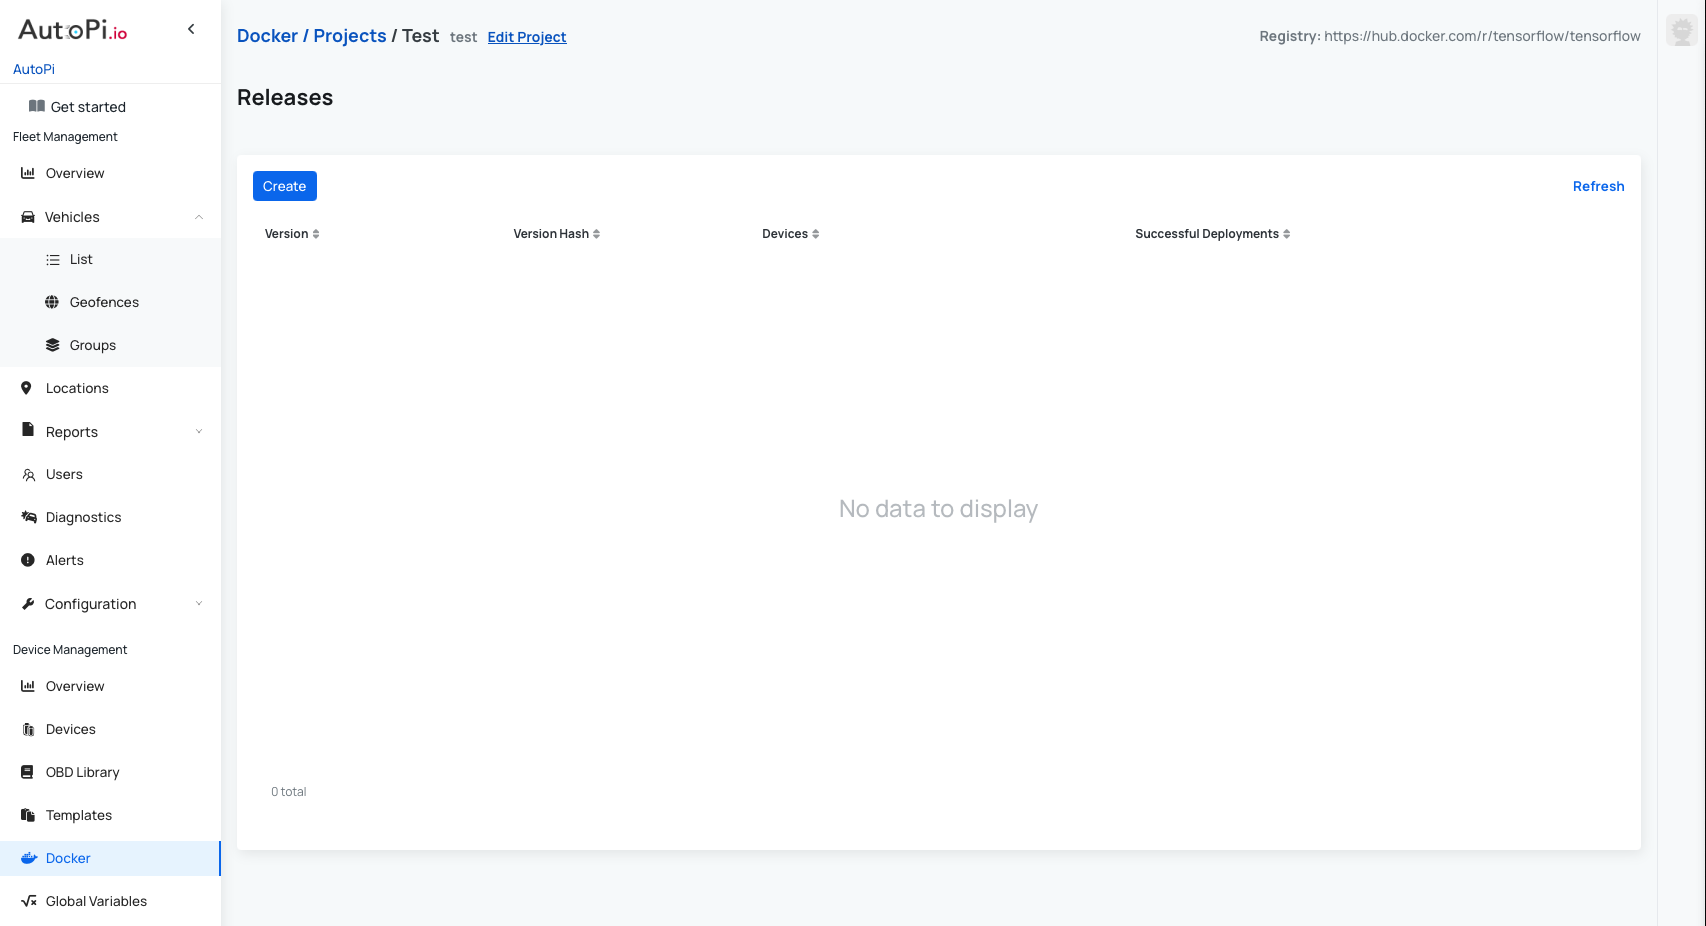
- In order to add a new release, click on "Create" button.
- Choose the version and select devices.
- Enter container settings:
- Image name + tag
- Include the image
- Optionally fill out the rest of the parameters.
- Press "Save".
3. Deploy to Devices
Select which devices the release should be deployed to. AutoPi will:
- Pull the image
- Start the container
- Auto-restart it based on your policy
Example Release Payload
This is an example release payload:
    {
      "version": "1.0.0",
      "devices": [
        "device_id"
      ],
      "containers": [
        {
          "name": "hello_word",
          "image": "hello-world",
          "tag": "latest",
          "required_tags": [],
          "startup_parameters": {
            "privileged": false,
            "environment": [],
            "network_mode": "host",
            "restart_policy": "always"
          },
          "purge_data": false,
          "fully_qualified_name": "test-arm_hello-1.0.7"
        }
      ],
      "remove_containers": [
        "hello_world"
      ]
    }
Special Fields
| Name | Required | Description |
|---|---|---|
| remove_containers | No | Explicitly names the containers which should be handled as ‘initial containers’. On release it will attempt to stop each container, run deployment, and if successful the containers will be removed, or on failure, they will be restarted. |
| version_hash | Readonly | Alternative autogenerated field (readonly) only used for referencing a release by a generated version. |
| successful_deployments | Readonly | Will include only devices which has successfully deployed the release. |
Troubleshooting
Container fails to start
- Check container logs in Device → Logs.
- Ensure the image and tag exist in your registry.
- Verify networking mode does not conflict with other services.
Image Cannot Be Pulled
- Ensure the device can access the registry.
- Confirm the image is public or authentication is configured.
- Check for typos in image/tag names.
Container Keeps Restarting
- Review application logs inside the container.
- Confirm environment variables are set correctly.
- Temporarily set
restart_policytoon-failurewhen debugging.
Permission Issues
- Only use privileged: true if absolutely required.
- Verify required volume mount paths.
- Some applications may need root permissions—verify documentation.
Networking Problems
- Use
network_mode:hostif interacting with: CAN, GPS or other hardware interfaces. - Ensure no port conflicts with existing services.
You are all set!
With Docker support on the AutoPi device, you can deploy powerful and flexible applications at the edge. Using registries, projects, and releases ensures a clean and maintainable deployment workflow.
 Buy AutoPi device
 Compare all AutoPi devices
 Contact our sales team