How to Create a Custom Event for Your Custom Logger
This guide is applicable to the following device / devices:
TMU CM4
This guide walks you through creating a custom event for your own logger script. This is useful when you want your AutoPi device to react to specific conditions like determining when a trip has started or ended based on your own parameters.
We'll go step-by-step through:
- Creating a custom execution script
- Hooking it into the OBD Manager
- Enabling it on a CAN logger
Step 1: Create a Custom Execution Script
Start by creating a new custom module. In this example, we’ll call it custom_event.
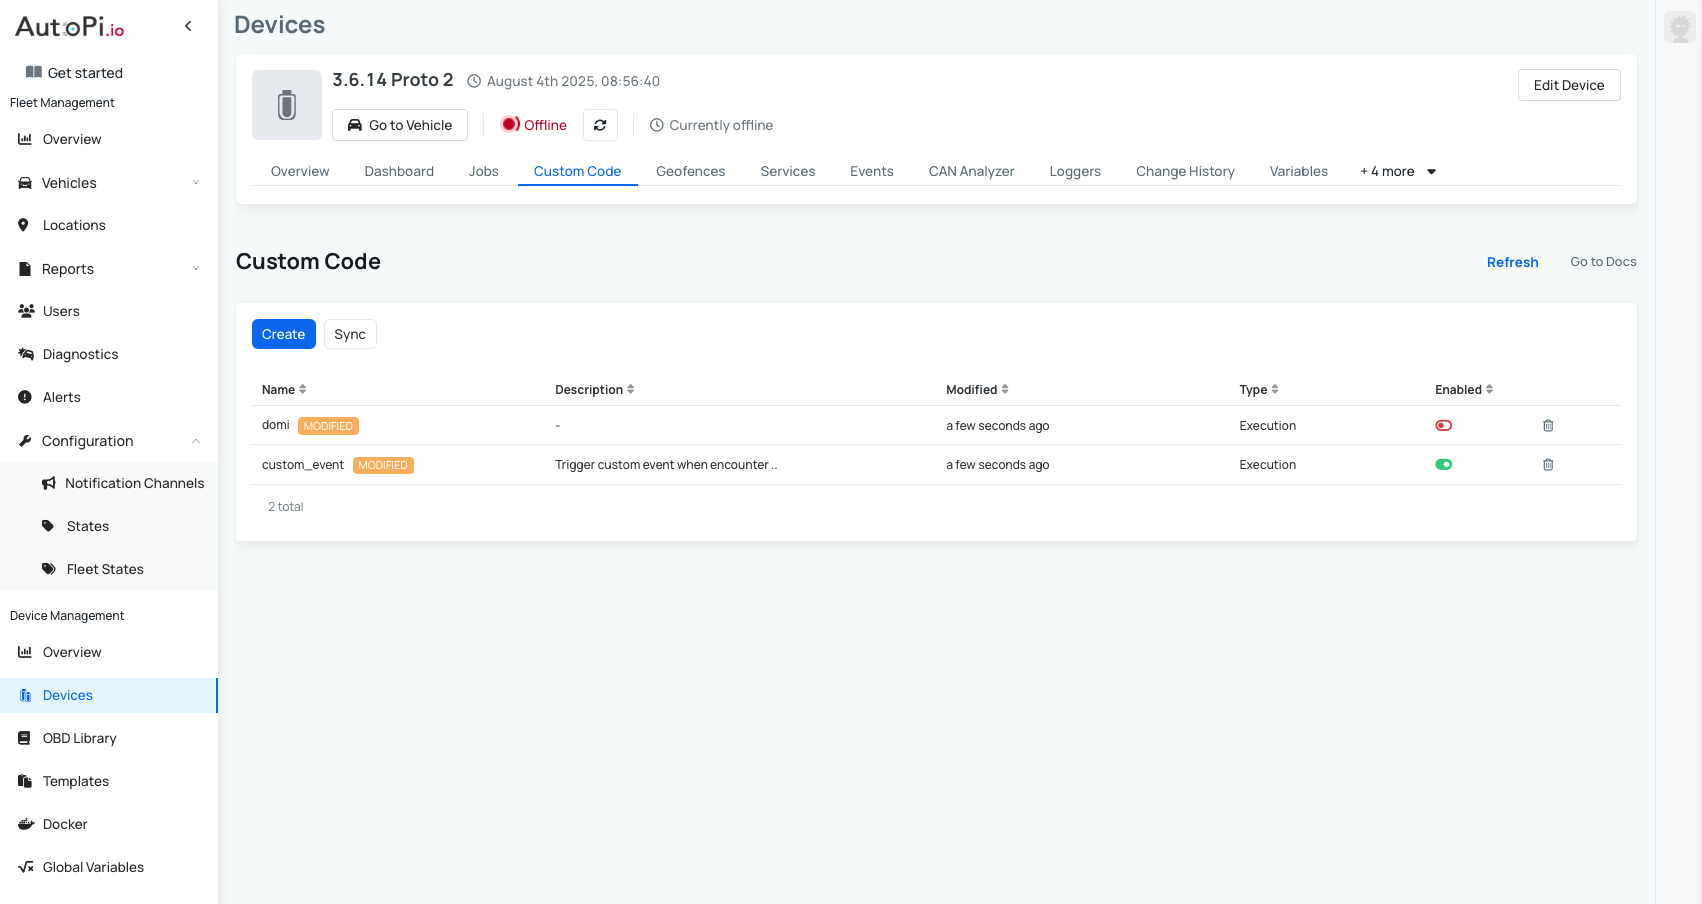
- Navigate to Devices and click on the device you want this change to be applied to.
- Click on Custom Code tab and click "Create".
Here’s what the script looks like:

Here is the code example:
import logging

log = logging.getLogger(__name__)

def trigger(res):
    if not isinstance(res, dict):
        return
    for logger_output in res['values']:
        if logger_output['_type'] == "pack_sum_voltage":
            trigger_val = None
            if logger_output["value"] > 400:
                trigger_val = "nominal"
            else:
                trigger_val = "low"

            __salt__["minionutil.trigger_event"]("vehicle/hv_battery/voltage/{}".format(trigger_val), data=(dict({"value": logger_output['value']}, **{"_alternating_cache_event_filter.skip": True})))
            log.info("Triggered event {:}".format(trigger_val))
    return None
Explanation
You have created a new function that is called trigger, and it takes one input argument res.
resis a dictionary passed from theobd.manager.- The _type attribute of the res dict is the name of the logger we want to react to. Here you can set up some conditionals for 2 different event types:
- Preferably, limit the event types to limit the amount of indexing elastic_search has to do.
- The data parameter will usually be the data we react to - which is the value parameter of the logger_output we are looking at.
- We use the alternating_cache_event_filter.skip to ensure that we limit the amount of events, if the events do no change.
Step 2: Add the Script as a Trigger in the OBD Manager
- Navigate to Services tab.
- Select OBD Manager.
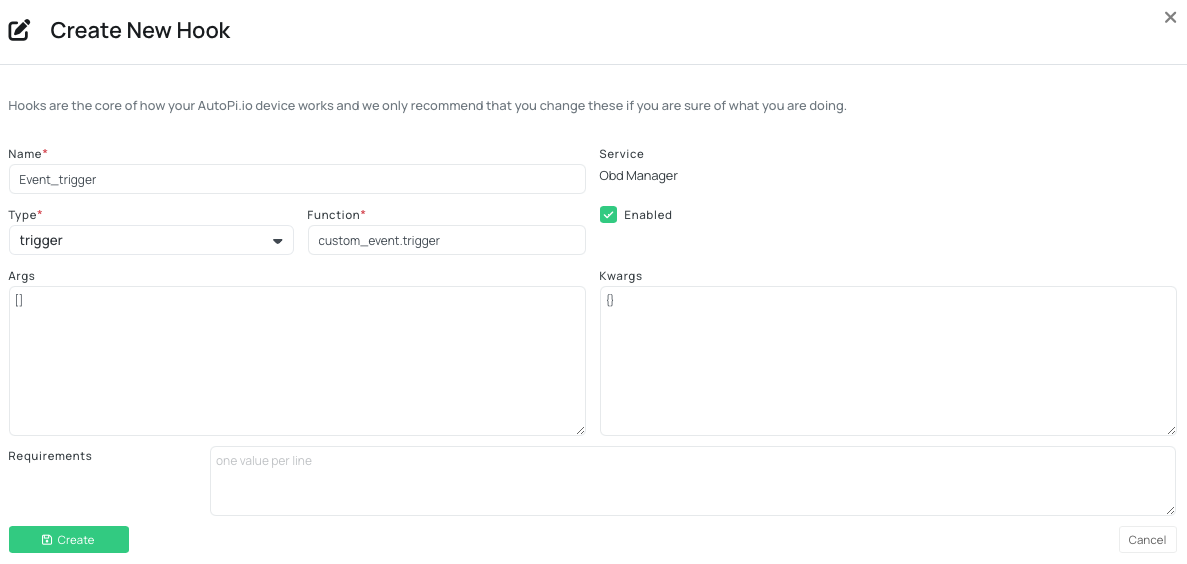
- Navigate to the Hooks tab.
- Click Create Hook.
- Fill in the fields:
- Name: Choose a descriptive name (e.g., event_trigger)
- Type: Select trigger from the dropdown
- Function: Use the format custom_event.trigger
- Enabled: Make sure this toggle is turned on
- Click Save.
Step 3: Assign the Trigger to a Logger
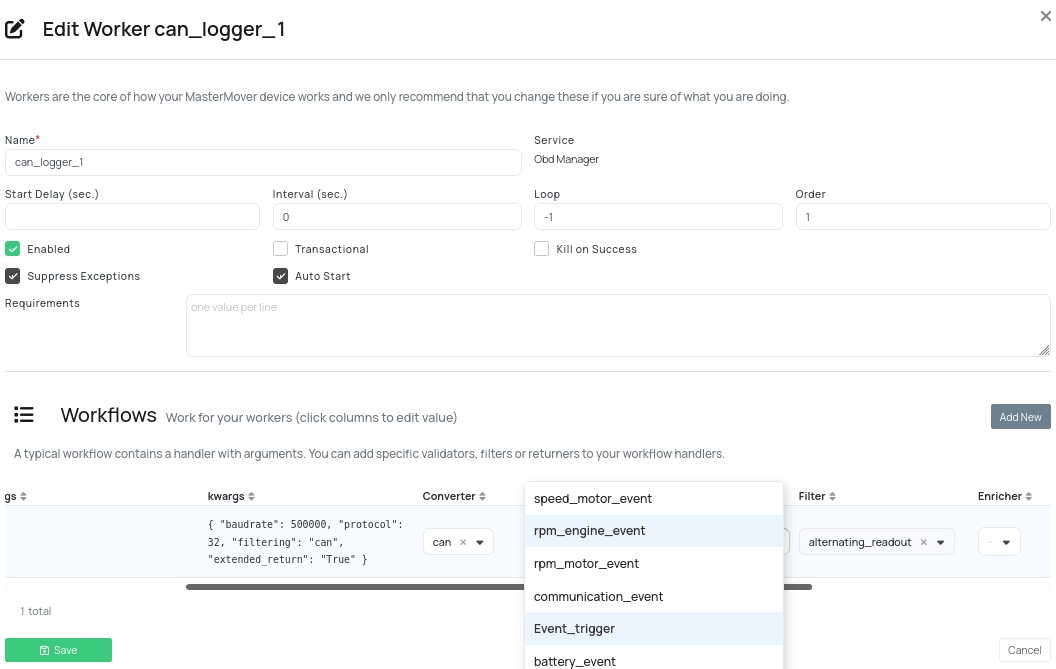
- Navigate to the Workers tab.
- Select the CAN Logger you want to apply the trigger to.
- In the logger settings, find the Trigger dropdown.
- Select your newly created trigger (e.g., event_trigger).
- If your new trigger doesn't appear immediately, try clearing any pending syncs and refreshing the page.
You now have a custom trigger configured for your custom logger. Your AutoPi device will automatically evaluate the logger output and trigger events based on your defined conditions.
 Buy AutoPi device
 Compare all AutoPi devices
 Contact our sales team