Geofences


In the second subsection on the Vehicle Tab, you will find Geofences. This
feature allows you to create and manage geofences, which define specific
boundaries on a map to mark areas of interest and receive notifications about
events within those boundaries. For example, you can get notification when a
vehicle enters or exits a designated geofence.
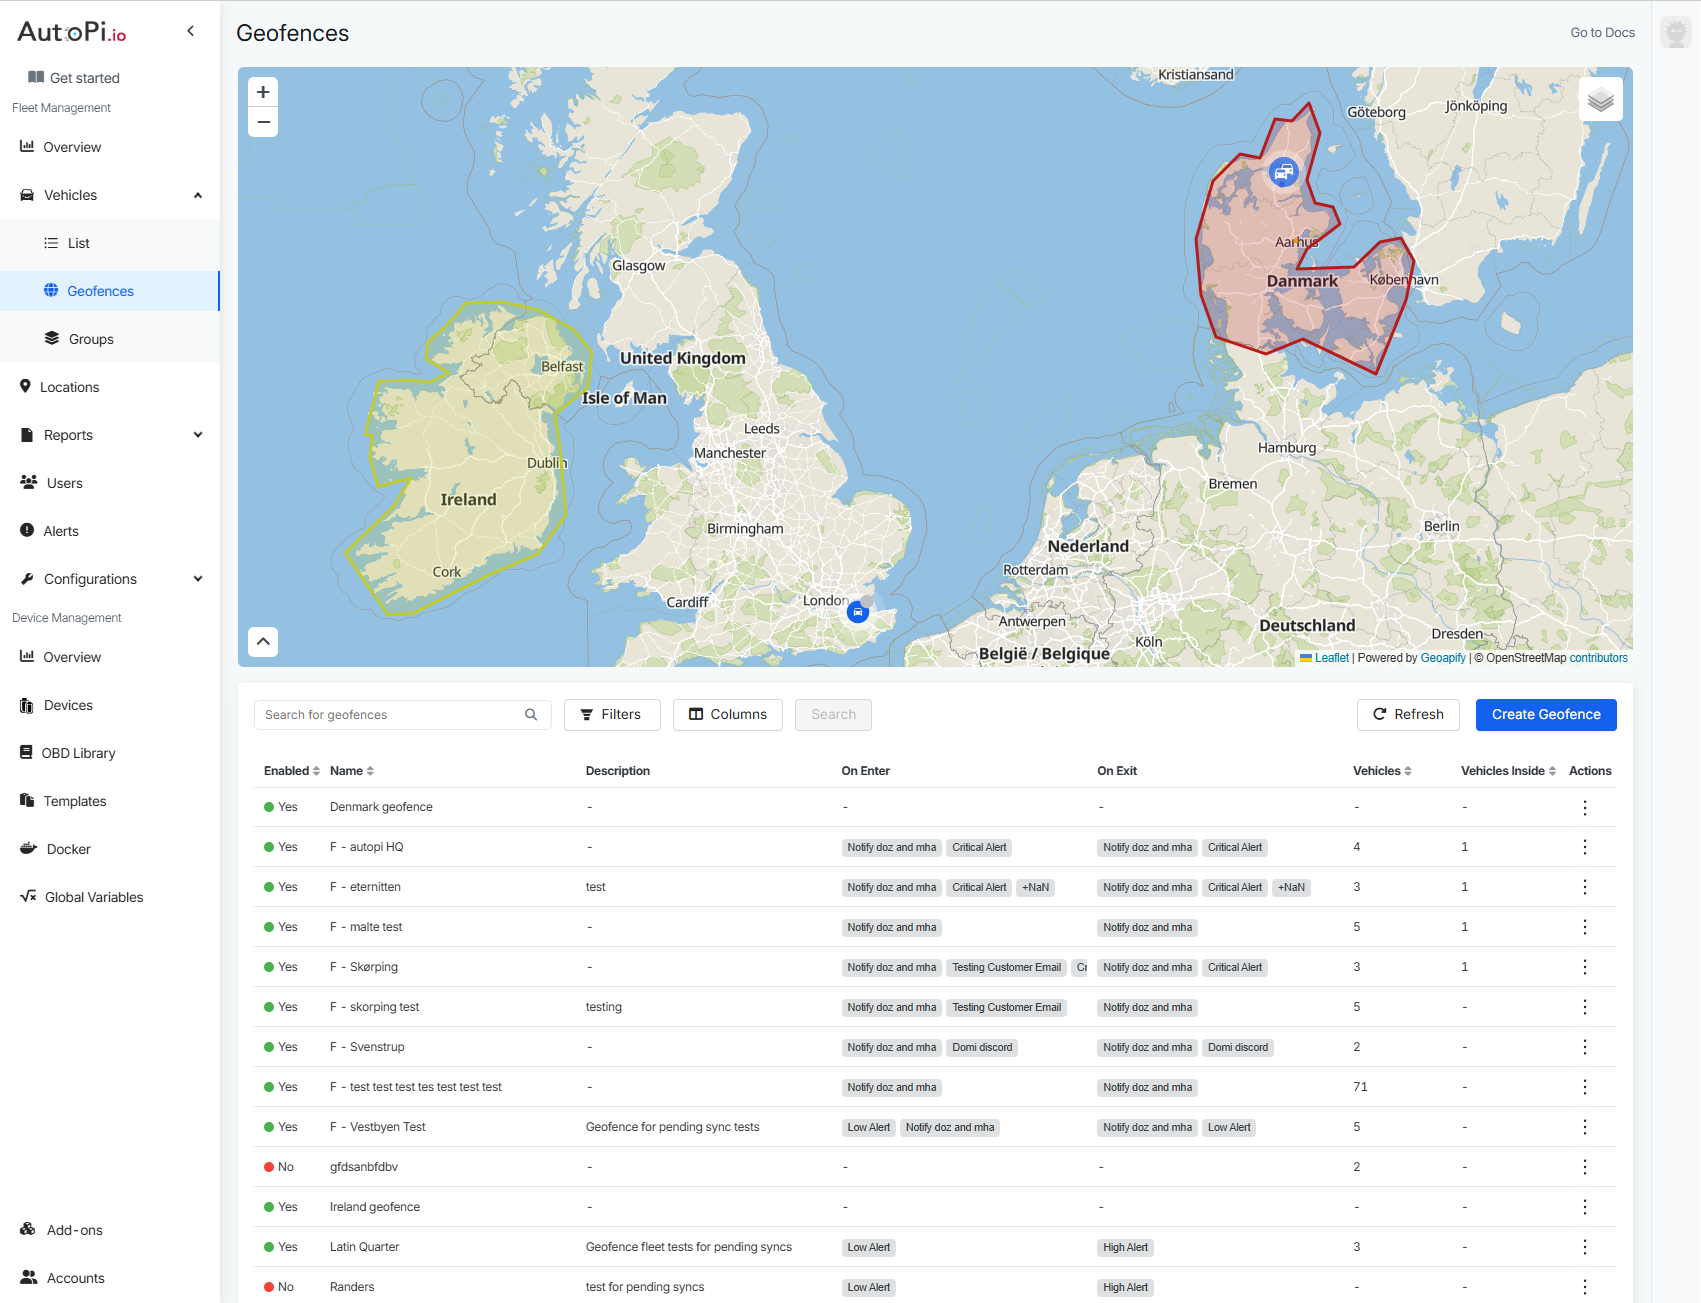
Click on the Geofences tab to see the world map under which is a list of any
geofences that have been created.
How to Create a Geofence
-
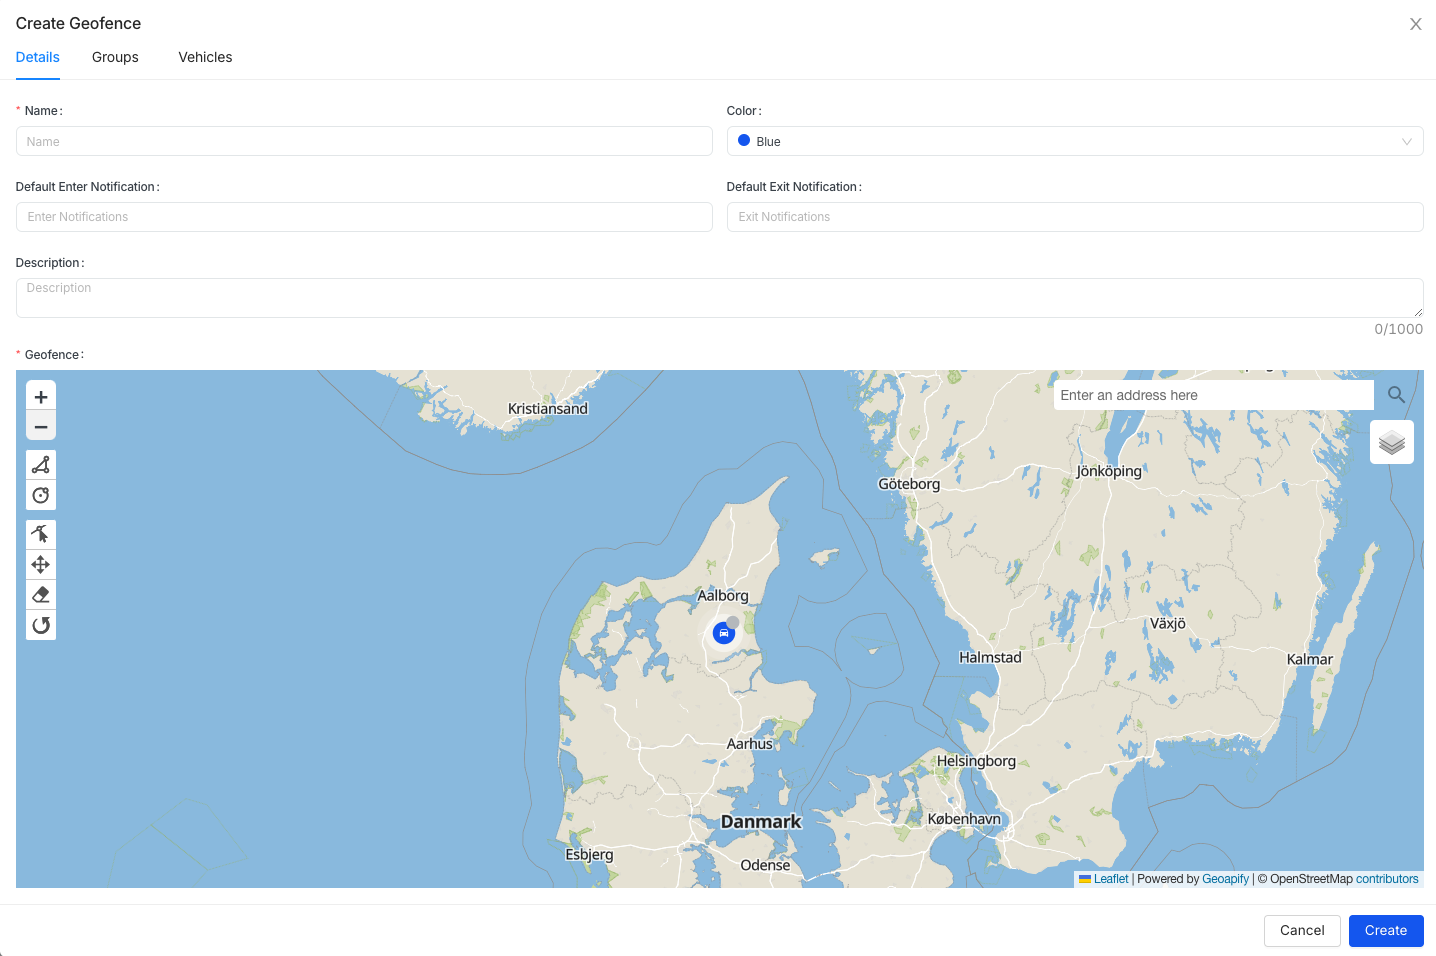
Click Create to start creating a geofence. Under the headline Create Geofence you’ll see three columns – Details, Groups, Vehicles.
We’ll start with Details; add a name for the geofence for an easy internal identification. Add a description for more information about the geofence. Choose a color for the geofence to be shown on the map. -
Configure Notifications:
- In the Default Notification section, specify who will receive notifications. Ensure you have created notification channels (learn how here).
- Choose a channel to receive notifications when vehicles enter and/or exit the geofence. You can select multiple notification channels.
-
Draw the Geofence:
- On the map, zoom in on the area where you want to set boundaries.
- Use the tools on the left side to create the geofence. Select either a circle or polygon tool to draw boundaries.
- Additional tools include options to edit, drag, remove or rotate layers.
-
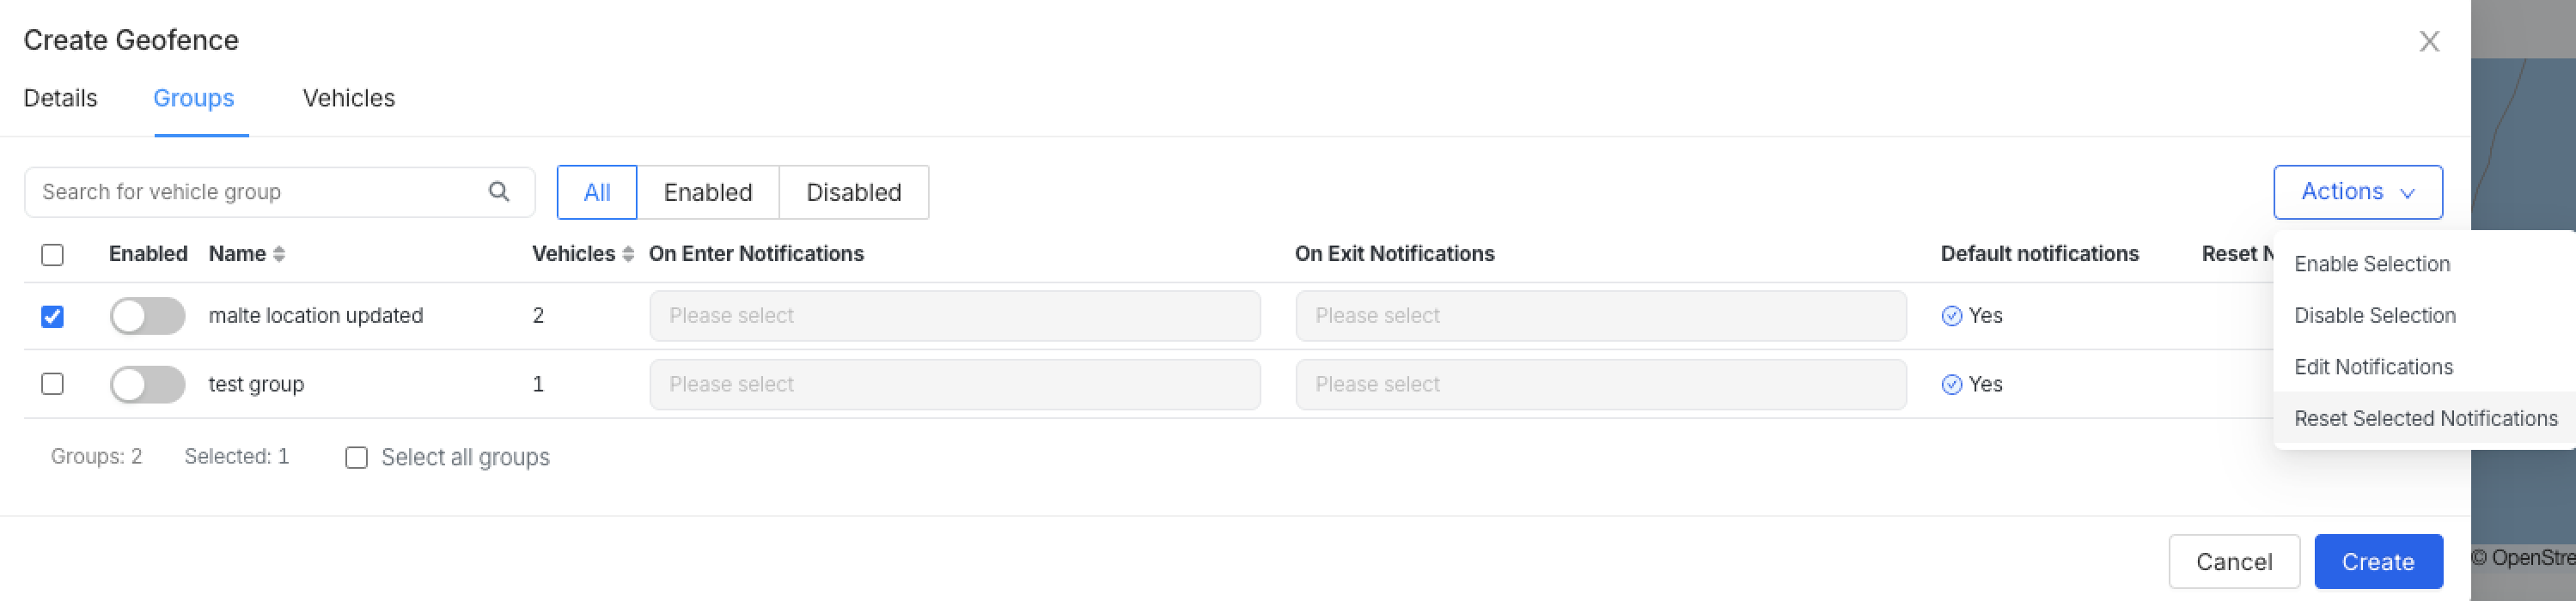
Add Vehicle groups to the Geofence:
- In the second column under Create Geofence you can add vehicle groups to the geofence.
- If you have created a vehicle group (more info here), you can apply the geofence to the desired group of vehicles. Find the group in the list or search for it using the filtering option.
- View group details including name, number of vehicles, notification channels, and default notifications. You can edit the Notification channels here.
- Choose a Group by check-marking one or multiple groups to enable Actions in top right corner. From here you can bulk edit notifications, reset selected notification channels, enable or disable all selected groups.
- You can save time editing chosen groups using Actions, just make sure to
check-mark the groups to access Actions, see image below.
- Enabling desired groups means all the vehicles in the vehicle Groups will be under this geofence.
- When you are making changes to the Groups or Vehicles you might see an orange dot at the top on enabling icon as well as orange letter circle icon letting you know that the changes have not been saved.
- For filtering on ‘All’, “Enabled’, and ‘Disabled’ you’ll have to save changes first.
-
Add Individual Vehicles to the Geofence:
- If you want to add vehicles individually, or you have not created Vehicle groups, we can go to the third column under the headline - Vehicles. Here you will find a list of all your vehicles, with their name and VIN.
- Search for the vehicle. Enable the vehicles you want to include in the geofence.
- If you want to see if you are choosing the correct vehicle to enable, you can click on the icon next to the vehicle name and a new window will open up where you can double check without interrupting the process.
-
Save the Geofence:
- Once satisfied, click Create. You can always add more vehicles or change details later.
- A notification will confirm that the geofence was successfully created.
 Buy AutoPi device
 Compare all AutoPi devices
 Contact our sales team