Locations


The Locations feature helps you organize your fleet by creating and managing operational areas for your company—such as regional offices, headquarters, distribution centers, or service hubs. You can assign vehicles to specific locations and control user access based on their assigned areas. Users will only see vehicles and manage operations tied to the locations they have access to.
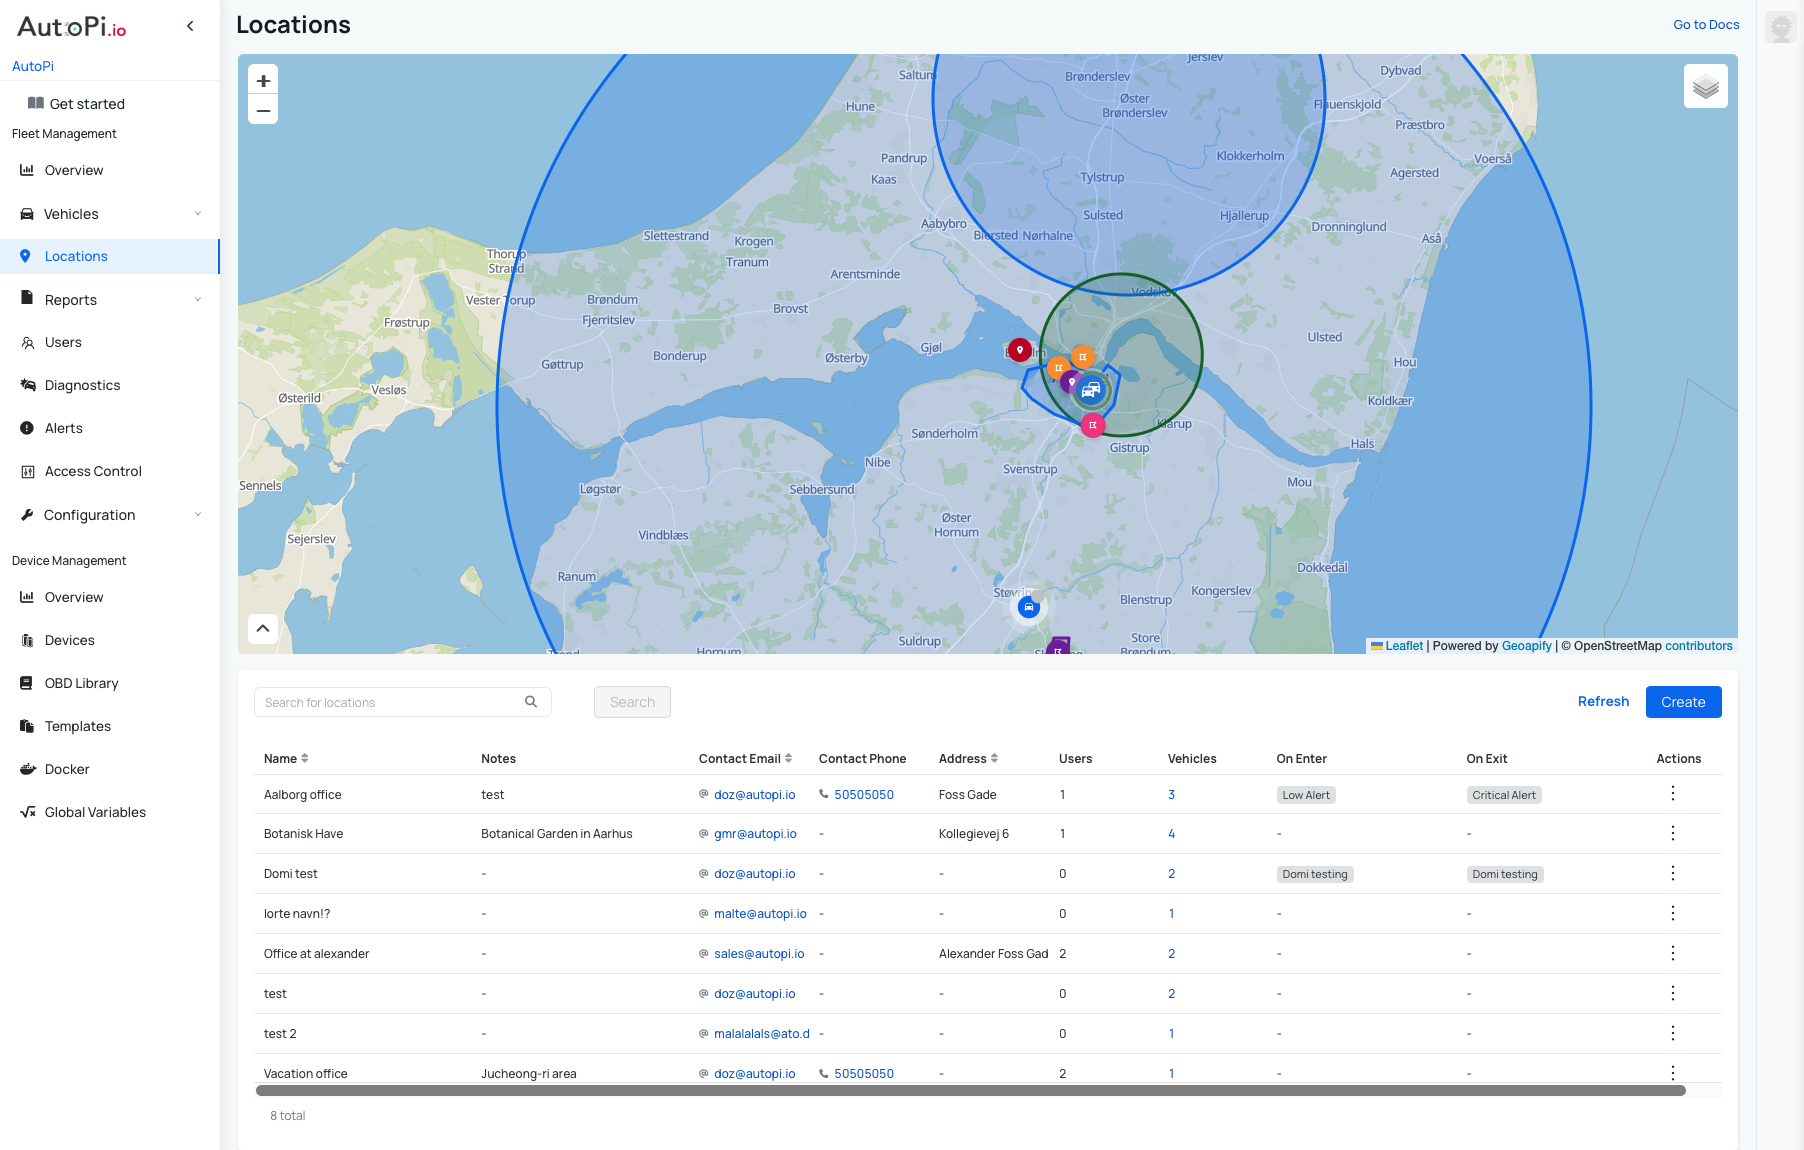
To begin, navigate to the Locations tab, where you'll see a world map of your existing locations and a list view for easy navigation.
Creating a Location
-
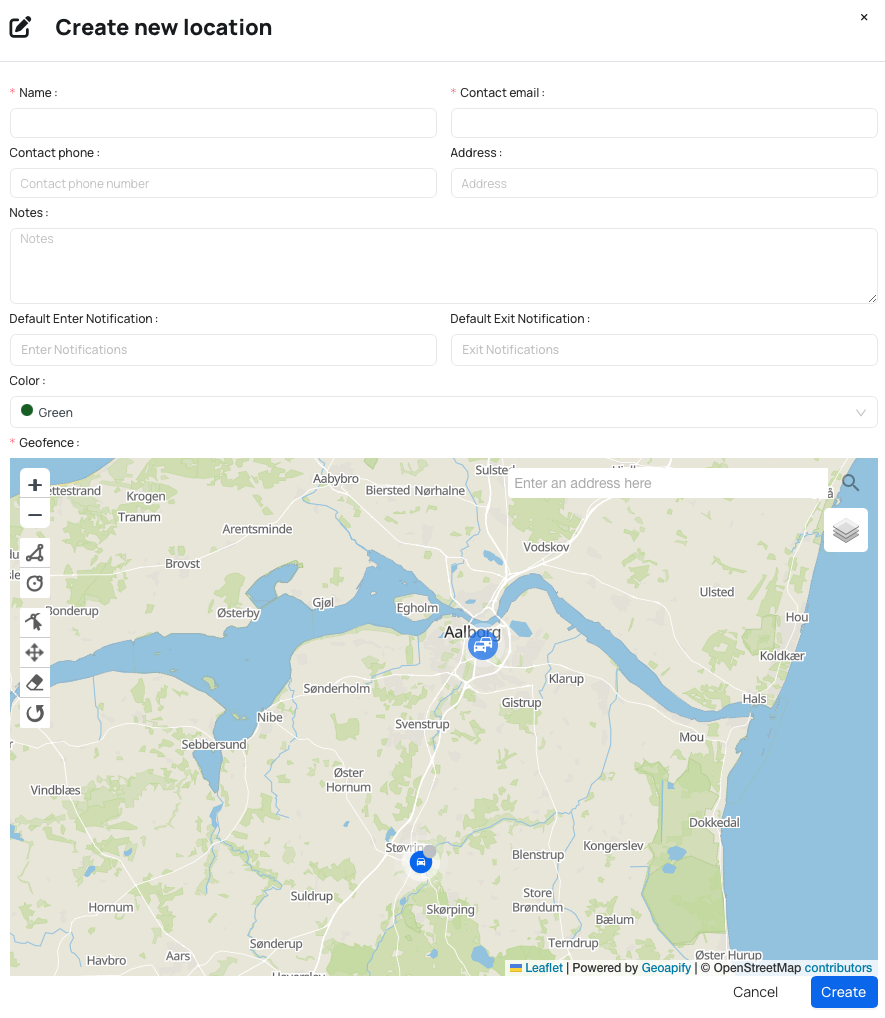
Click Create and enter the location details:
- Location name (required): An internal identifier for the location
- Contact email (required): The main contact for this location
- Phone number, address, and notes (optional): Additional information to describe the location
-
Configure geofence settings:
- Enter an address to zoom in on the map
- Choose a color for the geofence if desired
- Select the default enter and exit notifications
- Notification channels are configured once under Notification Channels and then reused here
-
Draw the geofence:
- Use the tools on the left side to create and edit the geofence
- Click on the map to draw a circle or polygon that outlines your desired area
- Additional tools allow you to edit, drag, remove, or rotate layers
-
Click Create to save the location
Managing Locations
Once created, your location appears in the list. To edit or delete a location, click Actions (the three dots) next to the location name. Use the Search for Location filter to quickly find specific locations when you have multiple entries.
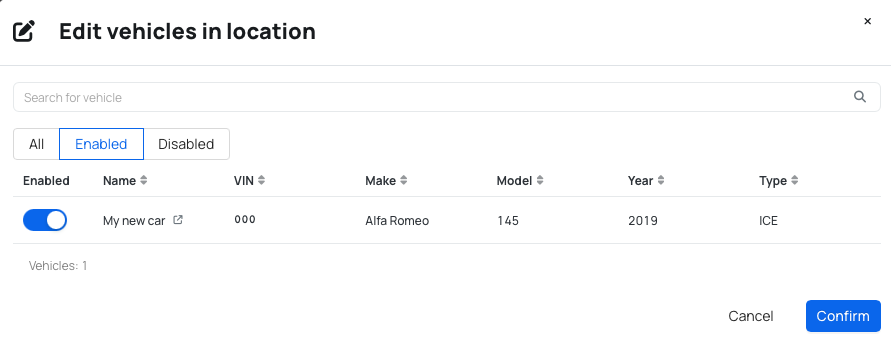
Assigning Vehicles to a Location
- Click on a location from the list to open the Edit vehicles in location dialog.
- Search for and select vehicles to assign to this location.
- Enable the vehicles you want to assign to this location. You can enable multiple vehicles at once.
- Click Confirm. A confirmation notification will confirm the changes have been saved.
The Vehicles column on the Locations list shows the number of vehicles assigned to each location. Click this number to view the vehicles assigned to that location in the Vehicle section.
Assigning Users to a Location
You can assign users to specific locations to control their access to vehicles and operations in those areas. For detailed instructions on assigning locations to users, see Assigning Locations to Users.

Using Locations with Templates
Combine Locations with Templates to efficiently configure vehicles across your fleet with consistent location assignments.
- Open the template you want to use for your vehicles.
- Set the desired Location on the template.
- Apply the template to your selected vehicles or groups.

This allows you to maintain consistent location configurations across your entire fleet.
 Buy AutoPi device
 Compare all AutoPi devices
 Contact our sales team