A Guide to Triggers


This guide introduces Triggers and explains how to create and edit them on your AutoPi device. Triggers allow you to receive notifications when specific events occur on your device or vehicle. They provide a flexible way to monitor vehicle activity and respond automatically to events. Notifications can be sent via email or webhook requests. In this guide, we will explain how triggers work and walk through an example where a notification is sent if a vehicle starts outside of working hours (8 PM – 8 AM).
What Are Triggers?
Triggers allow you to receive notifications when specific events occur on the device.
Whenever a device receives an event (for example vehicle/engine/running), the device sends the event and its associated data to the AutoPi Cloud. The Cloud system then processes the data and checks whether any configured triggers match the event tag and conditions.
A trigger consists of:
- Event type or signal
- Event tag
- Optional conditions
- Actions.
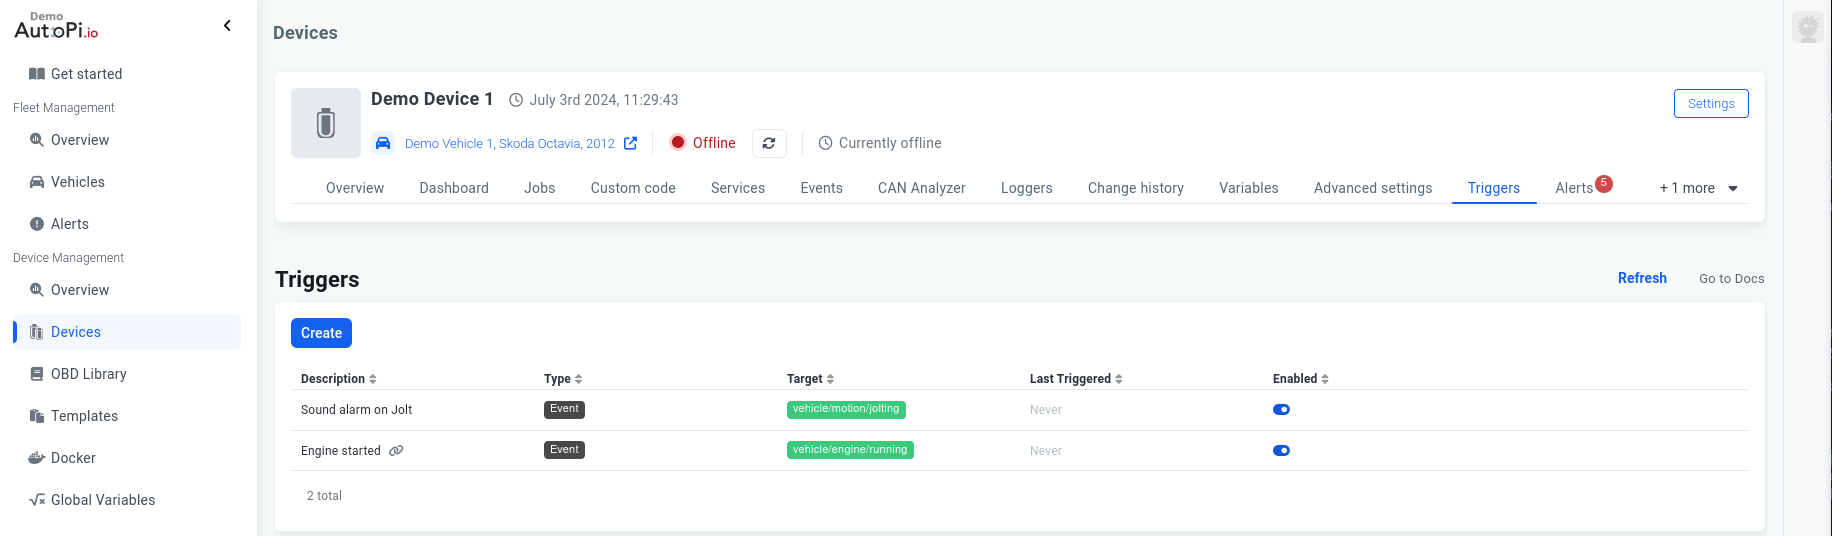
When the event matches the trigger and all conditions are satisfied, the configured actions are executed, such as sending an email or triggering a webhook. Triggers are configured and managed directly in the AutoPi Cloud under Device > Triggers.
Create a New Trigger
Quick Setup
To create a new trigger:
- Navigate to Device → Triggers.
- Click Create.
- Fill out the basic information.
- Define conditions (optional).
- Configure actions.
- Click Save.
Below we will explain each step in more detail to help you understand how to configure a trigger correctly.
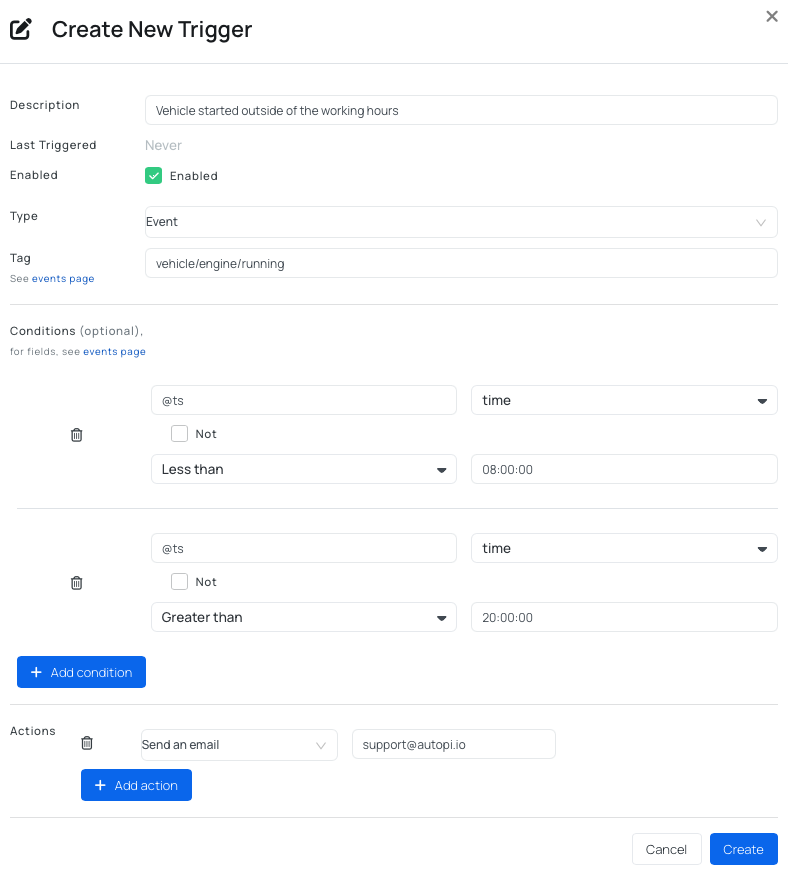
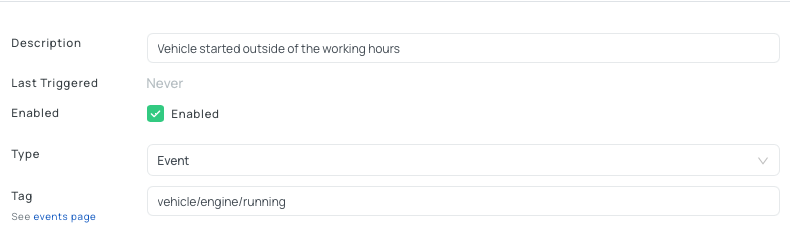
Step 1: Fill Out Basic Information
The basic settings define what event will activate the trigger.
-
Description
A descriptive name for your trigger.
Example:Vehicle started outside of working hours. -
Last Triggered
Displays the last time the trigger was executed. This value is automatically updated and visible in the triggers overview. -
Enabled
Determines whether the trigger is currently active. -
Type
Specifies whether the trigger reacts to an event or a signal. -
Tag
The event tag that the trigger will react to. Examples:vehicle/engine/runningvehicle/engine/*(using a wildcard).
Step 2: Define Conditions (Optional)
Conditions allow you to control when a trigger should execute. A trigger can have zero or multiple conditions, and all conditions must be satisfied before the action is executed.
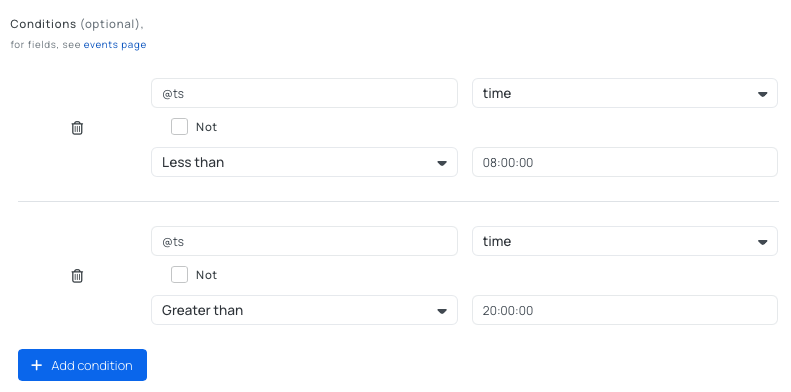
In our example we configure two conditions:
@tstime less than08:00:00@tstime greater than20:00:00
This means the trigger will activate if the vehicle starts between 8 PM and 8 AM.
Condition Fields Explained:
Field - the name of a field available in the event data.
-
Example event data:
{
"@rec": "2021-05-25T12:33:52.636385Z",
"@t": "event.vehicle.engine",
"@tag": "vehicle/engine/running",
"@ts": "2021-05-25T12:33:42.686380Z",
"@uid": "ee3df171-ff0f-6209-a3db-aa00b00e1d05",
"@vid": 106
} -
Important fields include:
@rec– When the event was received by the cloud@ts– When the event occurred on the device@uid– Device unit ID@vid– Vehicle ID
Type - defines the data type used for comparison. Different types include: string, int, datetime, bool, float, object and time.
-
Example:
- When using
@ts, you may want to compare only the time, not the full timestamp. In that case you can change the type from: datetime → time.
noteAll timestamps are stored in UTC, so the comparison value must also use UTC.
- When using
Not - inverts the condition logic.
- Example:
- You can use that with the "field present" operator, to make a condition that only executes if the field is NOT present.
Operator - defines the comparison method. Some operators only apply to certain data types. For example, you would probably not use the comparison operators (greater than, etc.) for a string types. Different types of operators:
- field present
- equals
- greater than
- greater than or equal
- less than
- less than or equal.
Value - the value used for comparison.
- Examples:
- some.field should "be present" (in this case no value is needed).
- some.field should "equal" 1234.
- some.field "greater than"0.
Example Condition Use Cases
Here are some examples of how to use conditions:
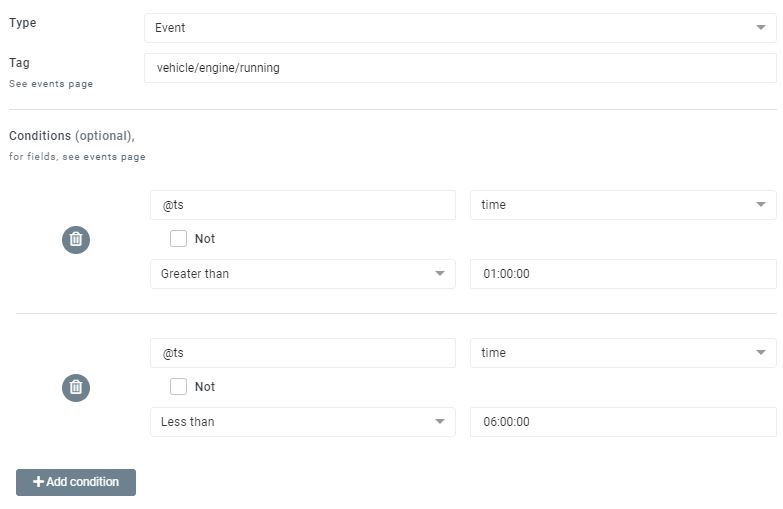
-
Notify on engine start between 01:00 and 06:00 at night. (Remember all times are UTC, so keep that in mind when creating the conditions. So if your timezone is UTC+2, the below conditions will in reality match between 03:00:00 to 08:00:00 local time.)
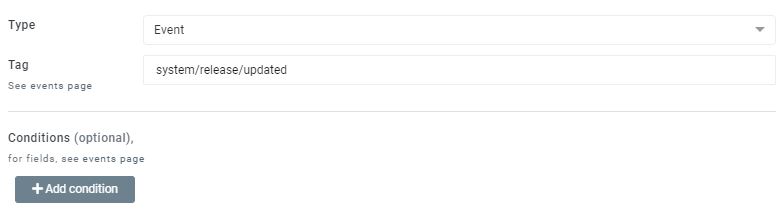
-
Notify on device update (No conditions)
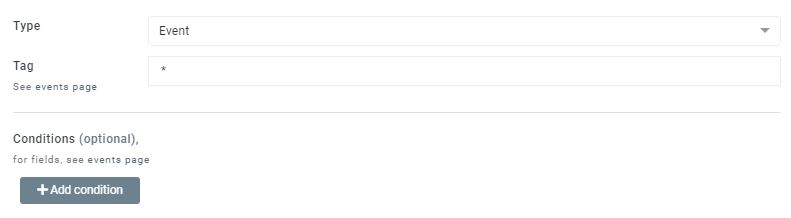
Notify on all events (will only execute once every minute no matter how many events are received)
Step 3: Configure Actions
Actions define what happens when the trigger is executed. Currently supported actions include:
- Send email
- Send webhook request.

In this example we configure an email notification to: support@autopi.io .
Event Context Variables
When you speicfy you'd like to send a webhook request, you can specify the payload that is sent with the request. When specifying the payload, you can use the Jinja templating language to insert data that's passed by the trigger's context. Here's what the context can offer:
event #the event that got fired
    @vid: int - Vehicle ID of the vehicle associated with the device
    @uid: UUID - The Unit ID of the device
    @tag: string - Additional event information
    @t:   string - Type of the event
    @ts:  string - Timestamp from the device
    @rec: string - Timestamp of when the event was received

trigger # the trigger
    created:        date - When the trigger was created
    last_modified:  date - When was the trigger last modified
    last_triggered: date - The last time this trigger got executed
    last_error:     date - When was the last error for this trigger
    description:    string - A description of the trigger
    enabled:        boolean - Whether the trigger is enabled or not
    device:         Device - The device model
    interval:       duration - How often is the trigger allowed/going to trigger

# nested models
Device
    id:                 uuid - The device id
    unit_id:            uuid - The device's unit id
    callName:           string - The name of the device (user provided)
    vehicle:            Profile - The profile (vehicle) model
    last_communication: date - The last time this device was connected to the cloud

Profile (the vehicle the device is registered to)
    type:         string - The type of the vehicle
    vin:          string - Serial number of the vehicle
    model:        Model - The model of the vehicle
    year:         integer - The creation year of the vehicle
    callName:     string - The name of the vehicle (user provided)
    licensePlate: string - The license plate of the vehicle

Model
    make: Make - The make of the model
    name: string - The name of the model

Make
    name: string - The name of the make (BMW, Mercedes-Benz, Toyota etc.)
You can use these values in a payload like the following example:
{
    "payload": "{{ trigger['description'] }}",
    "device_uid": "{{ event['@uid'] }}"
}
which will translate into the following payload:
{
    "payload": "Description that you've specified when creating the trigger",
    "device_uid": "c3cce723-79ed-4897-80cf-4cd48b62b235"
}
Keep in mind that some events provide additional data in the event context, so there will be additional fields available. An example for such a scenario is the vehicle/battery/discharging event which has an event.vehicle.battery.level value showing a percentage value of the battery.
Example Action Use Case
Here are some examples on how to use actions:
-
Send email

- Here is how an example email from a trigger looks:
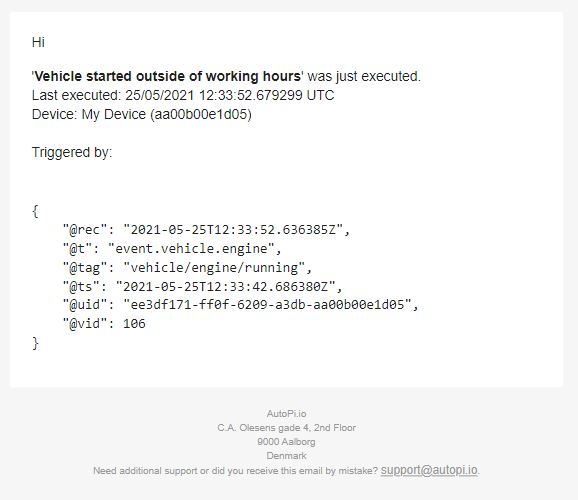
-
Send webhook request

-
Address: Your unique Slack webhook address
-
Payload:
{"text": "{{ trigger['description'] }} was executed, by device {{ trigger['device']['callName'] }}"} -
The payload in this case will end up looking something like this when being sent to Slack:
{
    "text": "your_trigger_description_here was executed by device your_device_callName"
}
-
-
Send MQTT message via webhook (home assistant etc)
- Check out this tutorial: https://www.home-assistant.io/blog/2017/03/28/http-to-mqtt-bridge/
- Address: heroku app address
- Payload:
{"topic":"<mqtt_topic>","message":"<mqtt_message>","key":"<AUTH_KEY>"}
-
Trigger IFTTT applet via webhook
- Address: Find on https://ifttt.com/services/maker_webhooks/settings .
- Payload: optional and custom based on the IFTTT applet.
Like all AutoPi's cloud functionality, triggers can be managed programmatically through the AutoPi REST API, here is how to start: REST API. For more information you can also check out this documentation: API Automation.
Edit a Trigger
You can easily modify existing triggers. Here are the steps:
- Navigate to Device → Triggers.
- Locate the trigger in the triggers table.
- Click the trigger row to open the editing dialog.
- Make your changes.
- Click Save.

You can also enable or disable triggers directly from the triggers table by clicking the toggle icon.
 Buy AutoPi device
 Compare all AutoPi devices
 Contact our sales team