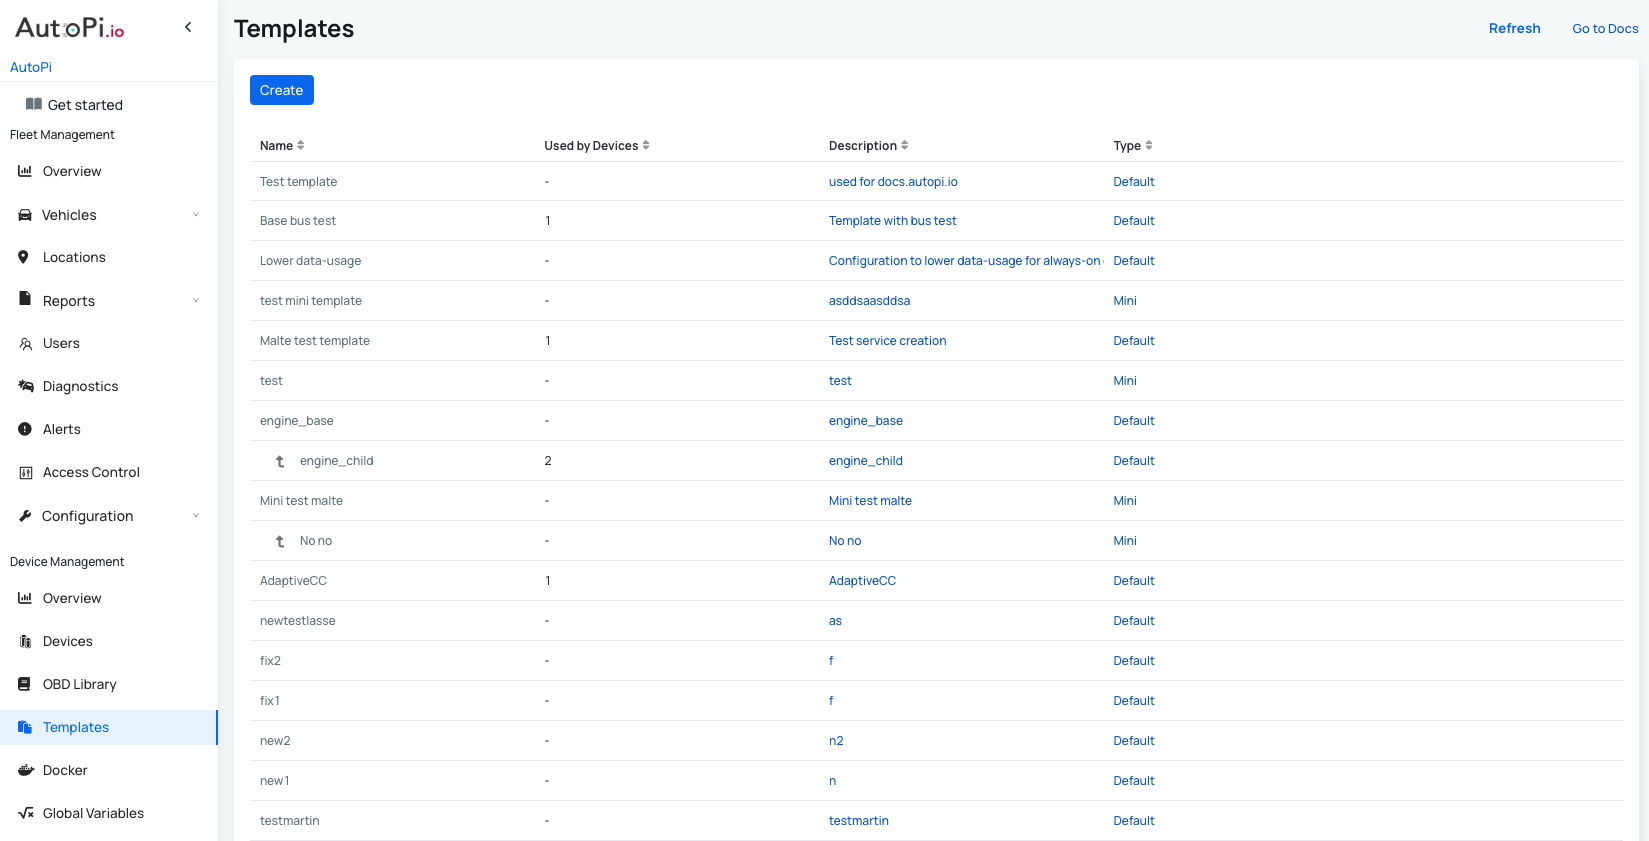
Templates

What are Templates?
Templates allow you to configure and manage multiple devices at once. Instead of setting up each device individually, you can create a template that contains all required configurations such as custom code, services and loggers and then apply it to one or more devices at once. This feature is especially useful for scaling deployments, ensuring consistent configurations across devices, and simplifying ongoing device management.
Quick Start for Templates
A typical workflow when using templates is:
- Create a template.
- Add the desired configurations.
- Assign devices to the template.
- Apply the template.
Once applied, all selected devices will inherit the configuration defined in the template.
How to Create Templates?
Templates allow you to configure and manage multiple devices at once. To fully use the Templates functionality, follow these three steps:
- Create a template - define a new template that will act as the base configuration for your devices.
- Define the configurations - add all required settings to the template, such as advanced settings, custom code, services, jobs, loggers, and other supported features.
- Assign devices and apply the template - select the devices you want the configurations to be applied to and apply the template. Once applied, the selected devices will inherit all configurations defined in the template.
This approach ensures consistent configuration across devices and significantly reduces setup time for larger deployments. Below, we’ll walk through each of these steps in more detail to make it easy to understand the different parts of template creation and how they work together.
STEP 1: Create New Template
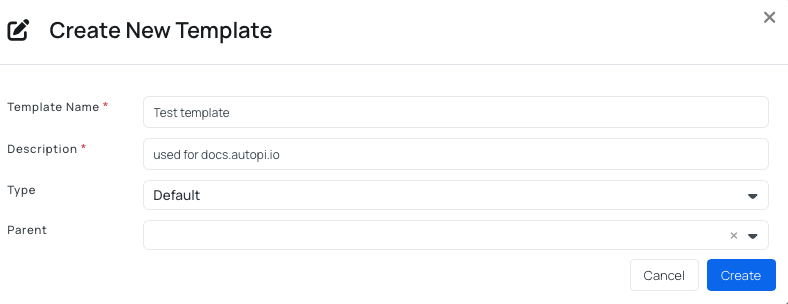
Steps to create a new template:
- Navigate to the Templates section.
- Click the Create button.
- Fill in the following details:
- Template name - use a clear and descriptive name.
- Description (optional) - add a description to help distinguish the template from others.
- Type - choose the appropriate device type:
- Default is meant to be used for AutoPi TMU CM4 devices.
- Mini is meant to be used for AutoPi Mini devices.
- Parent (optional) - select a parent template if you want to inherit its configurations. The child template will include all configurations from the parent, in addition to its own.
- Create the template. Your new template will now appear in the templates table.
STEP 2: Define the configurations
In this section, we’ll walk through each configuration section available for templates and explain how they can be used to define device behavior consistently across multiple devices.
Templates support most of the same configuration options available for individual devices. Options that are too device-specific have been intentionally excluded to ensure templates remain reusable and scalable.
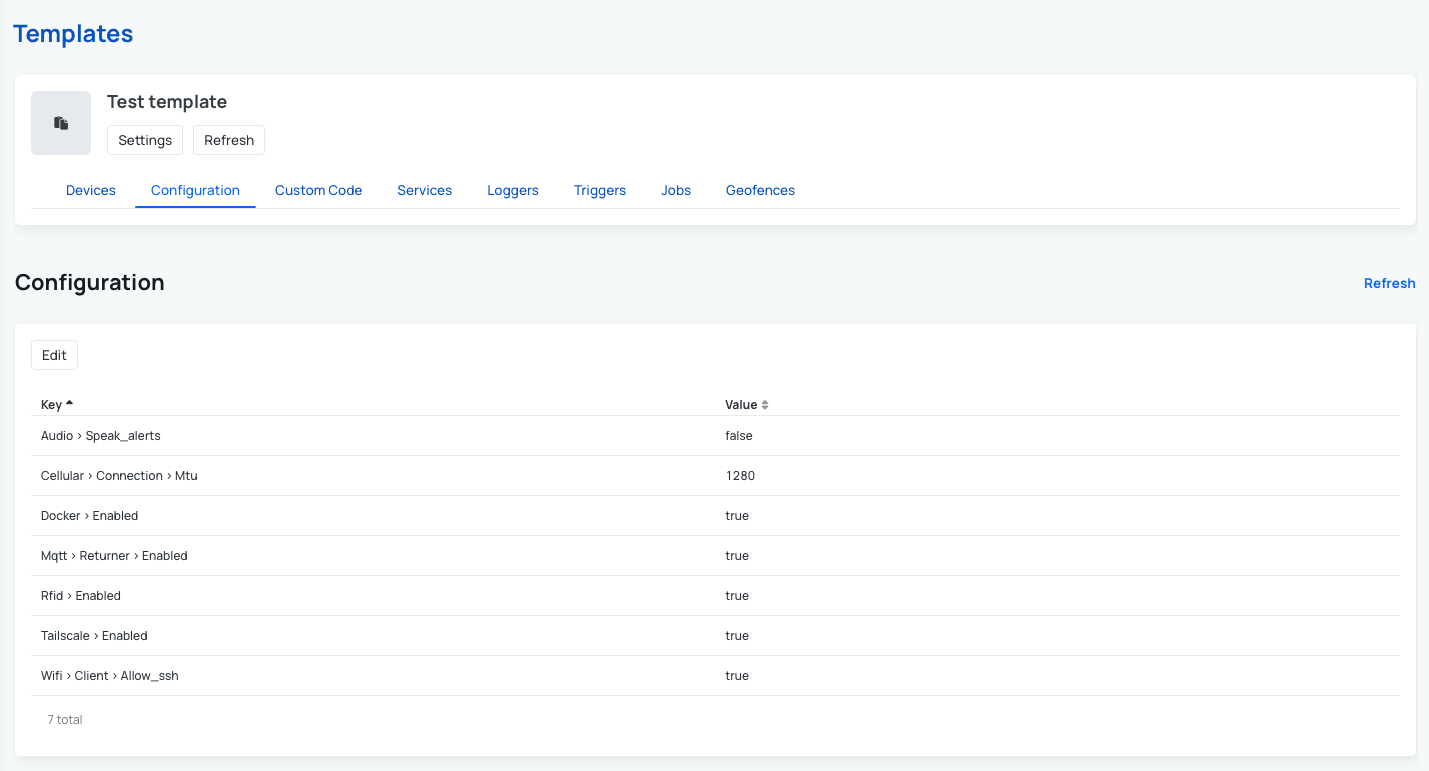
Configuration (Advanced Settings)
Most advanced settings are available to be specified for a template. Options that aren't available for templates have been removed because they are too specific for each device and it doesn't make sense to set in a template.
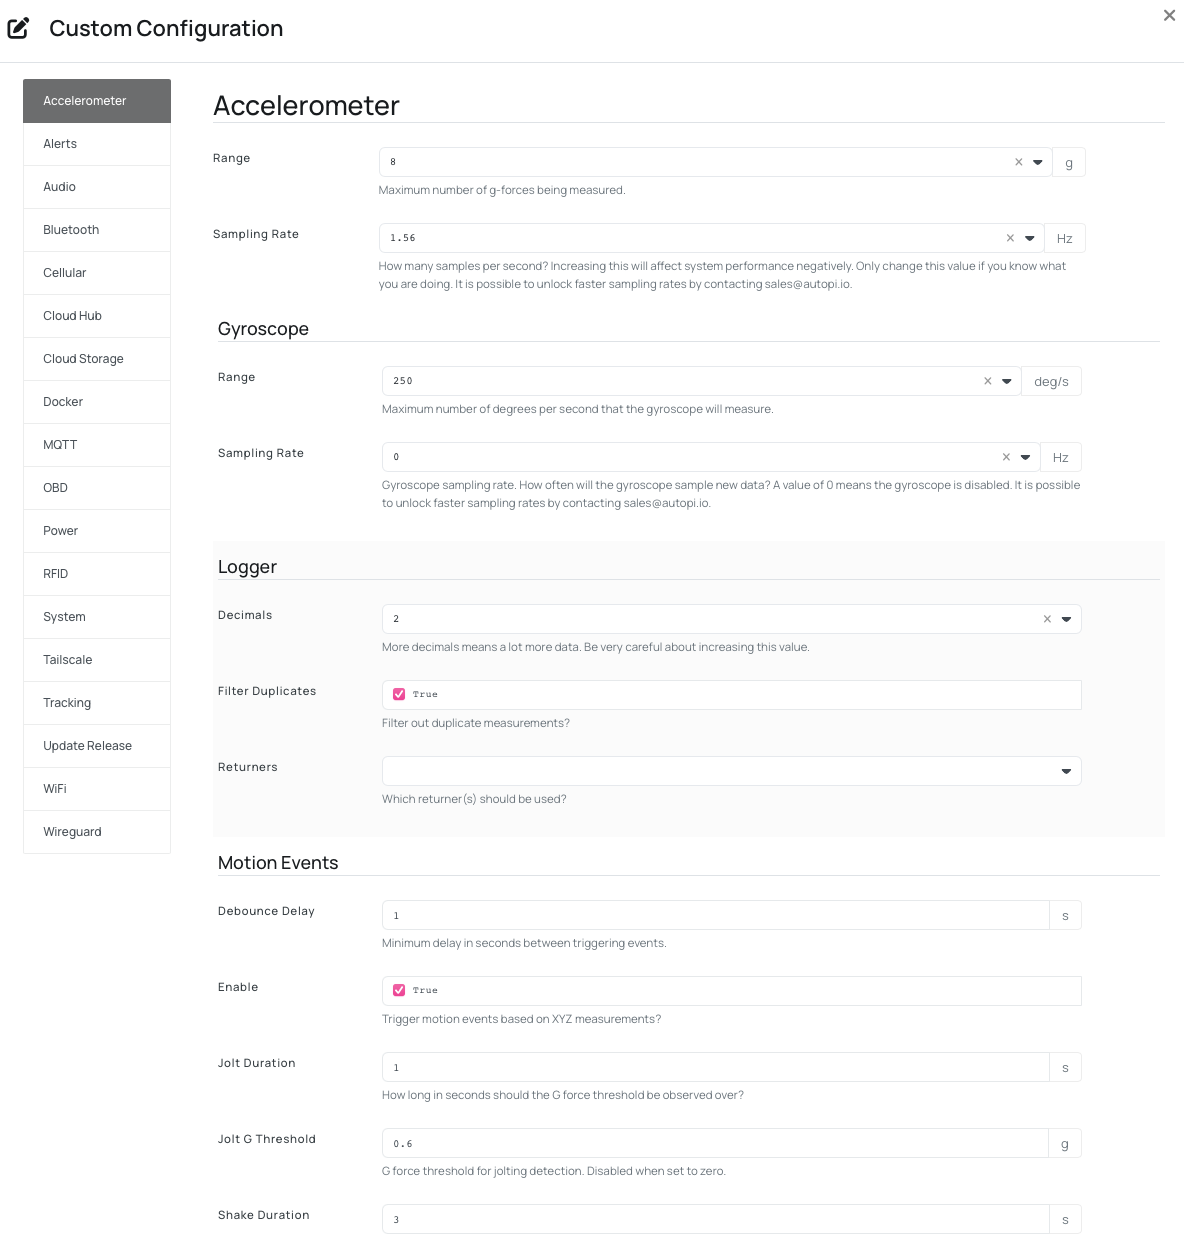
The configuration table shows all settings currently associated with the template, including their keys and values. To modify or remove settings:
- Click Edit, the advanced settings UI will open.
- Make your changes.
- Click Save. The table will automatically update to reflect your changes.
To learn more about individual settings, refer to the relevant guides:
- For AutoPi Mini devices: Advanced settings for Mini
- For AutoPi TMU CM4 devices: Advanced settings for TMU CM4
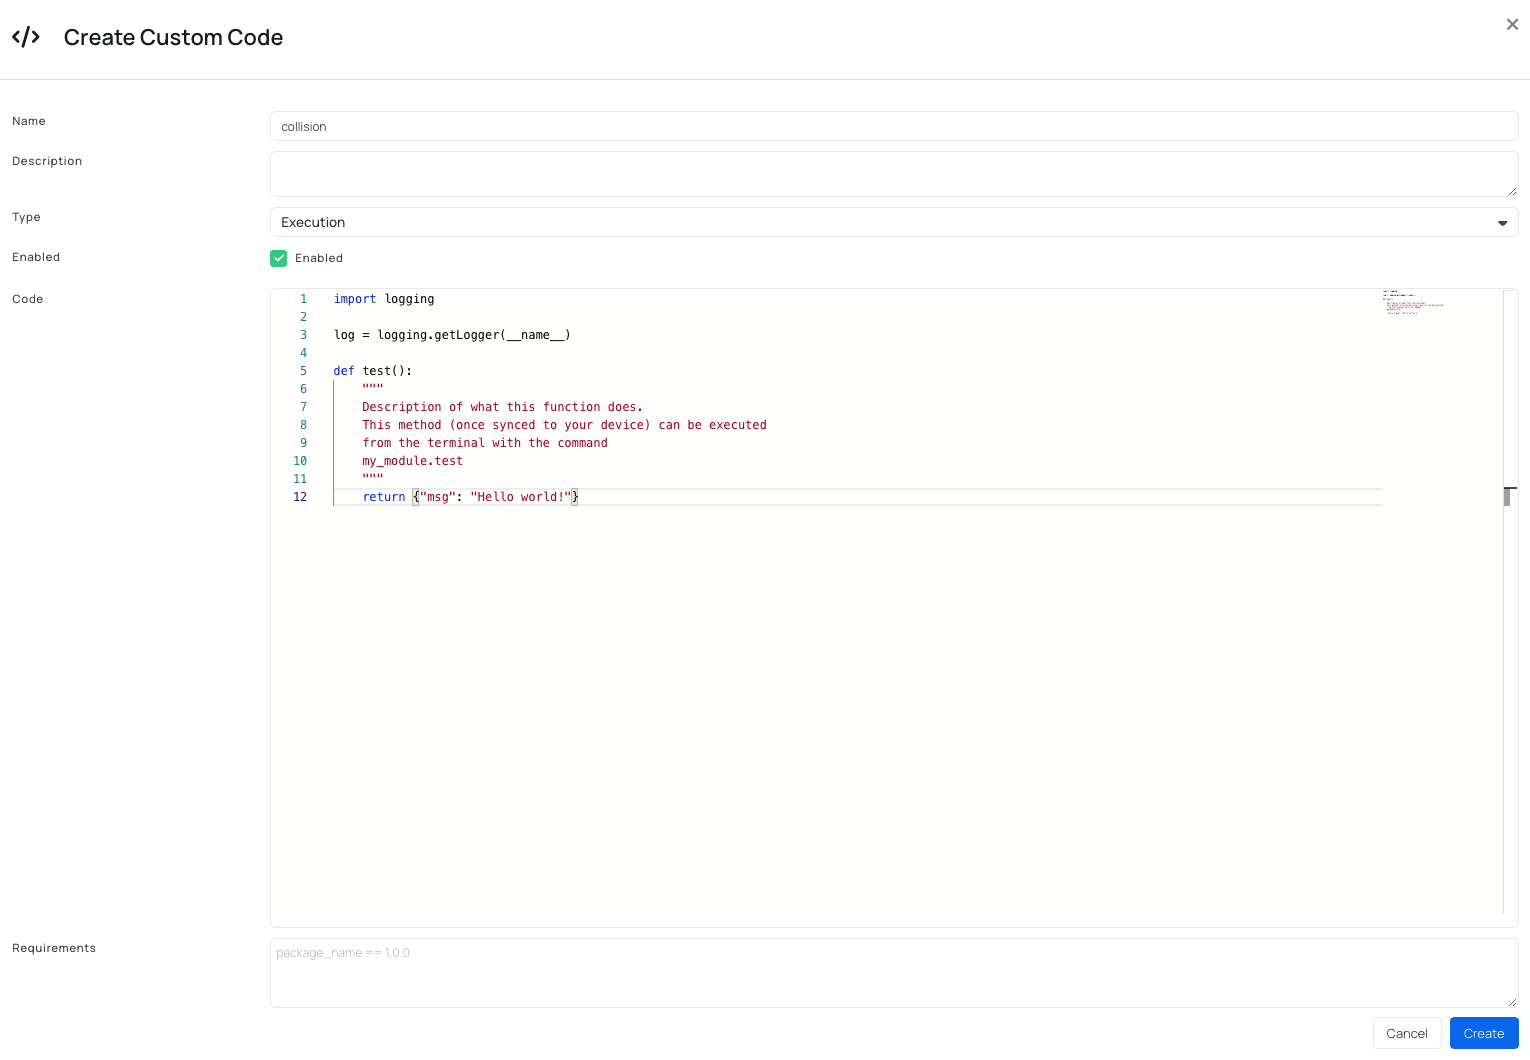
Custom Code
Custom modules are created in templates the same way they are for individual devices. You can choose the appropriate module type based on your needs.
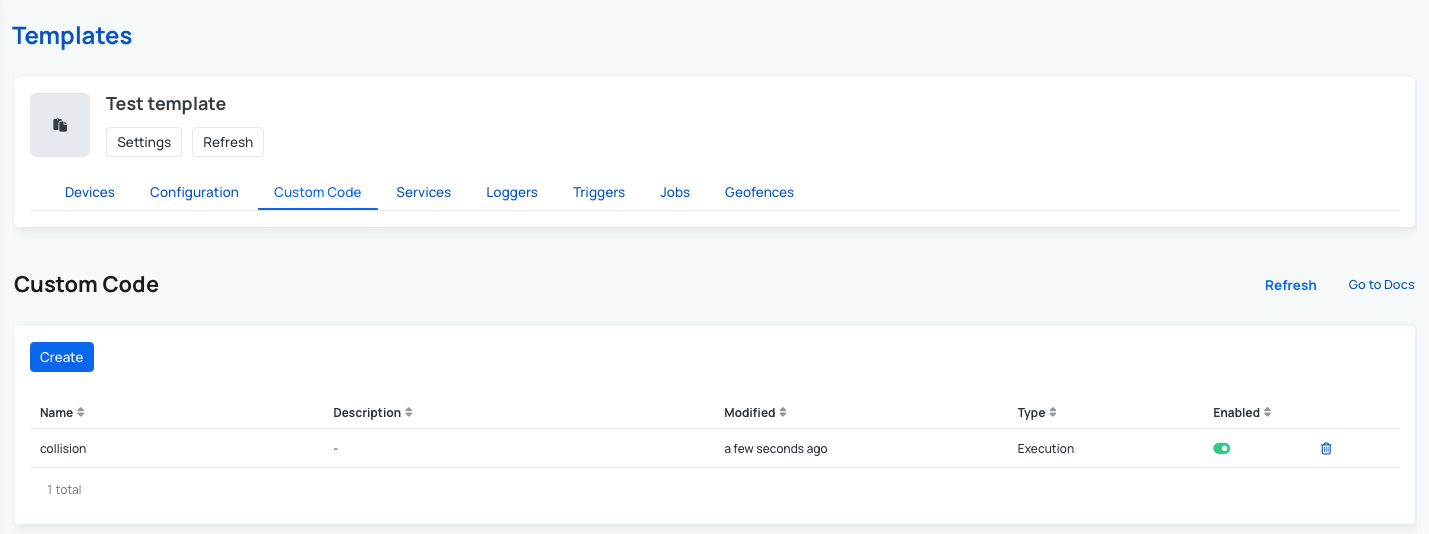
When creating a custom module of type Service, a corresponding custom service is automatically created and associated with the same template. Example of the custom code is shown below:
Services
Services (also known as managers) are background processes running on the device and managed by a parent process (Salt Minion). If a service fails, it is automatically restarted and reported as needed.
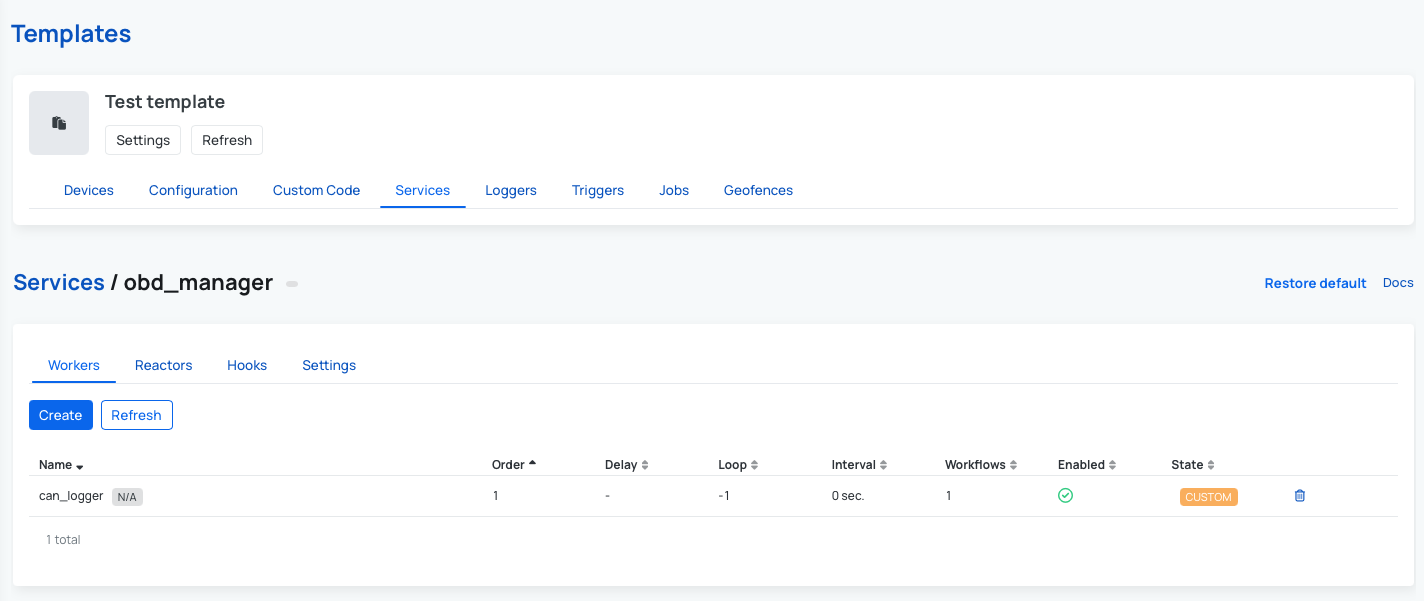
Default AutoPi services act as the primary interface between the Core software and hardware components. For example, the obd_manager service handles communication with the STN chip and enables vehicle communication. Templates also support custom services, including defining required Python (PIP) packages. These services start automatically when the device boots. Below is one example on how the services can be configured:
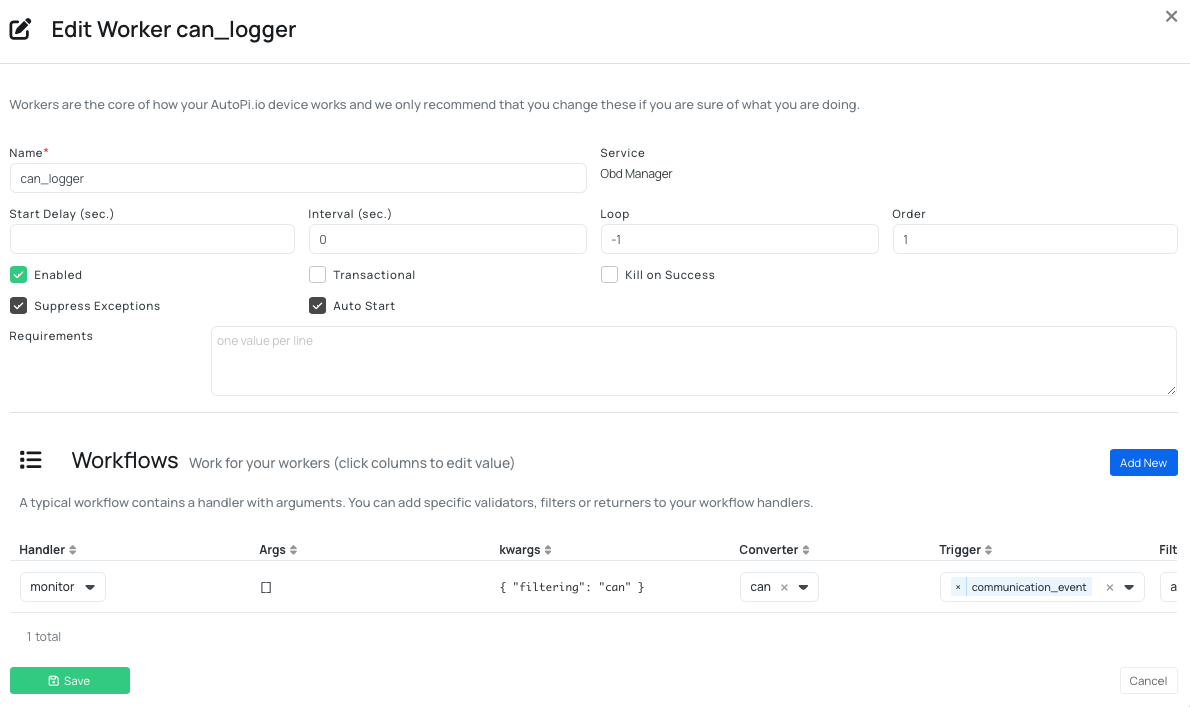
To override a default service (for example obd_manager) using a template, simply create a custom service with the same name.
To learn more about individual settings, refer to the relevant guide: Creating Custom Services.
Loggers
Loggers in templates are created similarly to device loggers, with a few key differences:
- Creating a logger in a template also creates a bus associated with that template. This does not happen when creating loggers directly on devices.
- Before creating templated loggers, make sure you have already created CAN Messages, CAN Signals, or PIDs in the OBD Library.
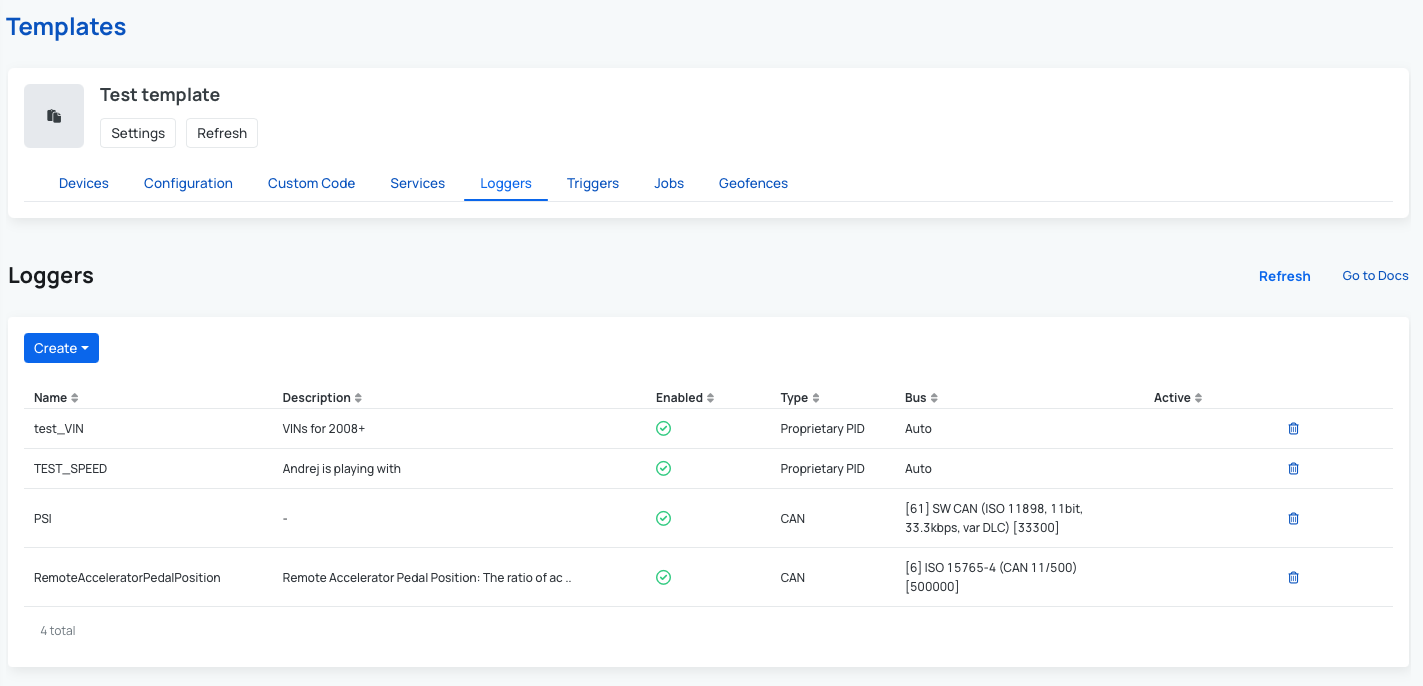
You can create:
Create CAN Logger
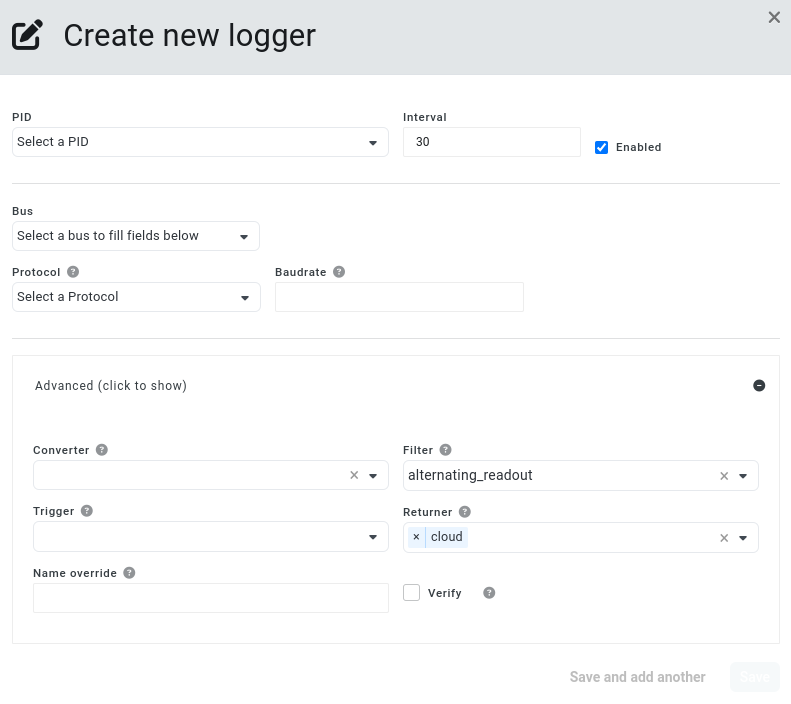
To create a templated CAN logger, find the Loggers tab in the template you would like to edit, click Create, and choose CAN. You will be presented with a window like this:
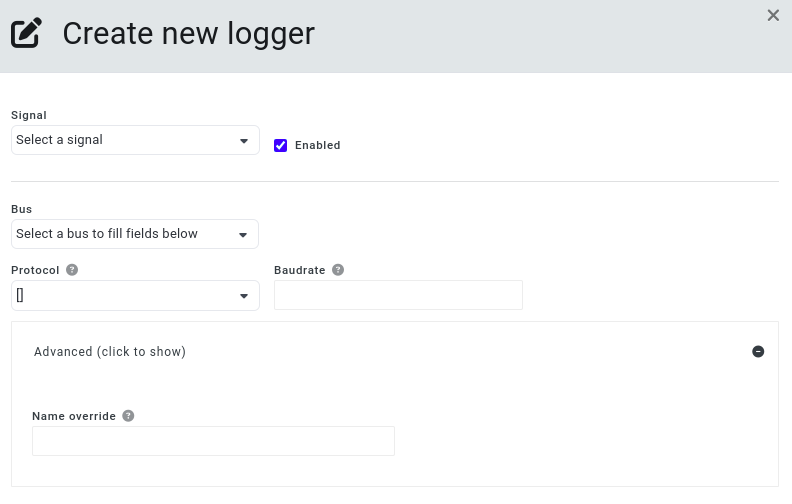
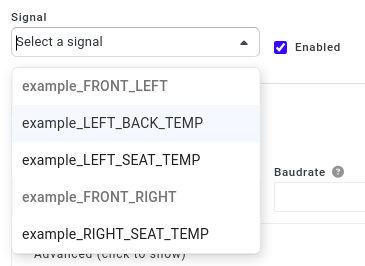
Here you will need to select the CAN signal you'd like to log, set the bus configuration and specify the baudrate if desired. In a guide on Importing CAN messages and signals through DBC files we imported some signals related to the seat temperature. Here we can see those in the dropdown:
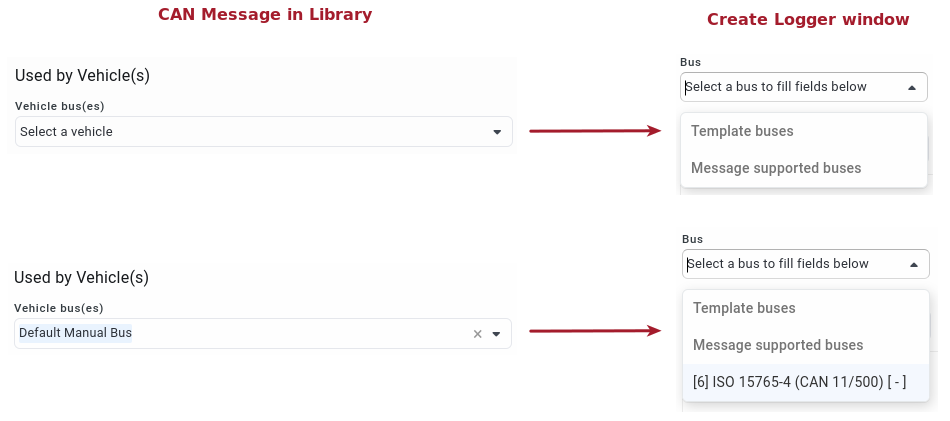
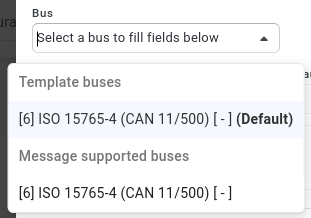
The first logger you create on a template will always create a bus that's associated to that template. More buses will be created when loggers are created with a protocol, which none of the existing buses are set to. Multiple buses with the same protocol are not supported. When you click on the Bus dropdown, you will see both the buses that are associated to the template, and the buses which are 'supported' by the message. If one of these buses is selected, it will prefill the Protocol and Baudrate fields (there are no association made between the selected bus and the newly created logger/bus/template).
The Message supported buses section in the dropdown for Bus, refers to the Used by Vehicle(s) setting in the Create New CAN Message edit windown in the OBD Library -> My Library -> Create CAN.
Let's say this signal can be logged on a bus with protocol ID 6 and default baudrate. You'd set the parameter values, save, and the next logger you create for this template, you can choose to fill these fields using the bus that was just created.
Create PID Logger
The process for creating templated PID loggers is very similar as for CAN loggers. Go to the template's Loggers tab, click Create, then select PID. You'll be presented with a window similar to this:
A key difference compared to CAN loggers is that Bus selection is optional for PID loggers. If no bus is specified, the vehicle’s default bus is used.
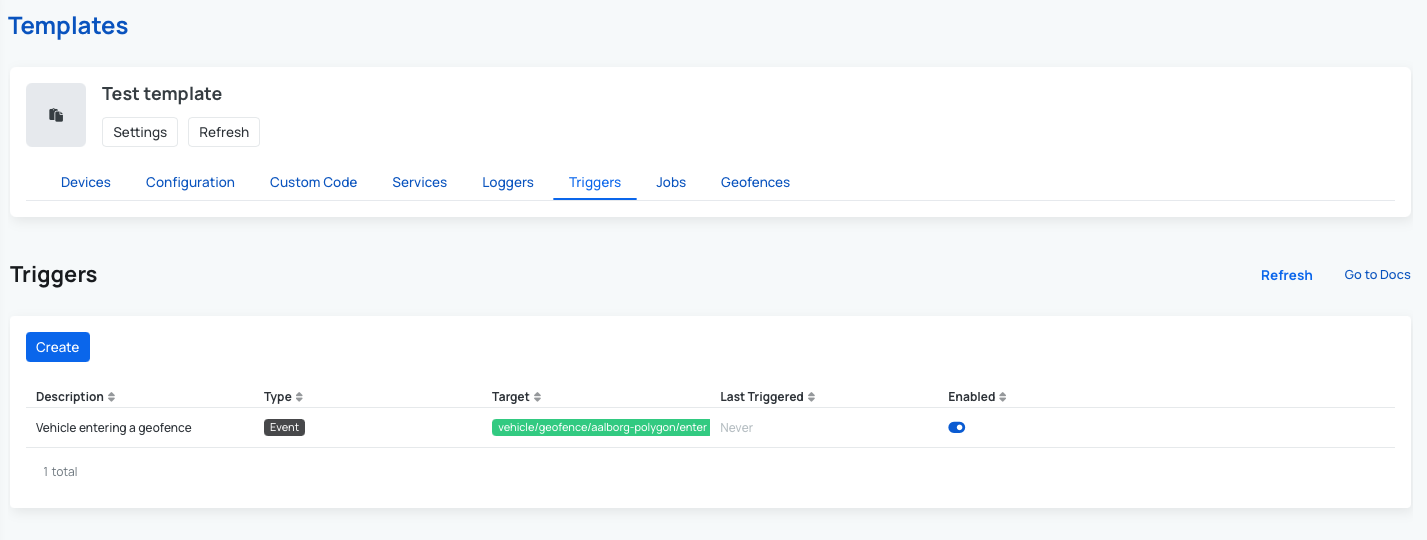
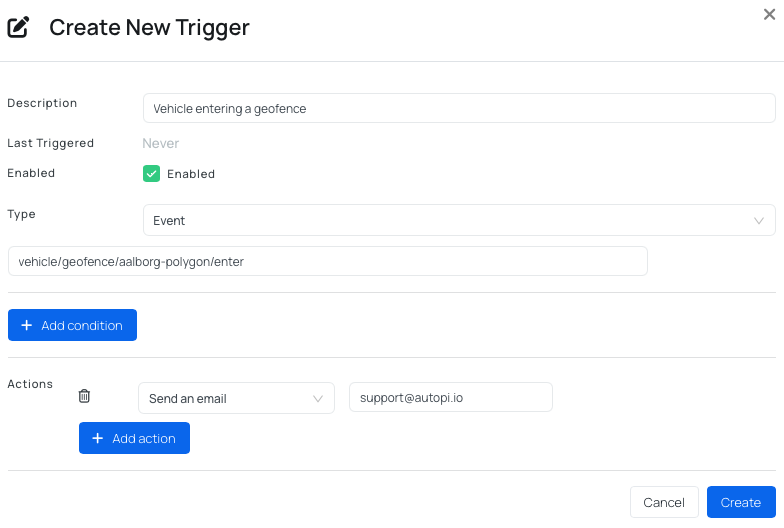
Triggers
Triggers allow you to receive notifications when specific events or signals occur on a device. Conditions can be applied so triggers only fire when defined criteria are met.
When a device reports an event or signal to the cloud, the system evaluates whether any triggers match based on:
- Event tag or signal name.
- Defined conditions.
Supported trigger actions include:
- Send an email - specify an email address.
- Send webhook request - define the URL and payload.
- Create an alert - generate a cloud alert with severity, name, and description.
Example of setting up a new trigger:
To learn more about individual settings, refer to the relevant guide: A Guide to Triggers.
Jobs
Jobs allow you to schedule commands to run on devices. Results can be uploaded to AutoPi Cloud or external systems using returners.
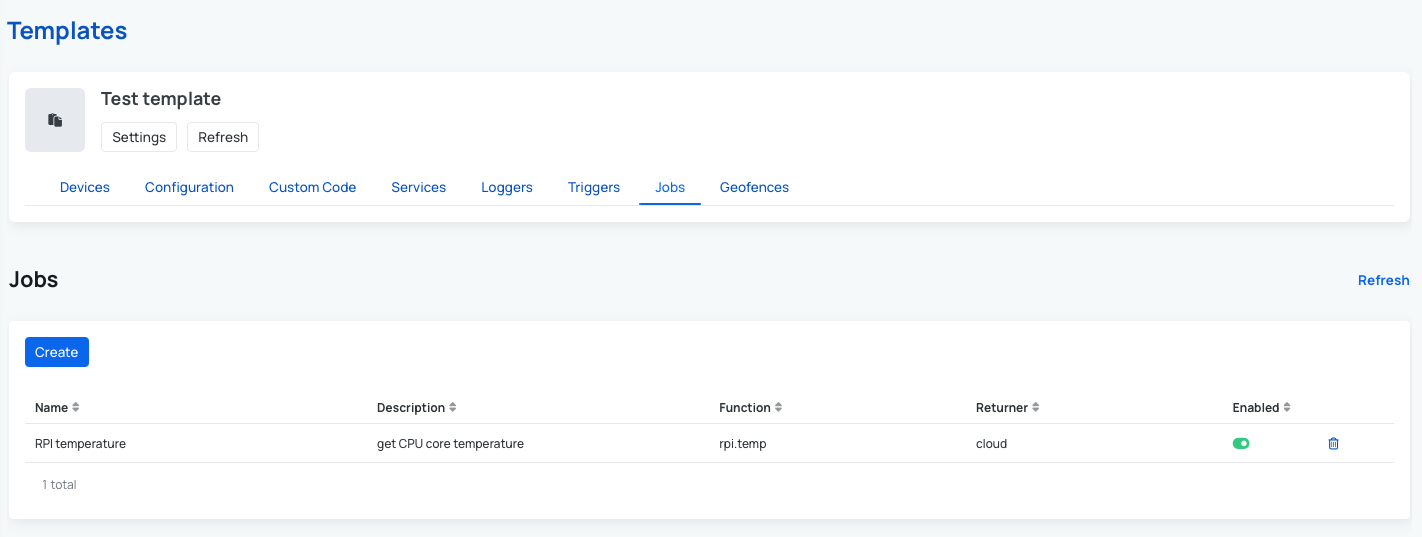
Example of the Job for getting CPU core temperature:

To learn more about individual settings, refer to the relevant guide: A Guide to Jobs.
Geofences
Geofences allow you to define geographic areas and receive notifications when a vehicle enters or exits those areas. Geofences can be defined as a polygon shape, or a point with a radius.
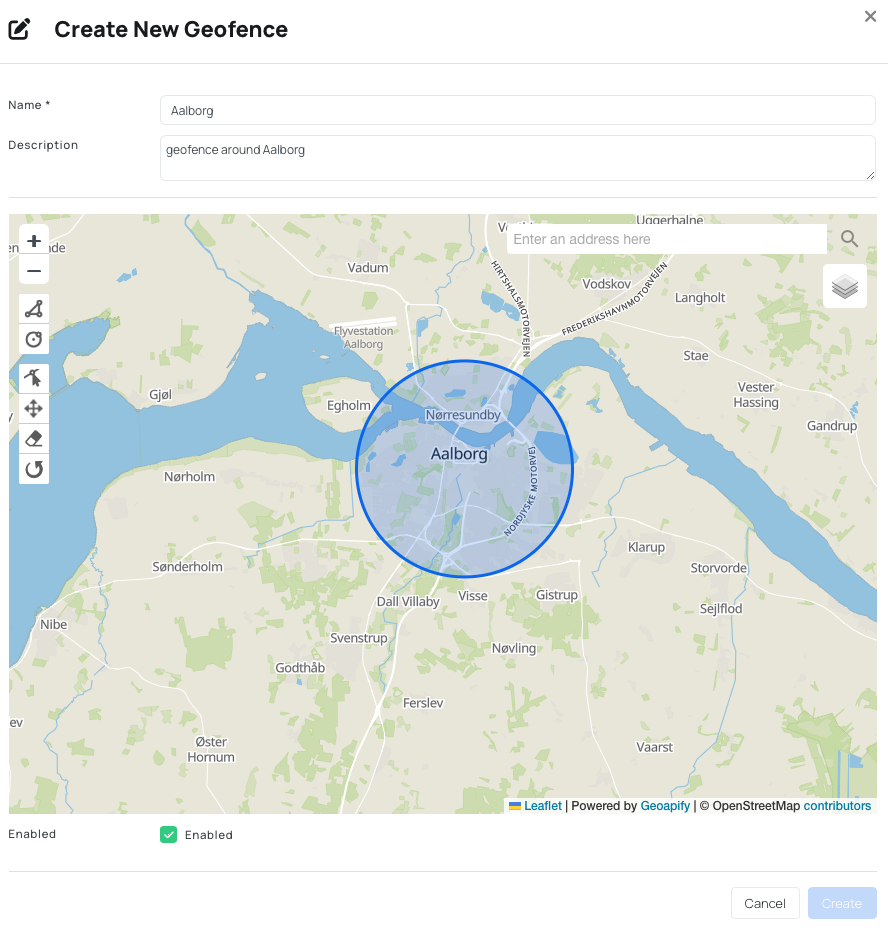
Templates currently support device geofences only. Fleet geofences are not yet supported but are under development.
To learn more about individual settings, refer to the relevant guide: A Guide to Geofences.
STEP 3: Assign devices and apply the template
Once your template configuration is complete, you can assign devices and apply the template by following these steps:
- Navigate to the Templates table.
- Click on the template you want to use, this will redirect you to the Devices page under the chosen template.
- Click the Add button to assign a device to the template.
- In the pop-up window, select the device you want to assign. To add multiple devices, repeat this step for each device.
- After assigning all desired devices, click Apply template in the upper-right corner and choose one of the following options:
- Apply all async
- Apply all async + all descendants
- Apply all (deprecated).
- The selected devices are now assigned to the template, and the template configuration has been applied. This completes the template setup and deployment process.
To ensure reproducible behavior, please make sure to keep the configuration on each device as "clean" as possible, as that will make it easier to manage, and try to keep manual changes to devices with a template applied, as few as possible to avoid any colissions between the changes made manual and the changes from the template.
 Buy AutoPi device
 Compare all AutoPi devices
 Contact our sales team