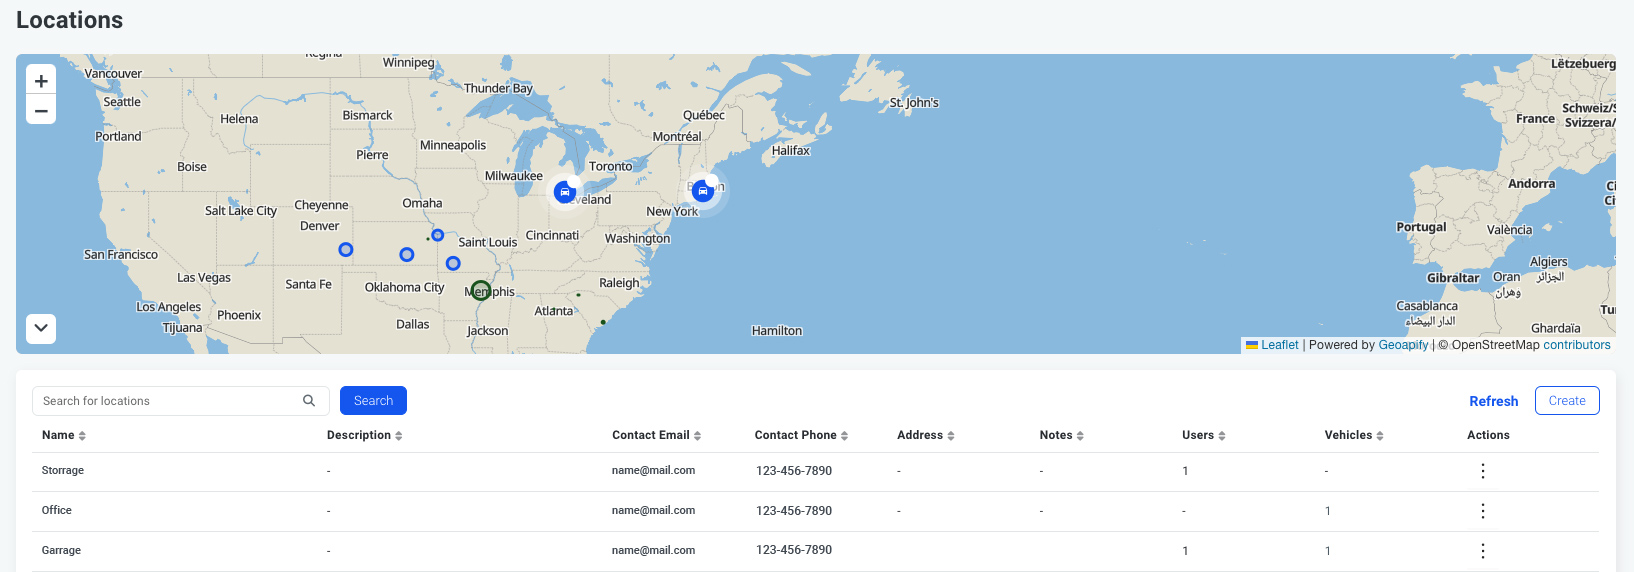
Locations


The Locations feature enables you to create and manage various operational areas related to your company, such as your US office, EU office, headquarters, or any other key locations. This feature helps streamline your fleet management by allowing you to assign vehicles to specific locations, ensuring more efficient organization and oversight.
Additionally, you can assign users to specific locations, allowing you to control their access based on their assigned area. This means users will only see and manage the vehicles and operations tied to the locations they are permitted to access.
To begin, navigate to the Locations tab. Here, you'll find a world map displaying your existing locations, along with a list view for easier navigation and management.
Creating a Location
To create a new location:
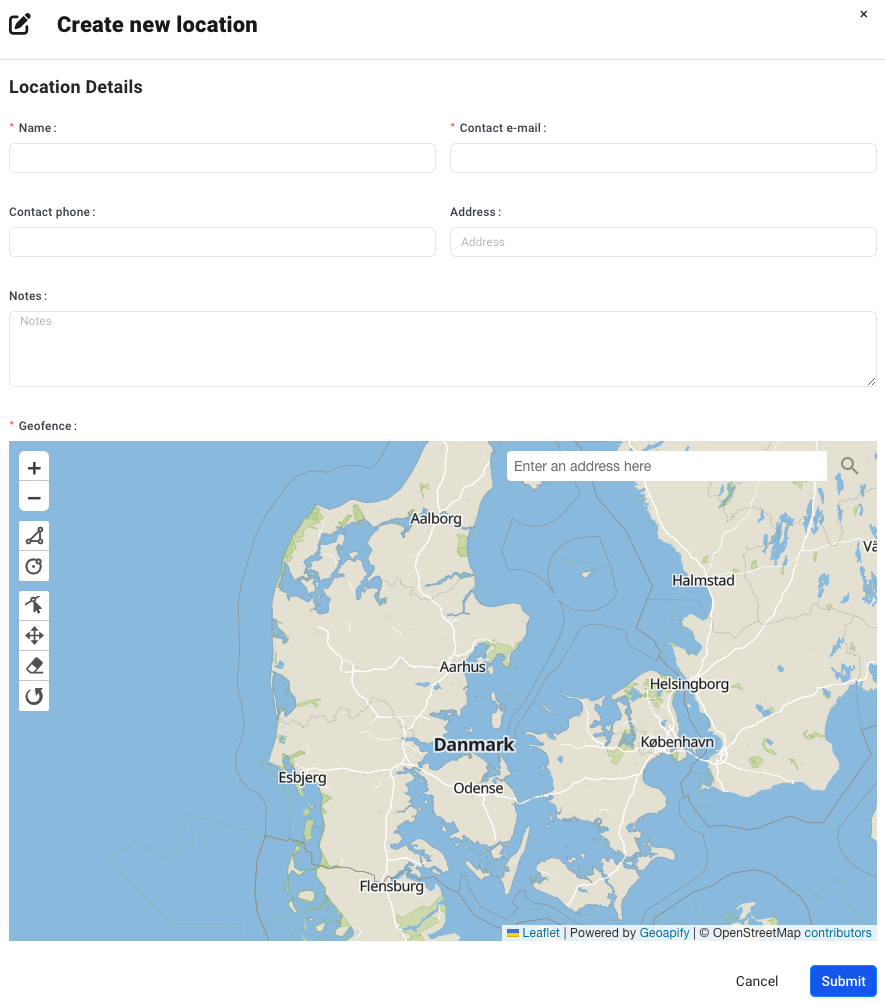
- Click Create and enter the necessary details. Required fields include the location name, which will serve as an internal identifier, and a contact email. You may also include additional information such as a phone number, address, or notes to further describe the location.
Creating a Geofence
To set up a geofence:
- Enter an address to zoom in on the map.
- Use the tools on the left side to create and edit the geofence. You can draw a circle or polygon by clicking on the map to outline your desired area. Additional tools allow you to edit, drag, remove, or rotate layers.
- Once you're satisfied with the outline, click Submit. You can also choose a color for the geofence if desired.
Managing Locations
After creating a location, it will appear in the list along with the details you provided. To make changes, click Actions and select the three dots to either edit or delete the location. If you have multiple locations, use the Search for Location filter to quickly find specific ones.
Assigning Vehicles to a Location
To assign vehicles to a location:
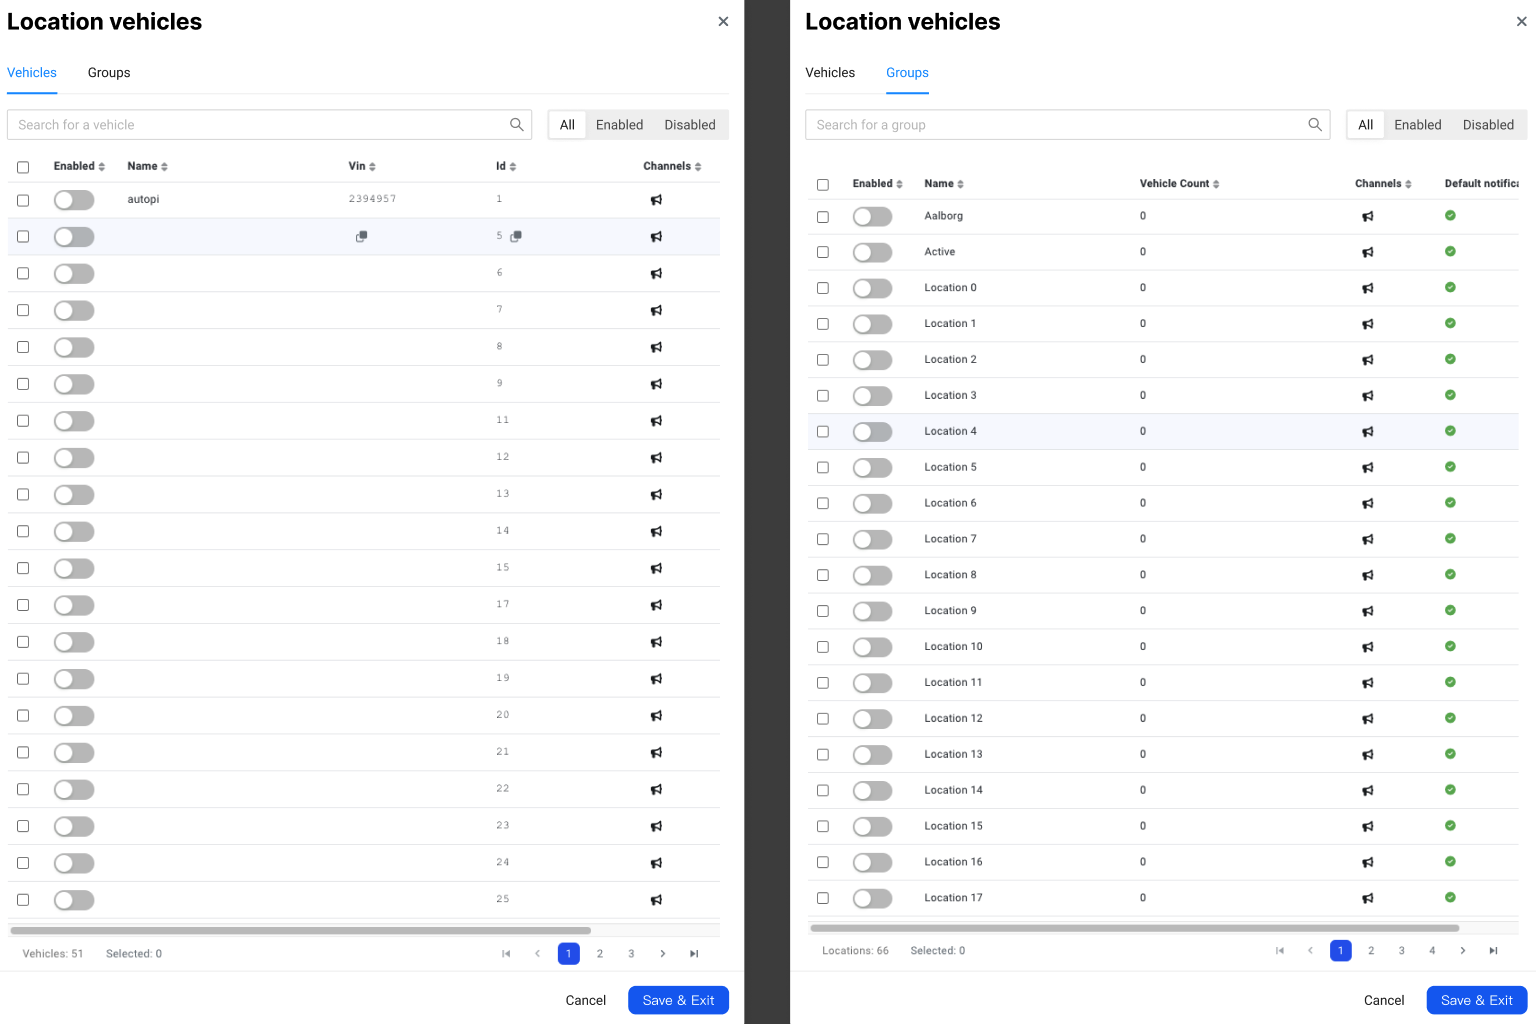
- Click on a location from the list to open the Edit vehicles in location pop-up.
- Search for and add vehicles that belong to this location or select a vehicle group. If assigning vehicles individually, you can search by vehicle name, model, year, or other identifiers.
- Check the right corner to see if any vehicles are already enabled or disabled for this location. Enable the vehicles you want to assign to this location. You can enable multiple vehicles at once.
- If you’ve created a Vehicle Group (learn more here), you can quickly assign multiple vehicles by selecting ‘Groups’ and enabling those that belong to the location.
- Click Save & Exit to complete the process. A notification will confirm that the changes have been successfully saved.
Back on the Locations list, the Vehicles column will be updated to show the number of vehicles associated with each location. Clicking on this number will take you to the Vehicle section, where you can view the specific vehicles assigned to that location. You can always edit the location details by selecting the Actions column.
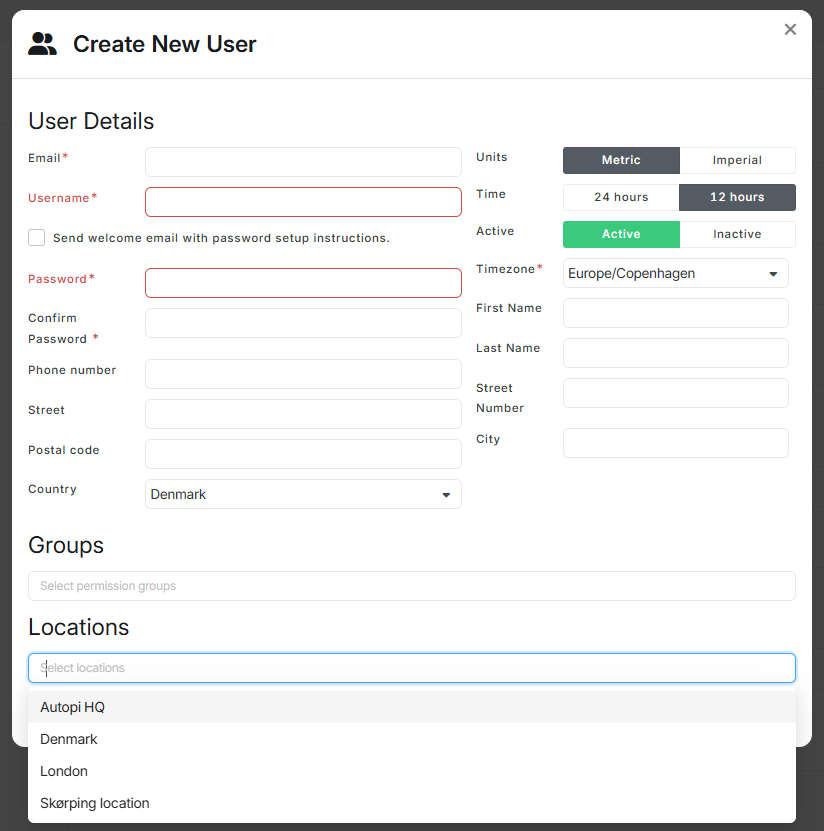
Assigning Users to a Location
You can assign users to Locations if you have created any, read more on how to Assign users to a location. To save the edits, click Create. A notification table in the right corner will confirm the successful user creation. You can now find the user in the list with their e-mail address, username, assigned customer, location, last login, permissions group, active status either with green check mark or red cross. You can delete the user with the last bin icon.
 Buy AutoPi device
 Compare all AutoPi devices
 Contact our sales team