Using DIMO Device on AutoPi's Cloud
If you have a DIMO x AutoPi device and would like to use it on the AutoPi Cloud platform, this guide will walk you through the full migration process. You will learn how to transition your device from the DIMO server to AutoPi's server and unlock all AutoPi Cloud features.
Prerequisites
Before beginning, ensure you have:
- A DIMO x AutoPi device.
- Access to your device's physical location (for setup and reflashing).
- An email address for creating your AutoPi account.
Step 1: Order an AutoPi SIM Card
Start by ordering a Global SIM card from the AutoPi Shop: Order SIM Card Here →
The subscription cost is €6 per month, which includes both data usage and full access to the AutoPi Cloud platform.
Step 2: Create Your AutoPi Account
Go to my.autopi.io and click "Sign up." In the pop-up, add the email address you want to associate with your account and create a password. You can also expand the form to add additional details like your country and full name, though this can be done later. Click "Create account".
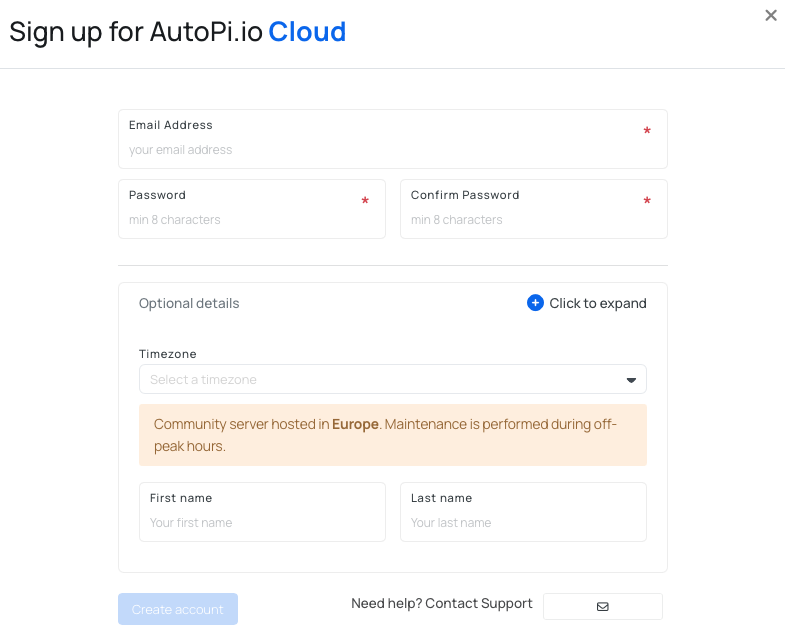
For more details, see: Setting up a User Account
Save your login email address; you will need it in the next step.
Step 3: Contact AutoPi Support
Open a support ticket with AutoPi by sending an email to support@autopi.io or through the support form in the AutoPi Cloud platform and provide the following information:
- Confirmation of your SIM card purchase.
- Your device ID (found on the sticker on the side of your device).
- The email address you used to create your AutoPi account.
This allows AutoPi's team to configure the server connection and set up the necessary permissions for your device registration.
Step 4: Receive Configuration Details
You'll receive a response from AutoPi support containing:
- Your device's board version.
- A link to the reflashing guide: Reflashing Your Device.
Keep this information handy for the next steps.
Step 5: Reflash Your Device
Reflashing migrates your device from the DIMO server to the AutoPi server. Follow the detailed instructions in the reflashing guide: Reflashing Your Device →
Reflashing erases the existing software on your device. Make sure you have backed up any critical local data before proceeding.
Step 6: Register Your Device
After creating an account, you can access the AutoPi Cloud features for fleet and device management. The next step is to register your device to unlock the platform's full potential.
To add a device to your account, follow one of these methods:
Option 1: Via Device Management
- Open the "Device Management" section of the platform.
- Click on "Devices".
- Find and click the "Register Device" button in the upper right corner.
Option 2: Via the Accounts Tab
- Navigate to the "Accounts" tab at the bottom of the left-side menu on the platform.
- Select "Devices".
- Locate and click the "Register Device" button in the upper right corner.
After clicking the "Register Device" button, the registration tab will appear. Enter all necessary information:
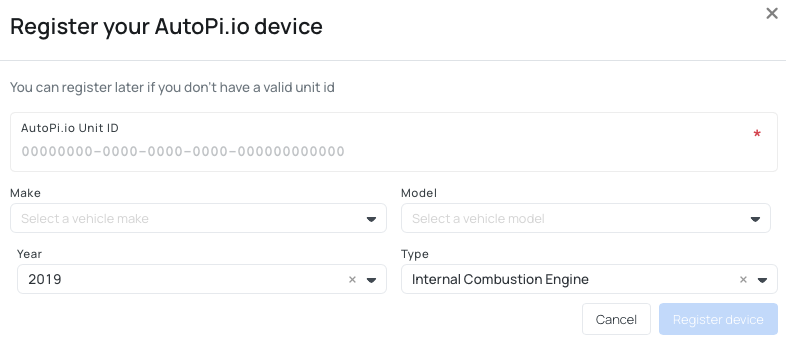
- AutoPi.io Unit ID: this is the number on the side of your device.
- Vehicle Information: optionally include the make, model, and year of the vehicle.
- Vehicle Type: choose the type of vehicle (ICE, Battery Electric Vehicle, Hybrid Electric Vehicle, or Plug-in Hybrid Electric Vehicle).
Once all information is entered, click the "Register Device" button. Your newly registered device will now appear in the list under "Vehicles" in the Fleet Management section and under "Devices" in the Device Management section of the Platform.
Step 7: Configure Your SIM Card
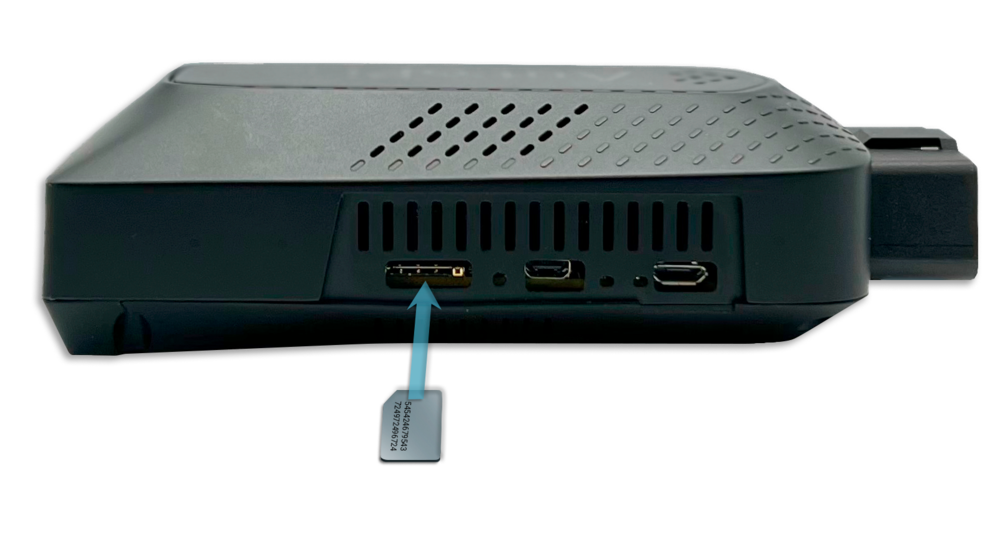
When inserting the SIM card, it is important to ensure it is installed correctly. If inserted correctly, the device makes a click sound. The picture below shows the proper orientation of the SIM card. Please note that the text side of the SIM card must face up and the "triangle" end must point into the device.
Connect to your device's local administration interface and update the APN (Access Point Name) to nxt20.net. This ensures your device connects to the AutoPi network: Local Administration Setup →
Here's how you configure the APN settings:
-
Go to my.autopi.io. If you're already logged in, please log out.
-
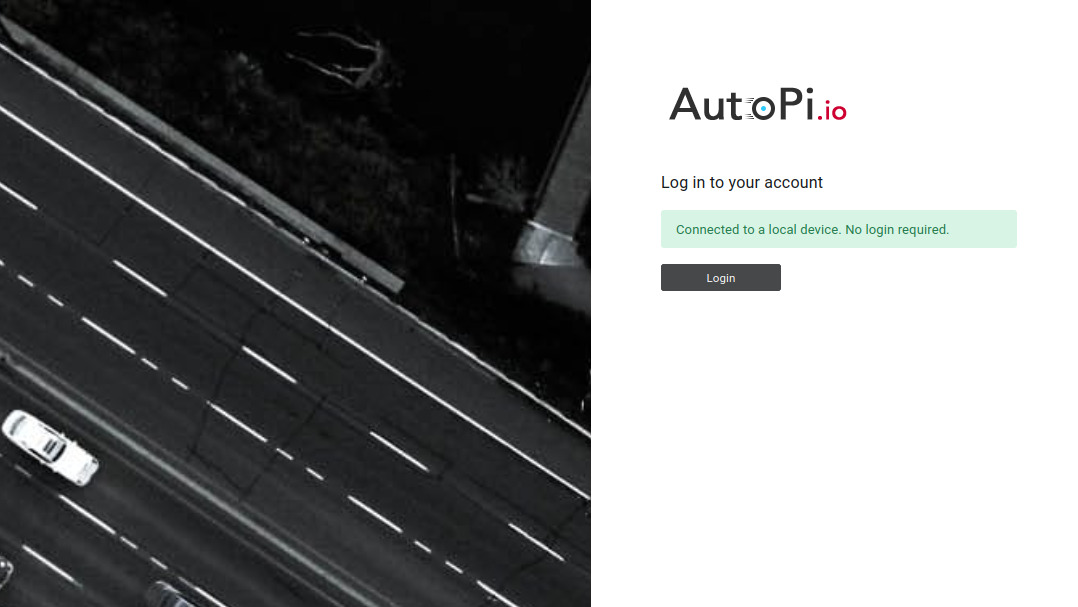
On the login page, find the "Go Local" button at the bottom-left side, or alternatively, go directly to local.autopi.io.

This will connect you to the local device, and you should see a screen similar to the one shown in the image below, indicating that you're connected locally. From here, you can log in without needing a username or password.
Once the information is saved, it will be applied to the device, and you should see a confirmation notification. To verify that you have set up your APN settings correctly, connect your phone to the AutoPi hotspot and use your browser to visit any webpage. If the page loads successfully, it means your device is online and has started uploading data to the AutoPi Cloud.
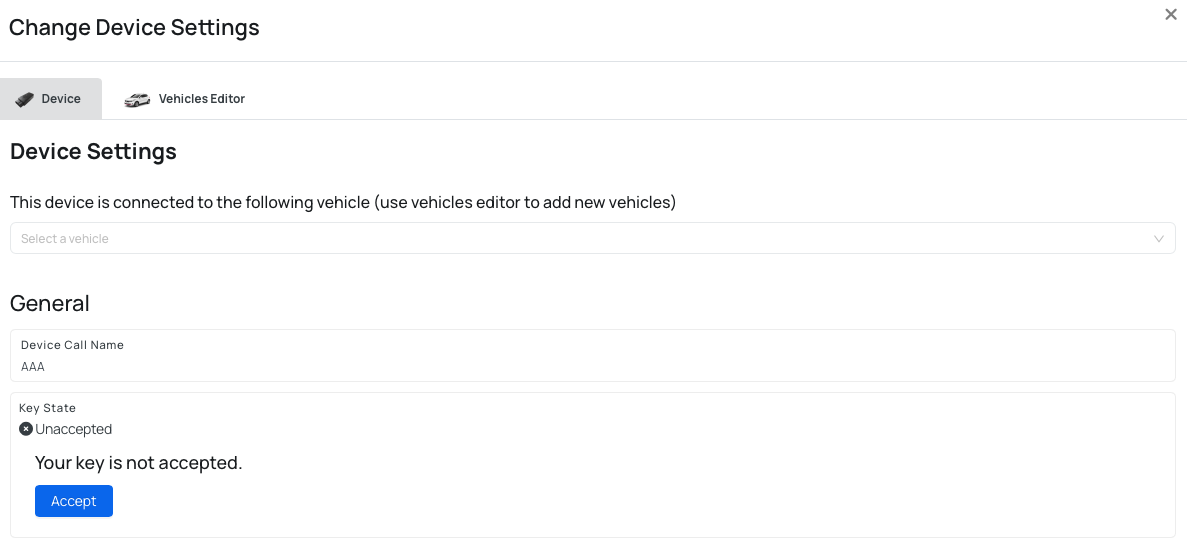
Step 8: Accept Device Key
When your device comes online over 4G, it will appear in your AutoPi Cloud dashboard as Online. Accept the device key to complete the connection.
- Navigate to the device page.
- Click the Edit device button in the upper-right corner.
- Scroll to the Key state section and press Accept the key.
You're Ready to Go!
Congratulations! Your device is now fully integrated with the AutoPi Cloud platform.
What's Next?
Now that your device is up and running, here are a few suggestions to help you get the most out of your AutoPi experience:
- Explore the AutoPi Cloud: Dive into the AutoPi Cloud platform to explore all the features available to you, such as real-time vehicle monitoring, advanced analytics, and customizable alerts.
- Check Out Our Documentation: Our documentation page is a great resource for learning more about advanced features, troubleshooting, and getting the most out of your device.
- Build your Nested Accounts and Invite New Users: AutoPi Cloud uses a multi-tenant architecture, which means multiple accounts (tenants) share the same platform and infrastructure, while all data, configurations, and user access remain securely isolated. You can read more here: Account management.
Start with the Cloud section to learn about device management, data logging, and advanced configurations. If you need additional support, our team is happy to help. Contact us at support@autopi.io or through the support form in the AutoPi Cloud platform.
 Buy AutoPi device
 Compare all AutoPi devices
 Contact our sales team