Getting Started
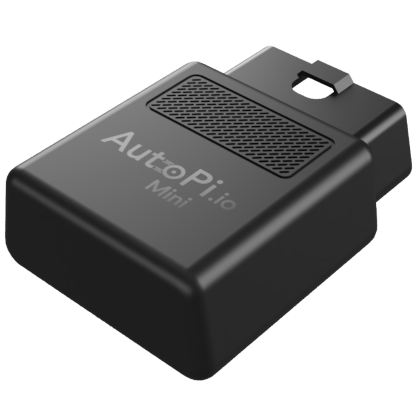
Welcome to AutoPi Setup
This guide walks you through setting up an AutoPi Mini, from creating an account to verifying cloud connectivity and configuring the device for an electric vehicle, if applicable. The device arrives pre-assembled with its SIM card installed.
Quickstart
Complete the steps in order:
- Create an AutoPi Cloud account.
- Register your device.
- Locate the vehicle's OBD-II port.
- Install and position the device.
- Verify cloud connectivity.
- Optional for electric vehicles only: Configure the Mini for an electric vehicle. If you do not have an electric vehicle, skip this step.
- Confirm the setup.
Important Safety and Setup Requirements
The AutoPi Mini connects directly to your vehicle's ECU. Follow these requirements before continuing:
- Turn off the vehicle: make sure the vehicle is completely powered off before connecting the device for the first time.
- Park before making changes: install or configure the device only while the vehicle is parked.
- Keep the device connected while driving: never disconnect the AutoPi Mini while the vehicle is moving.
- Use the OBD-II power source: power the device only through the OBD-II connector.
- Change advanced settings carefully: incorrect settings may affect vehicle data collection or battery life.
1. Set Up Your User Account
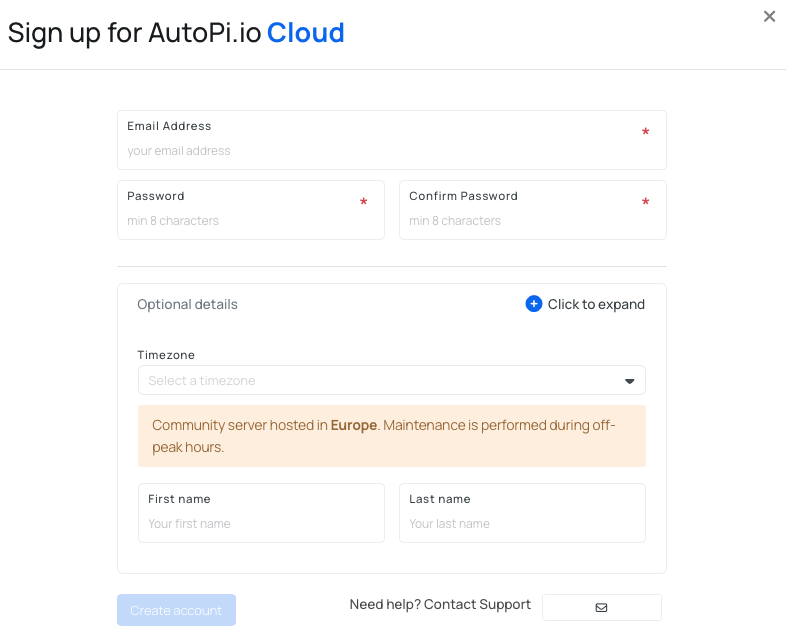
- Go to my.autopi.io.
- Select Sign up.
- Enter your email address and create a password.
- Optionally, expand the form and add your name and country. You can also add these details later.
- Select Create account.
2. Register Your Device
After creating an account, you can access the Cloud Platform features for fleet and device management. The next step is to register your device to unlock the platform’s full potential.
To add a device to your account, follow one of these methods:
Option 1: Via Device Management
- See the “Device Management” section of the Platform.
- Click on “Devices”.
- Find and click the “Register Device” button in the upper right corner.
Option 2: Via the Accounts Tab
- Navigate to the “Accounts” tab at the bottom of the left side menu on the Platform.
- Select “Devices”.
- Locate and click the “Register Device” button in the upper right corner.
After clicking the “Register Device” button, the registration tab will appear. Enter all necessary information:
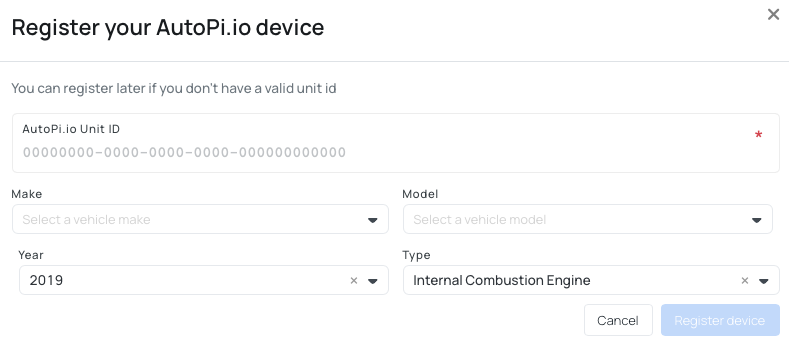
- Unit ID: This is the number on the side of your device. You can also find it in the. document attached in the email you received when the device was shipped.
- Vehicle Information: Optionally include the make, model and year of the vehicle.
- Vehicle Type: Choose the type of vehicle (ICE, Battery Electric Vehicle, Hybrid Electric Vehicle, or Plug-in Hybrid Electric Vehicle).
The Mini device should now appear under Fleet Management > Vehicles and Device Management > Devices.
3. Locate OBD Port
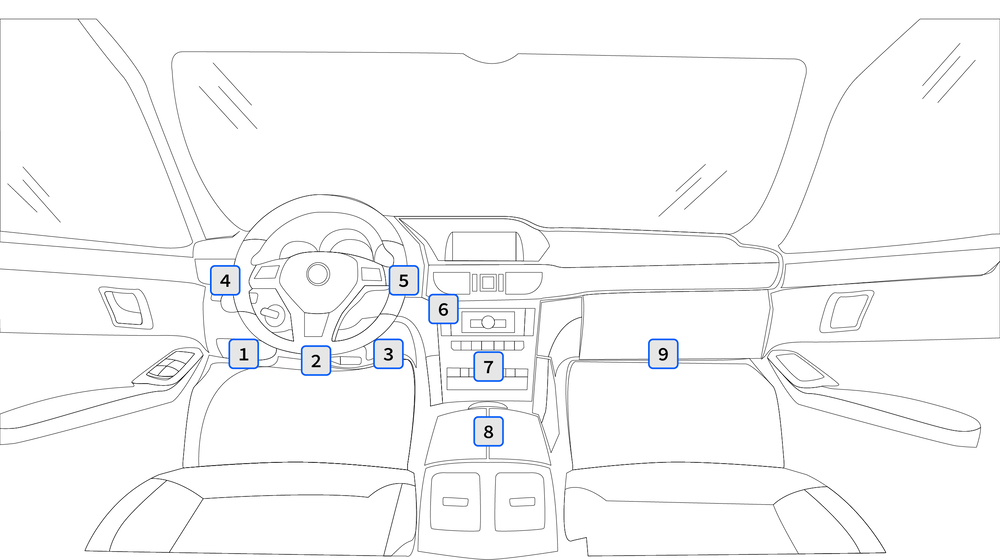
Next step is to install the device into your vehicle. Locate the OBD port in your car, it is usually found underneath the dashboard and looks something like this:
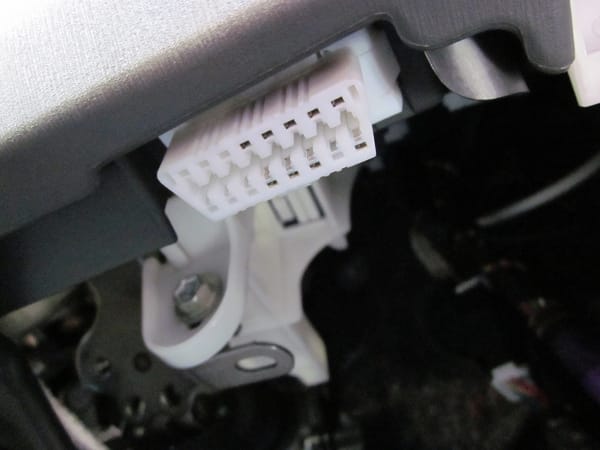
Its exact location depends on the vehicle's make and model. The following image shows common locations. If you cannot find the port, consult the vehicle owner's manual.
4. Install the Device
- Make sure the vehicle is completely powered off.
- Connect the AutoPi Mini to the OBD-II port.
- Position the device with the AutoPi logo facing upward toward the sky. The GPS antenna is inside the device, and another orientation may weaken the GPS signal.
- Make sure the device cannot interfere with pedals, steering, or other vehicle controls.
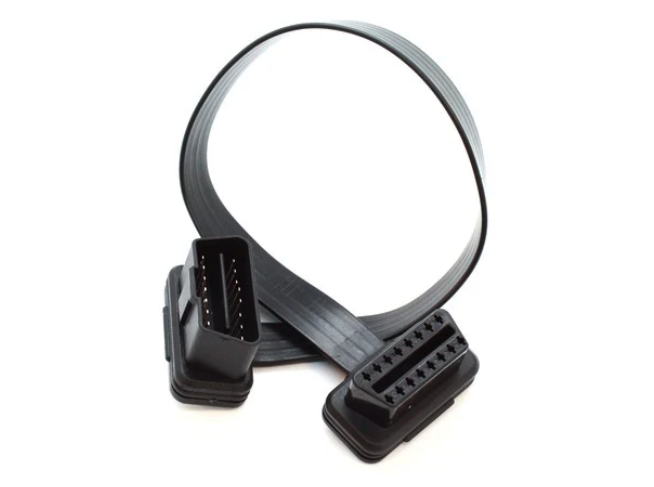
If the OBD-II port is difficult to reach or leaves the Mini in an unsafe position, use an OBD-II extension cable to move it to a suitable location.
- Keep the AutoPi logo facing the sky.
- Keep the device out of direct sunlight when possible. Excessive heat may reduce performance.
- Do not cover the device with metal, because this can interfere with the internal GPS antenna.
- Power the Mini only through the OBD-II connector.
5. Verify Cloud Connectivity
- Turn on the vehicle to supply power to the AutoPi Mini.
- Allow a few minutes for the device to start and establish its cellular connection.
- Sign in to the AutoPi Cloud.
- Open Devices, select the Mini, and confirm that it appears online.
The first cellular connection may take a few minutes. If the device does not appear online or does not report data, follow the AutoPi Mini Data Troubleshooting guide to check its status LEDs and data configuration.
6. Optional: Configure the Mini for an Electric Vehicle
Complete this step only if the Mini is installed in an electric vehicle (EV). For any other vehicle type, skip to Step 7: Confirm the Setup.
Some EVs do not support automatic VIN detection or standard OBD-II behavior, which can prevent the device from collecting data correctly. For more information, see Electric Vehicle Setup.
Set the OBD Feature
This setting allows the Mini to communicate with vehicles that do not use standard OBD-II behavior.
- Go to Advanced Settings > OBD Settings > OBD Feature.
- Select Non-OBD Compliant.
- Select Save.
Enter the VIN Manually
Complete this configuration even if the VIN was detected automatically.
- Go to Advanced Settings > OBD VIN Settings.
- Enter the 17-character VIN using digits and uppercase letters.
- Set VIN Source to Manual.
- Select Save.
Configure Ignition Detection
- Go to Advanced Settings > System > Ignition Settings.
- Select Accelerometer.
- Select Save.
Configure Movement Detection
- Go to Advanced Settings > System > Movement Source.
- Select Accelerometer.
- Set Movement start delay to a value from 5 to 12 seconds.
- Set Movement stop delay to a value from 30 to 60 seconds.
- Select Save.
After making these changes, open Change History and confirm that each setting was applied successfully.
7. Confirm the Setup
- Confirm that the Mini appears online in the AutoPi Cloud.
- Take the vehicle for a drive to begin collecting trip and vehicle data.
- Return to the AutoPi Cloud and confirm that new data appears for the device.
Setup Complete
Your AutoPi Mini is connected to the AutoPi Cloud and ready to collect and transmit vehicle data.
What's Next?
- Configure data collection: follow Create Mini Loggers to customize the data collected from the vehicle.
- Troubleshoot missing data: use AutoPi Mini Data Troubleshooting if the device is online but data does not appear.
- Explore the AutoPi Cloud: try real-time monitoring, analytics, and configurable alerts in the AutoPi Cloud.
 Shop AutoPi devices
 Compare devices
 Contact sales
 Contact support