Getting Started


You are able to use the AutoPi REST API with your browser, which will display our auto-generated documentation portal.
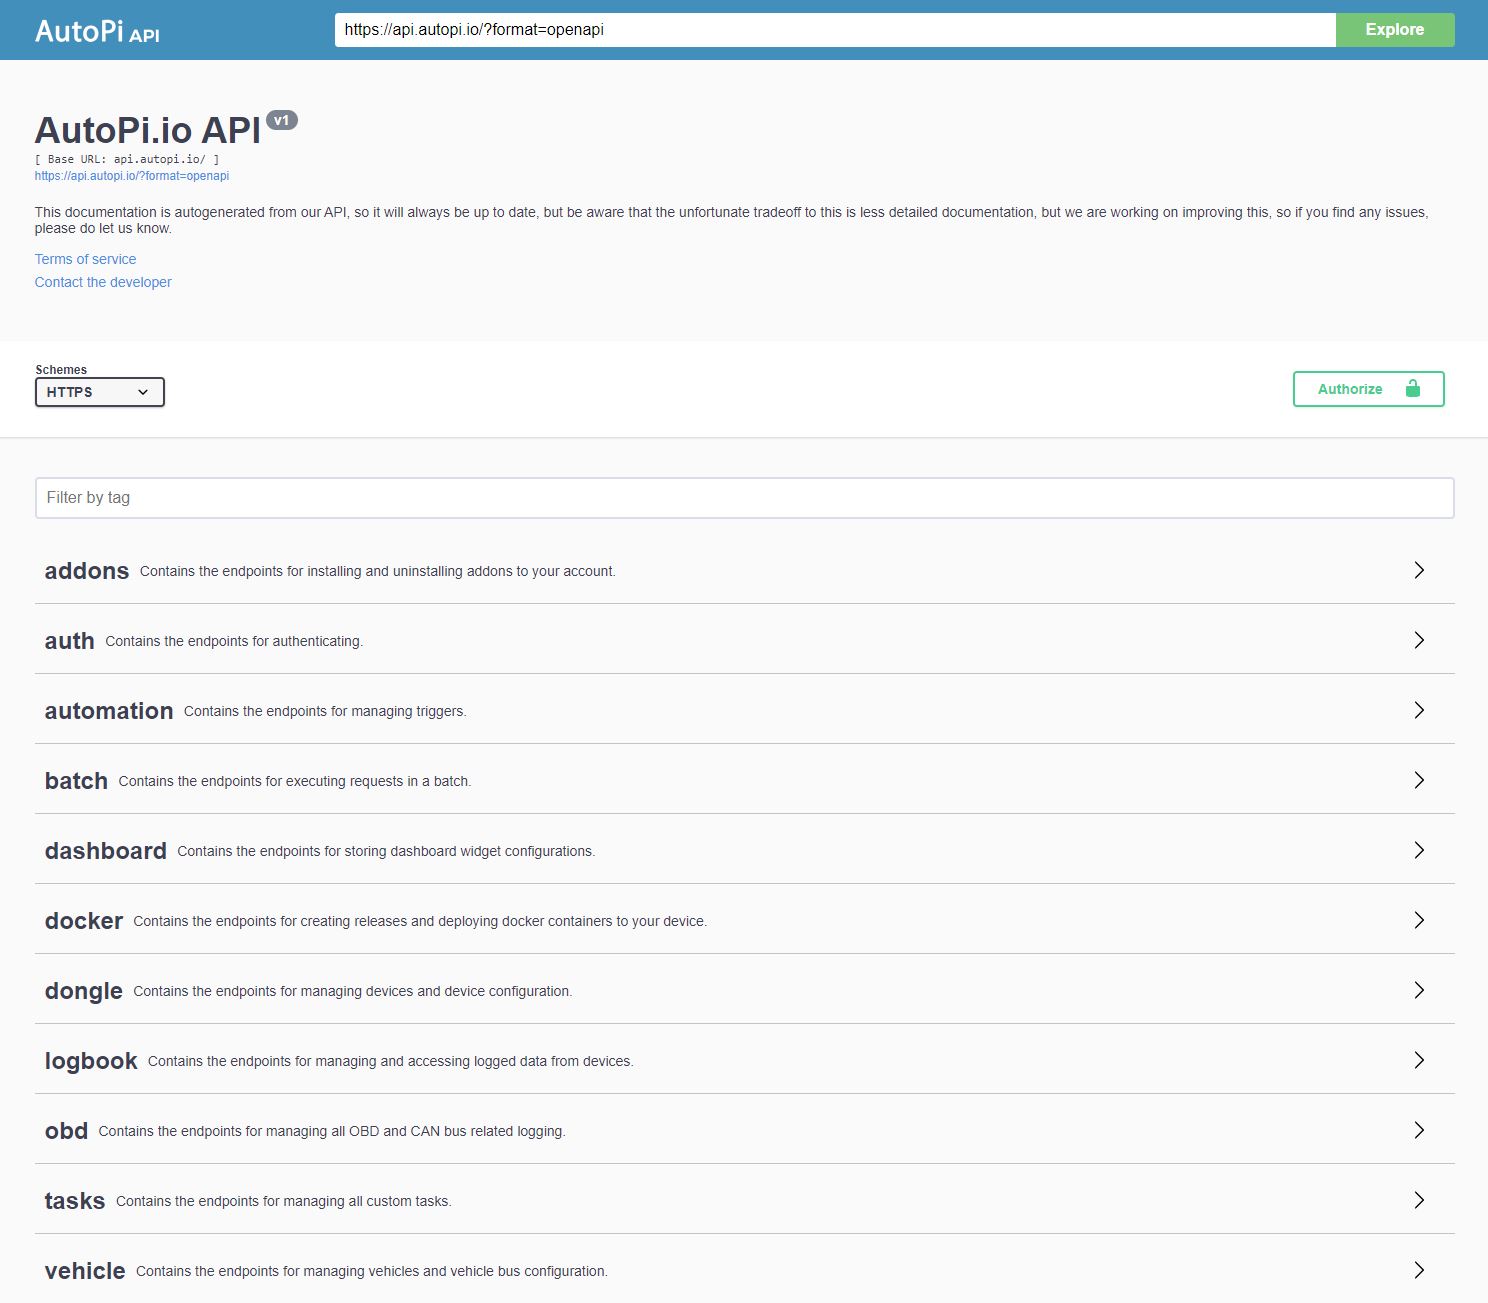
Authentication
If you want to test the endpoints, you can authenticate in the API documentation portal by setting the token to use when authenticating. In the picture above you can see there is a green 'Authorize' button which you need to press. This is where you'll be pasting your token.
It is possible to authenticate using two different tokens or sending the request manually using Postman (or similar).
1. API Tokens
Authentication should be done with the API tokens. These tokens can be generated in the account page. The expire date is optional. The tokens can then be used in external systems to authenticate the requests. To use the token, you simply set the Authorization header to the following value, when sending HTTP requests to the API:
Authorization: APIToken YOUR_TOKEN
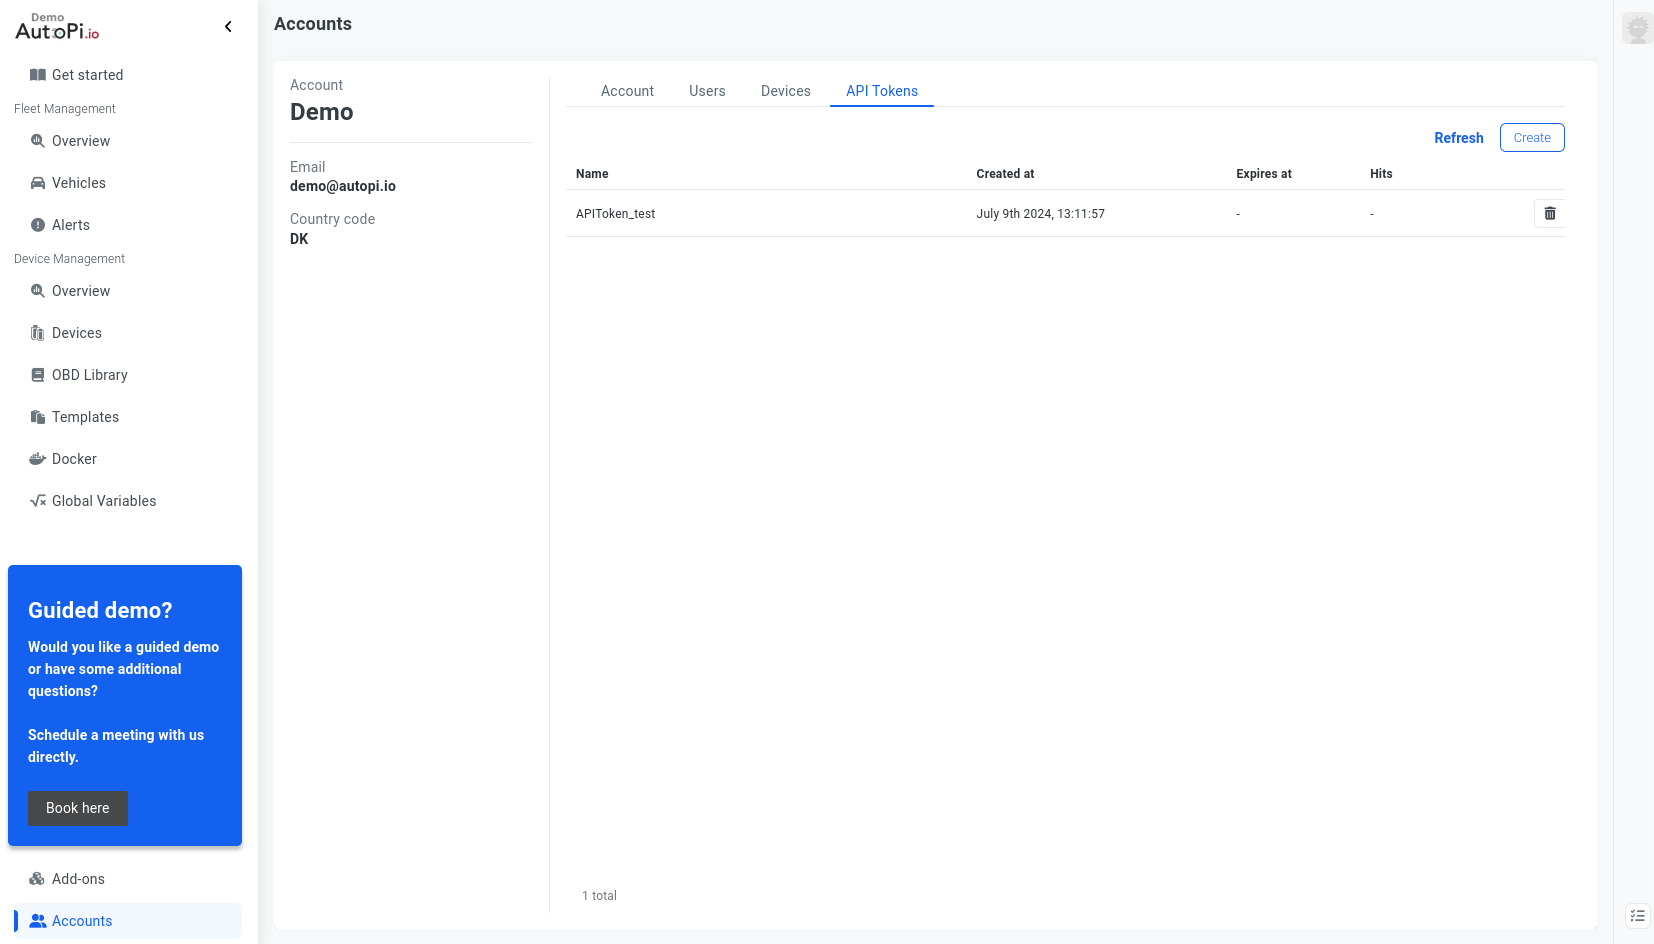
Creation of the API Token
You can generate the new API Token in the AutoPi Cloud. Clicking on the in the Account tab in the side menu gets you to the Account Page.
On the Account Page you may see an API Tokens tab which gets you to the API Token creation part. Here you are able to create a new API Token by giving it a name and there is an option to set an expiration date for the token if you need and clicking the Create button.
2. JWT Token
This token is the one used by the frontend when logging in. It expires relatively shortly and you need to enter you username and password to acquire the token.
Receiving the JWT Token
You can get the JWT token in two different ways:
-
Capture the Token by Using the Browser Developer Tools - the easiest way is to capture the token by logging into the Cloud, with the developer tools open in your favourite browser, with the network tab open, and then skip to step 6 in the below step by step guide.
-
Manually Call the Auth Endpoint to get the Token. - you can follow the steps below to call the login endpoint manually.
-
Click the "auth" app to fold out the available endpoints.
-
Click the "/auth/login/".
-
Click the "try it out" button to the right.
-
Change the payload to look like this (remove the username field, and fill out the email and password fields, like so:
{
    "email": "your_email",
    "password": "your_insanely_complex_password"
} -
Click the blue "execute" button.
-
Now you can copy the entire token.
-
Now click the green "Authorize" button in the top right of the page and paste the token in the field. Remember to write "Bearer" in front of the token - like so:
Bearer eyJhbGciOiJIUzI1NiIsInR5cCI6IkpXVCJ9.eyJzdWIiOiIxMjM0NTY3ODkwIiwibmFtZSI6IkpvaG4gRG9lIiwiaWF0IjoxNTE2MjM5MDIyfQ.4pXwtyQKCwSrYfcj9O7MGVv5ustPbx0GmYY7jHZL8es -
After clicking close, you should now be able to call the other authenticated endpoints.
-
3. Sending the Requests Manually Using Postman or Similar
Alternatively, if you are unable to use the above portal, or if you'd rather use something like Postman or similar, you can still see the requests and parameters in the portal, but to call them manually, see the below steps.
Authenticating manually w/o interactive API documentation portal - you can do the above steps manually by following these steps:
-
Authentication To obtain an authentication token, send a post request to https://api.autopi.io/auth/login/ with header
Content-Type: application/jsonand body
{ "email": "your email address", "password": "your password" }In the response, you will find the token used to authenticate the below requests
-
To request data from our API, the authorization header should be set.
You will need to set the "Authorization" header on the requests. To set the header, use the below values.
- If you're using a JWT token:
Authorization: Bearer YOUR_TOKEN- If you're using an API token:
Authorization: APIToken YOUR_TOKEN
If you find something where you are unsure how to proceed, you can log in to my.autopi.io and use the developer tools of your favourite browser to see the requests and parameters sent by the application, and if you are still experiencing issues, you can send us an email to support@autopi.io
Telemetry data examples
Accessing data from a device is done by calling the logbook endpoint.
Logbook Storage Read Parameters:
- device_id: ID of the device you want to retrieve data from.
- field: Name of the field you want to retrieve the value from.
- field_type: type of the field
- from_utc: ISO Datetime string
- to_utc: ISO Datetime string
- aggregation: Aggregation method (AVG, MIN, MAX, SUM)
- interval: Data is aggregated based on the aggregation method specified, the interval specifies how many groups the data is grouped into. For example, getting data for a 10 hour period, with the interval set to 1h, you will get back 10 values, one value per hour.
1.Getting positions
GET /logbook/storage/read/
?device_id=DEVICE_ID
&field=track.pos.loc
&field_type=geo_point
&from_utc=2020-01-01T00:00:00.000Z
&to_utc=2020-01-01T01:00:00.000Z
Example response:
[
    {
            "ts": "2020-07-09T10:11:53.811839Z",
            "location": {
                    "lat": 57.04699,
                    "lon": 9.93909
            }
    },
    {
            "ts": "2020-07-09T10:11:59.248421Z",
            "location": {
                    "lat": 57.04697,
                    "lon": 9.93808
            }
    }
]
2. Battery Voltage readings
GET /logbook/storage/read/
?device_id=DEVICE_ID
&field=obd.bat.voltage
&field_type=float
&aggregation=avg
&from_utc=2020-01-01T00:00:00.000Z
&to_utc=2020-01-01T01:00:00.000Z
&interval=10m
Example response:
[
	{
    	    "max_ts": 1594289021415,
    	    "ts": "2020-07-09T10:03:37.566Z",
    	    "value": 13.5
	},
	{
    	    "max_ts": 1594289026525,
    	    "ts": "2020-07-09T10:13:45.378Z",
    	    "value": 13.600000381469727
	}
]
Sending CAN Bus commands examples
Through the API it's possible to send CAN bus commands directly to the vehicle. See the crude example of how to that:
import os
import time
import requests
from typing import Any, Dict, List, Optional


class AutoPiClient:
    def __init__(self, api_token: str, base_url: str = "https://api.autopi.io"):
        self.base_url = base_url.rstrip("/")
        self.session = requests.Session()
        # AutoPi API token auth header format:
        # Authorization: APIToken YOUR_TOKEN
        self.session.headers.update({"Authorization": f"APIToken {api_token}"})

    def list_devices(self) -> List[Dict[str, Any]]:
        url = f"{self.base_url}/dongle/devices/"
        r = self.session.get(url, timeout=30)
        r.raise_for_status()
        return r.json()

    def execute(
        self,
        device_id: str,
        command: str,
        arg: Optional[List[Any]] = None,
        kwarg: Optional[Dict[str, Any]] = None,
    ) -> Dict[str, Any]:
        """
        Executes an AutoPi command on a device via:
        POST /dongle/devices/{device_id}/execute/
        Body format follows the standard command envelope:
          {"command": "...", "arg": [...], "kwarg": {...}}
        """
        url = f"{self.base_url}/dongle/devices/{device_id}/execute/"
        payload = {
            "command": command,
            "arg": arg or [],
            "kwarg": kwarg or {},
        }
        r = self.session.post(url, json=payload, timeout=120)
        r.raise_for_status()
        return r.json()


def non_obd2_can_query_example() -> None:
    """
    Example based on the docs' 'Non-OBD2 Queries' obd.query example:
      obd.query PROPRIETARY_SPEED header=1AA mode=00 pid=01
        can_flow_control_filter=2AA,7FF
        can_flow_control_id_pair=1AA,2AA
        force=True
        formula='bytes_to_int(message.data)'
    """
    api_token = os.environ["AUTOPI_API_TOKEN"]
    client = AutoPiClient(api_token=api_token)

    devices = client.list_devices()
    if not devices:
        raise SystemExit("No devices found on this account.")

    # Pick the first device. Adjust selection logic as needed.
    device_id = str(devices[0]["id"])
    print(f"Using device_id={device_id} (unit_id={devices[0].get('unit_id')})")

    # Non-OBD2 query parameters (headers are examples from the docs)
    result = client.execute(
        device_id=device_id,
        command="obd.query",
        arg=["PROPRIETARY_SPEED"],
        kwarg={
            "header": "1AA",
            "mode": "00",
            "pid": "01",
            "can_flow_control_filter": "2AA,7FF",
            "can_flow_control_id_pair": "1AA,2AA",
            "force": True,
            "formula": "bytes_to_int(message.data)",
        },
    )

    print("Raw execute response JSON:")
    print(result)


if __name__ == "__main__":
    # Usage:
    #   export AUTOPI_API_TOKEN="...your token..."
    #   python autopi_can_query.py
    non_obd2_can_query_example()
 Buy AutoPi device
 Compare all AutoPi devices
 Contact our sales team