Log Raw CAN Messages
It is possible to listen for raw CAN data on the OBD port. There are a couple of ways that this can be accomplished - a slower python implementation and a faster, C implementation. In this guide we will explore these two options and show the differences between the two. Later on we will also explore how you can make sense of this raw data after it has been recorded.
It is important to note that the monitoring tools can only be used as a part of an OBD service workflow. We won't get into details about how you can create a service worker in this guide, however we do have the Create Service Workers guide which you can take a look at for more details on how to create a worker and setup its workflow.
Reading Raw CAN Data
Firstly, we will explore how to read the CAN messages that are visible on the CAN bus. These messages will be raw, meaning that they will simply be binary data that is structured in a specific way. Later on we will also explore how we can make sense of this raw CAN data by transforming it into more readable format using DBC files that can automatically be generated for your vehicle.
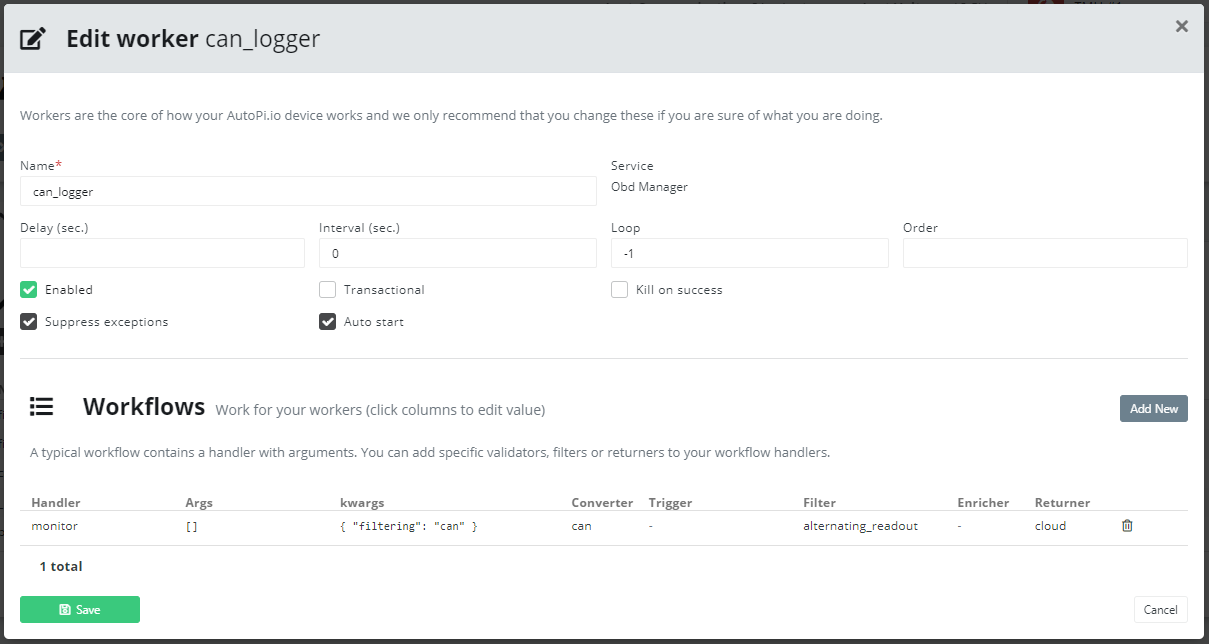
obd.monitor
The first and simplest way to monitor CAN data is with the
obd.monitor handler.
This handler will continuously listen on the OBD port looking for any data. This data
will then be transported down the workflow and there you will be able to use the different
hooks to transform the data and finally return the data to the Cloud, or save it to a file.
For greater performance read on to the obd.export handler. The image below shows an example
setup for an obd.monitor worker.
obd.export
obd.export is basically
obd.monitor on steroids. It is much faster than it's python counterpart and doesn't clog up the
AutoPi's resources as much. It starts up a separate process that does the monitoring,
instead of running as a part of the salt-minion process.
This however means that the external process will have to attach to the OBD serial port
(/dev/serial0), which means that it won't be possible to use obd commands to read CAN data.
This is because the obd.export handler needs to be sure to catch all CAN messages and it won't
release the lock on the device.
This handler is also a bit different than other handlers, as it does not pass any meaningful
data down the workflow, instead it saves the CAN messages to external files, which can then be
read by obd.import. The files are located in /opt/autopi/obd/export/protocol_N where N is
the protocol number for your vehicle. In that directory you will be able to see a number of log
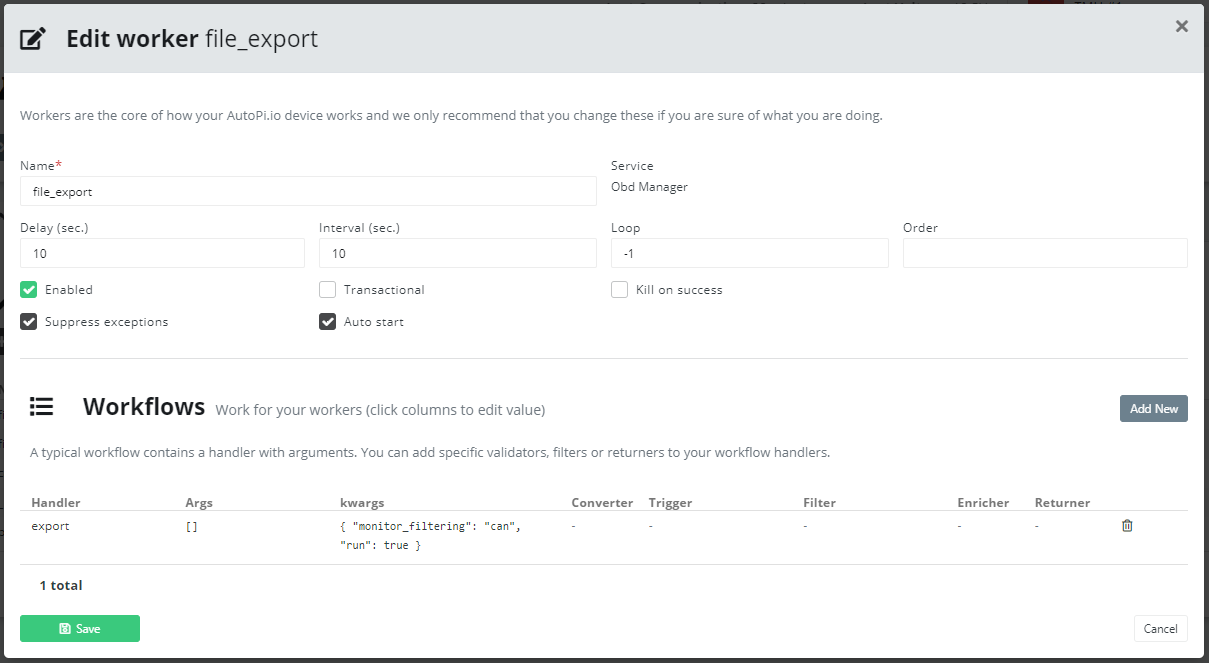
files which contain the raw data that has been recorded by the handler. An example setup for a
workflow can be seen below.
obd.import
In order to actually be able to use the recorded data by obd.export within the AutoPi Core system,
we need to somehow import it. This is where
obd.import comes in -
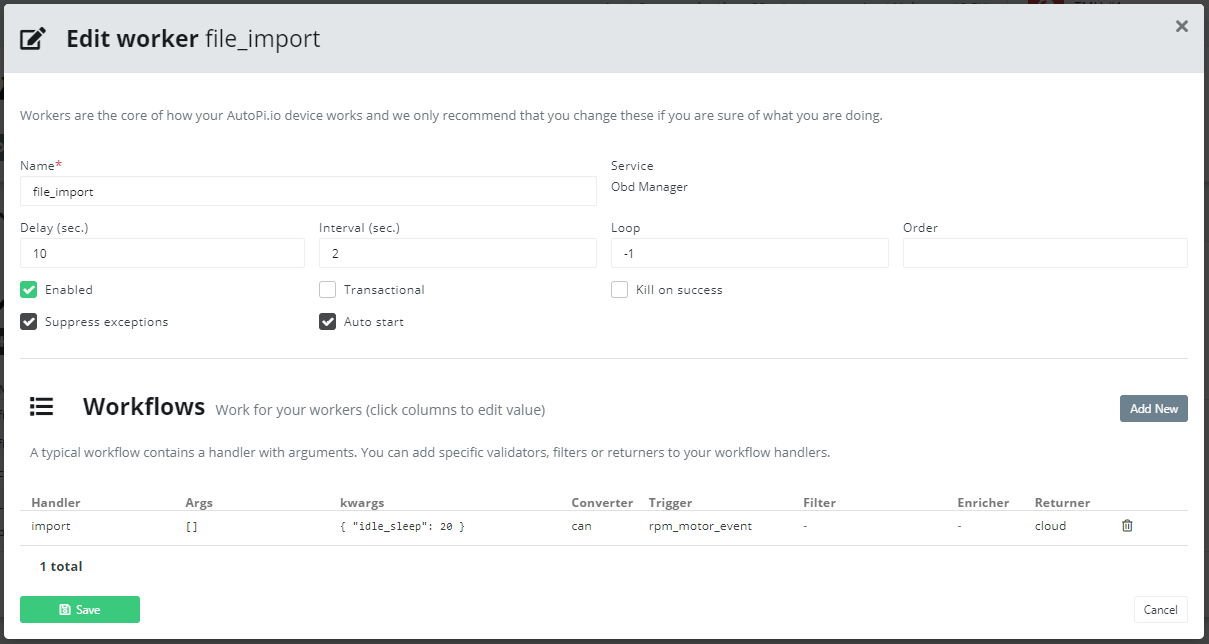
it reads the data that was written to the log files by obd.export and passes it down the workflow.
It is simply a workflow enabler, meaning that after you read the data, you can transform it in any
way you'd like, execute any triggers and use a returner to save the data on the Cloud or a local
file, just like with obd.monitor.
Making Sense of Raw CAN Data
A key converter that can be used in the workflows described above is the
CAN converter. It is able
to read the CAN database file that you have for your vehicle's protocol and transform the binary
data that has been passed to it into a more sensible format. Both obd.monitor and obd.import
use the CAN converter in the workflows to sanitize the data.
It is important to note however, that the DBC (CAN database) file would only be available if you have setup CAN loggers for your device. In the AutoPi Cloud navigate to Device > Loggers where you'll be able to see all the loggers you currently have. They need to be of type CAN. There are a few guides that you can take a look at to get them up an running:
 Buy AutoPi device
 Compare all AutoPi devices