Getting Started
Welcome to AutoPi!
This step-by-step guide will help you set up your AutoPi TMU CM4 4G/LTE Edition. The device comes pre-assembled with the SD card inside and requires just a few steps to complete the installation.
note
Important Notes Before You Start
The AutoPi Telematics Unit is a highly customizeable and technical device. It contains a direct interface to your car and communicates with the ECU in your car.
- Power Off the Vehicle: When inserting the device for the first time, ensure that the vehicle is powered off.
- Vehicle Must Be Parked: When working on and customizing your device, make sure your vehicle is in the parked position.
- Do Not Remove the AutoPi While Driving.
- Power Source: The device can only be powered through the OBD-II port. Powering the Raspberry Pi directly is not supported and may cause issues.
- Advanced Settings Caution: When updating the Advanced settings, ensure you understand what you are doing, as changes can affect the performance of your car and its battery.
1. Setting Up User Account#
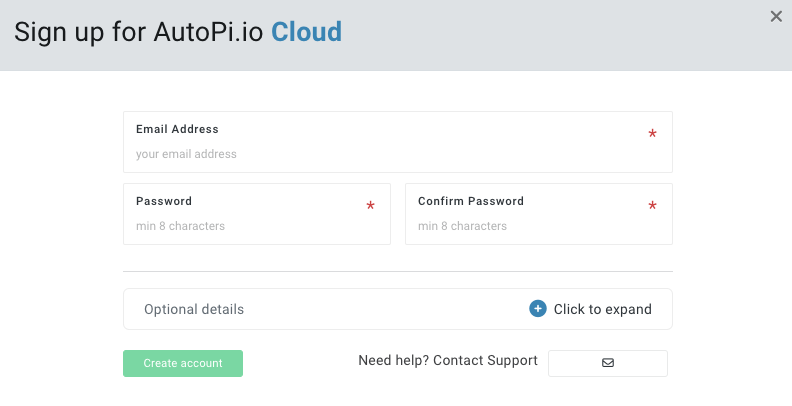
Once you have received your AutoPi device it is important to associate it with Cloud Platform. Go to my.autopi.io and click “Sign up”. In the pop-up, add the e-mail address you want to associate with your account and create a password. You can also expand the form to add additional details like your country and full name, though this can be done later. Click “Create account”.
2. Register Your Device#
After creating an account, you can access the Cloud Platform features for fleet and device management. The next step is to register your device to unlock the platform’s full potential.
To add a device to your account, follow one of these methods:
Option 1: Via the Accounts Tab
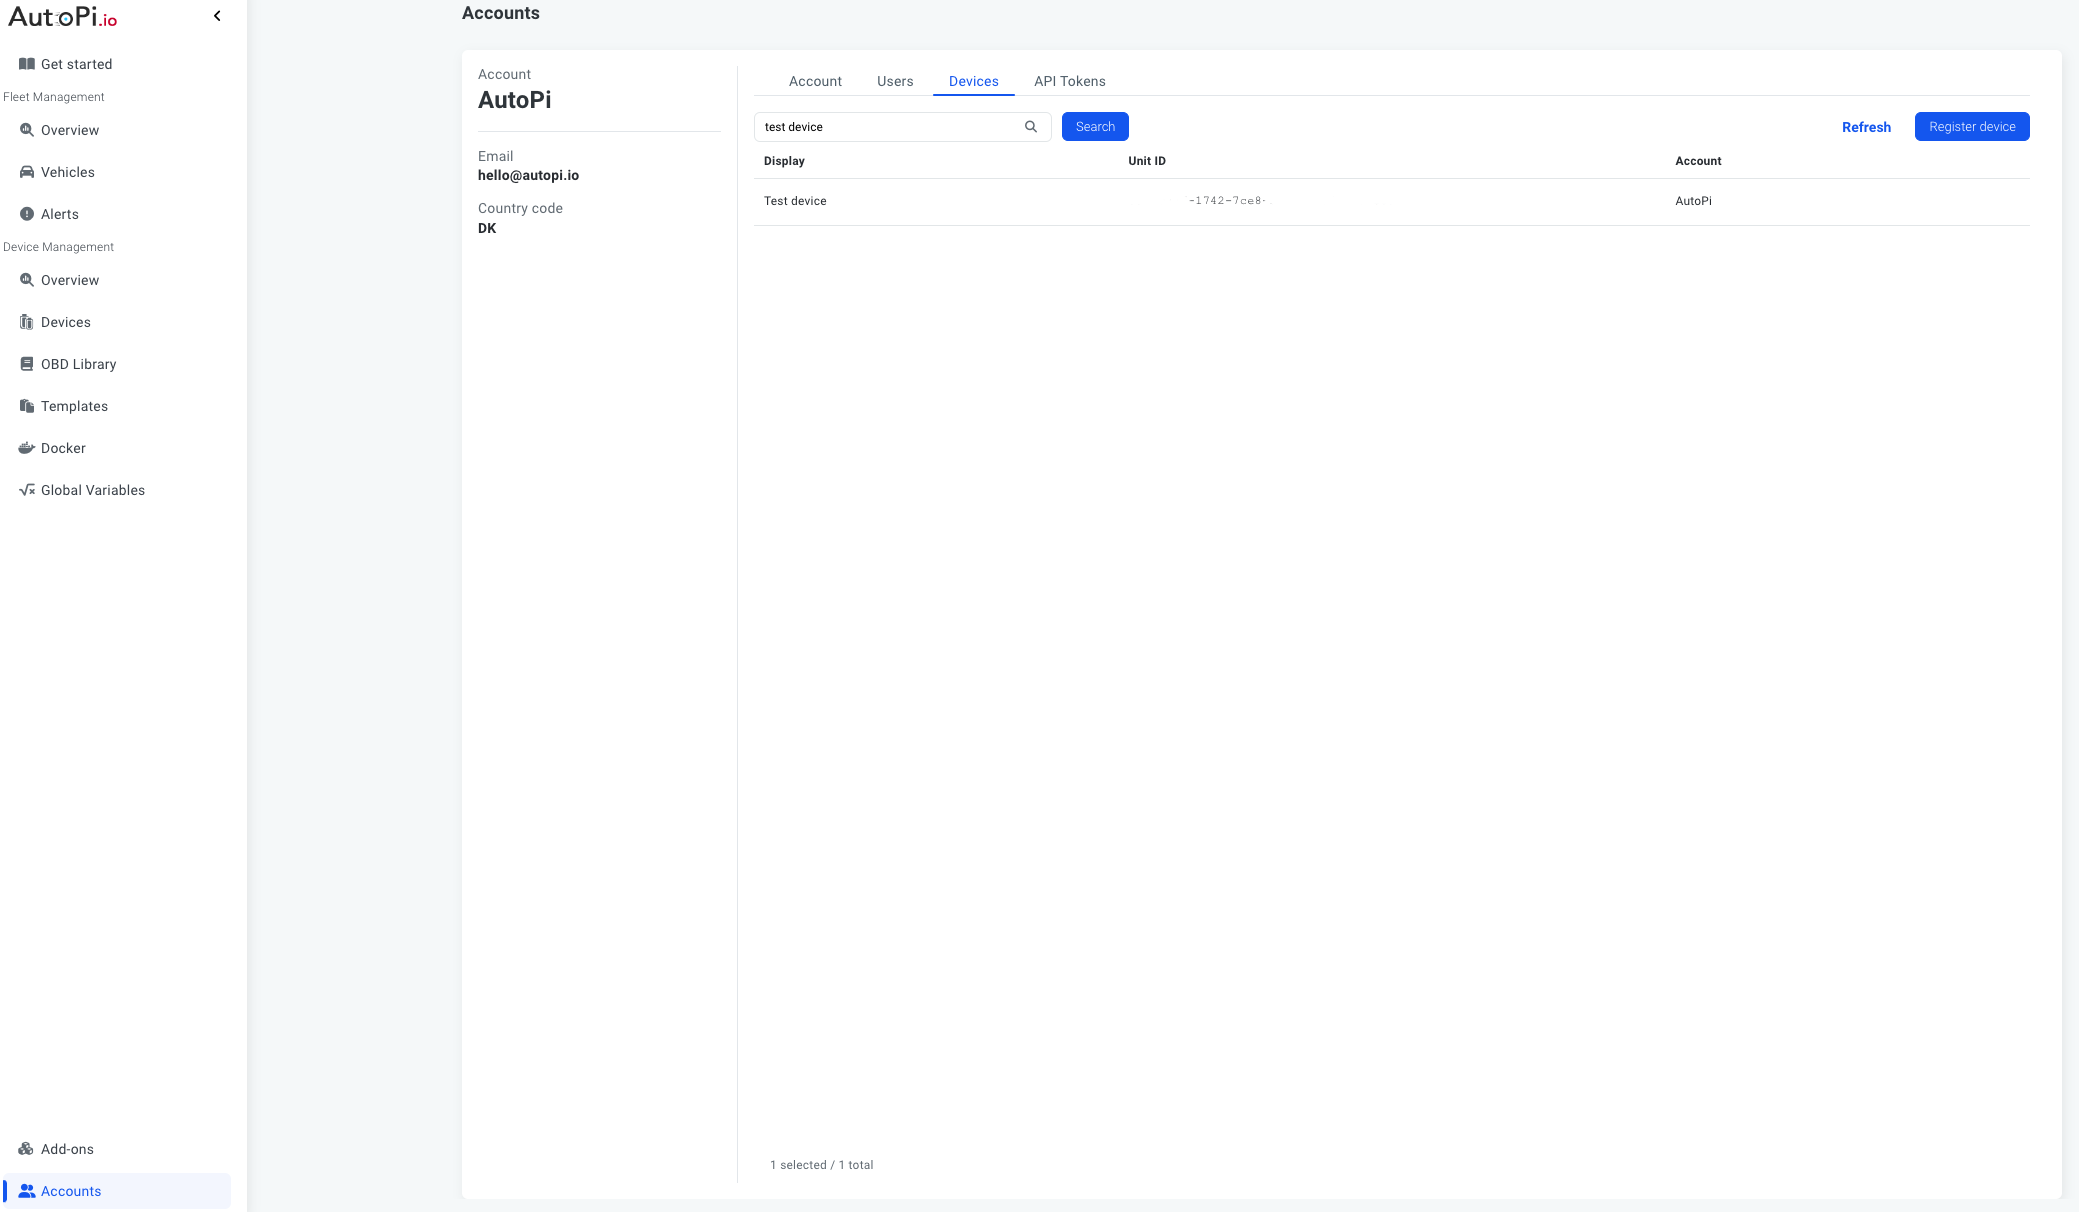
- Navigate to the “Accounts” tab at the bottom of the left side menu on the Platform.
- Select “Devices”.
- Locate and click the “Register Device” button in the upper right corner.
Option 2: Via Device Management
- See the “Device Management” section of the Platform.
- Click on “Devices”.
- Find and click the “Register Device” button in the upper right corner.
After clicking the “Register Device” button, the registration tab will appear. Enter all necessary information:
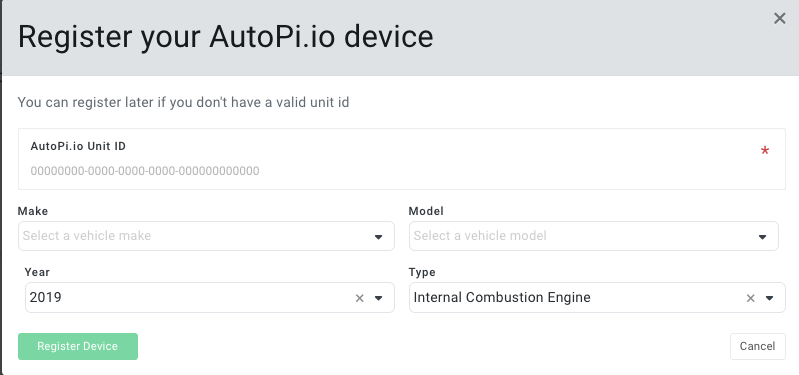
- Unit ID: This is the number on the side of your device. You can also find it in the. document attached in the email you received when the device was shipped.
- Vehicle Information: Optionally include the make, model and year of the vehicle.
- Vehicle Type: Choose the type of vehicle (ICE, Battery Electric Vehicle, Hybrid Electric Vehicle, or Plug-in Hybrid Electric Vehicle).
Once all information is entered, click the “Register Device”. Your newly registered device will now appear in the list under “Vehicles” in the Fleet Management section and under “Devices” in the Device Management section of the Platform.
3. Ensure SIM Connectivity#
note
If you have purchased the AutoPi TMU CM4 with monthly cloud subscription, your SIM card is already assembled in the device, so you can skip this step.
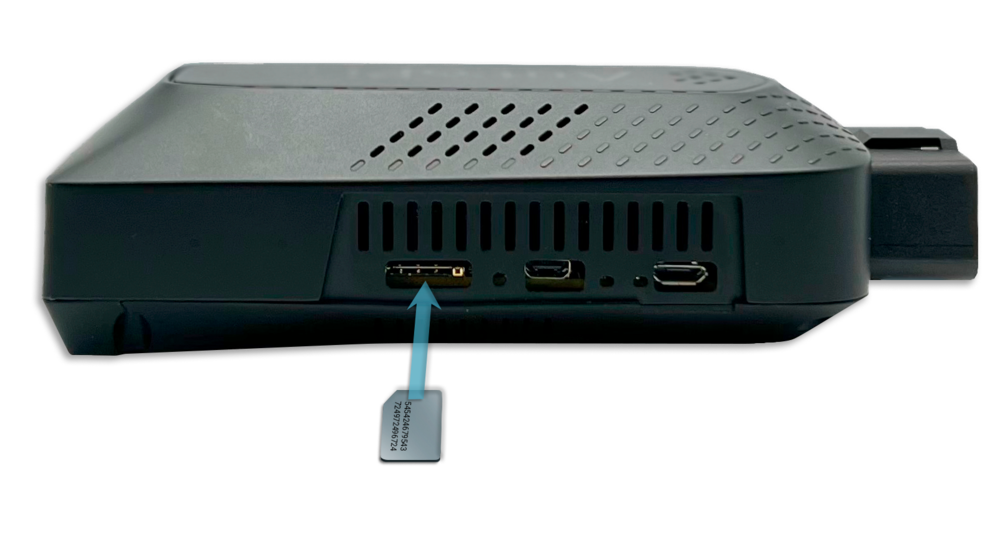
If you have purchased the hardware-only version, you will need to insert your SIM card into your AutoPi before connecting the device to your vehicle. The AutoPi uses nano SIM sizes. The location of the SIM card slot is shown in the picture below.
When inserting the SIM card, it’s important to ensure it is installed correctly. The picture below shows the proper orientation of the SIM card. Please note that the text side of the SIM card must face up and the “triangle” end point into the device.
caution
Please notice: When the SIM card is inserted correctly, you will hear a small "click" when the card is in position. Don't try do force the SIM out after the click as this will damage the device. Make sure the orientation is correct before inserting the SIM. Wrong orientation could potentially damage your device.
caution
Please notice: The SIM card needs to be compatible with ipv4, for the device to establish a 4g/LTE connection.
Here's a list of the US based SIM providers that we recommend to be used with the AutoPi:
- AT&T
- T-Mobile
- Any MVNO provider that is roaming the networks of the providers above
4. Locate OBD Port#
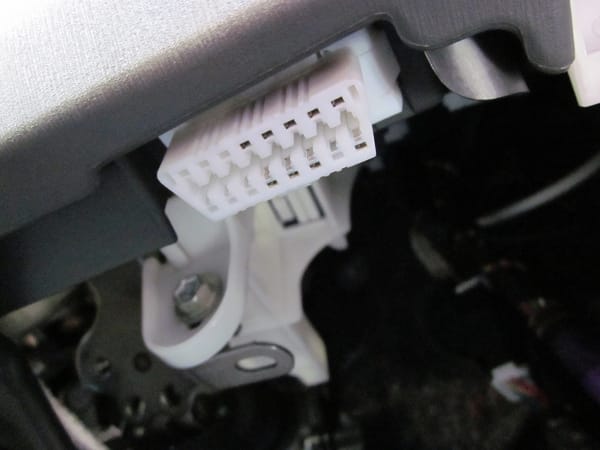
Next step is to locate your OBD port in your car, it is usually found underneath the dashboard and looks something like this:
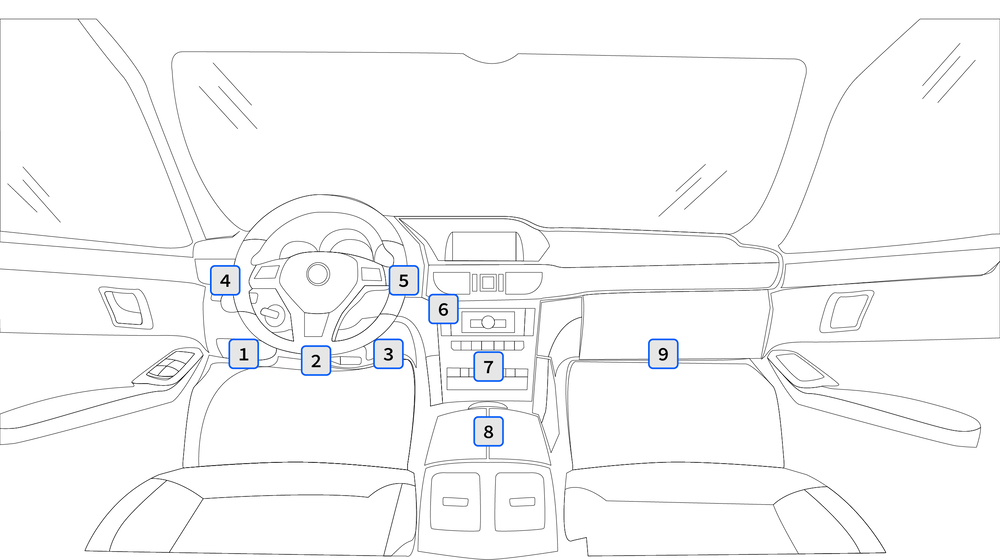
The location of the OBD port varies from make and model, but is typically fund in one of the locations shown below:
5. Installation#
When installing the AutoPi, always make sure that the device is positioned with the logo facing upwards towards the sky. This orientation is crucial because the GPS antenna is located within the device, and incorrect positioning may result in a weak GPS signal.
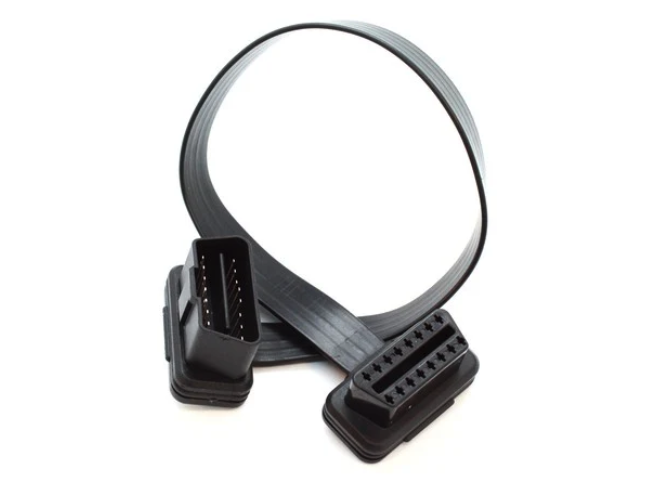
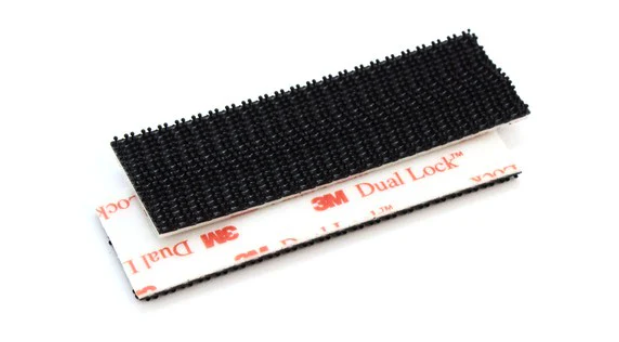
If the OBD port is in an inconvenient spot or gets in the way, you can buy an extension cable to move your AutoPi to a better location. You can also use a holder or a velcro strip to secure it on the side or underneath — just make sure the logo is still facing upwards.
This is the OBD-II extension cable:
Velcro Strip:
Tips on getting the best performance of your device:
- Make sure that the AutoPi logo is facing the sky.
- Try to avoid installing the device in direct sun. Direct sun will heat up the device and, in the summertime, this can cause the CPU to throttle down, if the temperature gets too hot.
- The device contains a GPS antenna inside. Make sure there is no metal covering the device as this can affect its performance.
- When powering the device, make sure you only power it through the OBD connector. The device cannot be powered through any of the other ports.
6. Connect to WiFi#
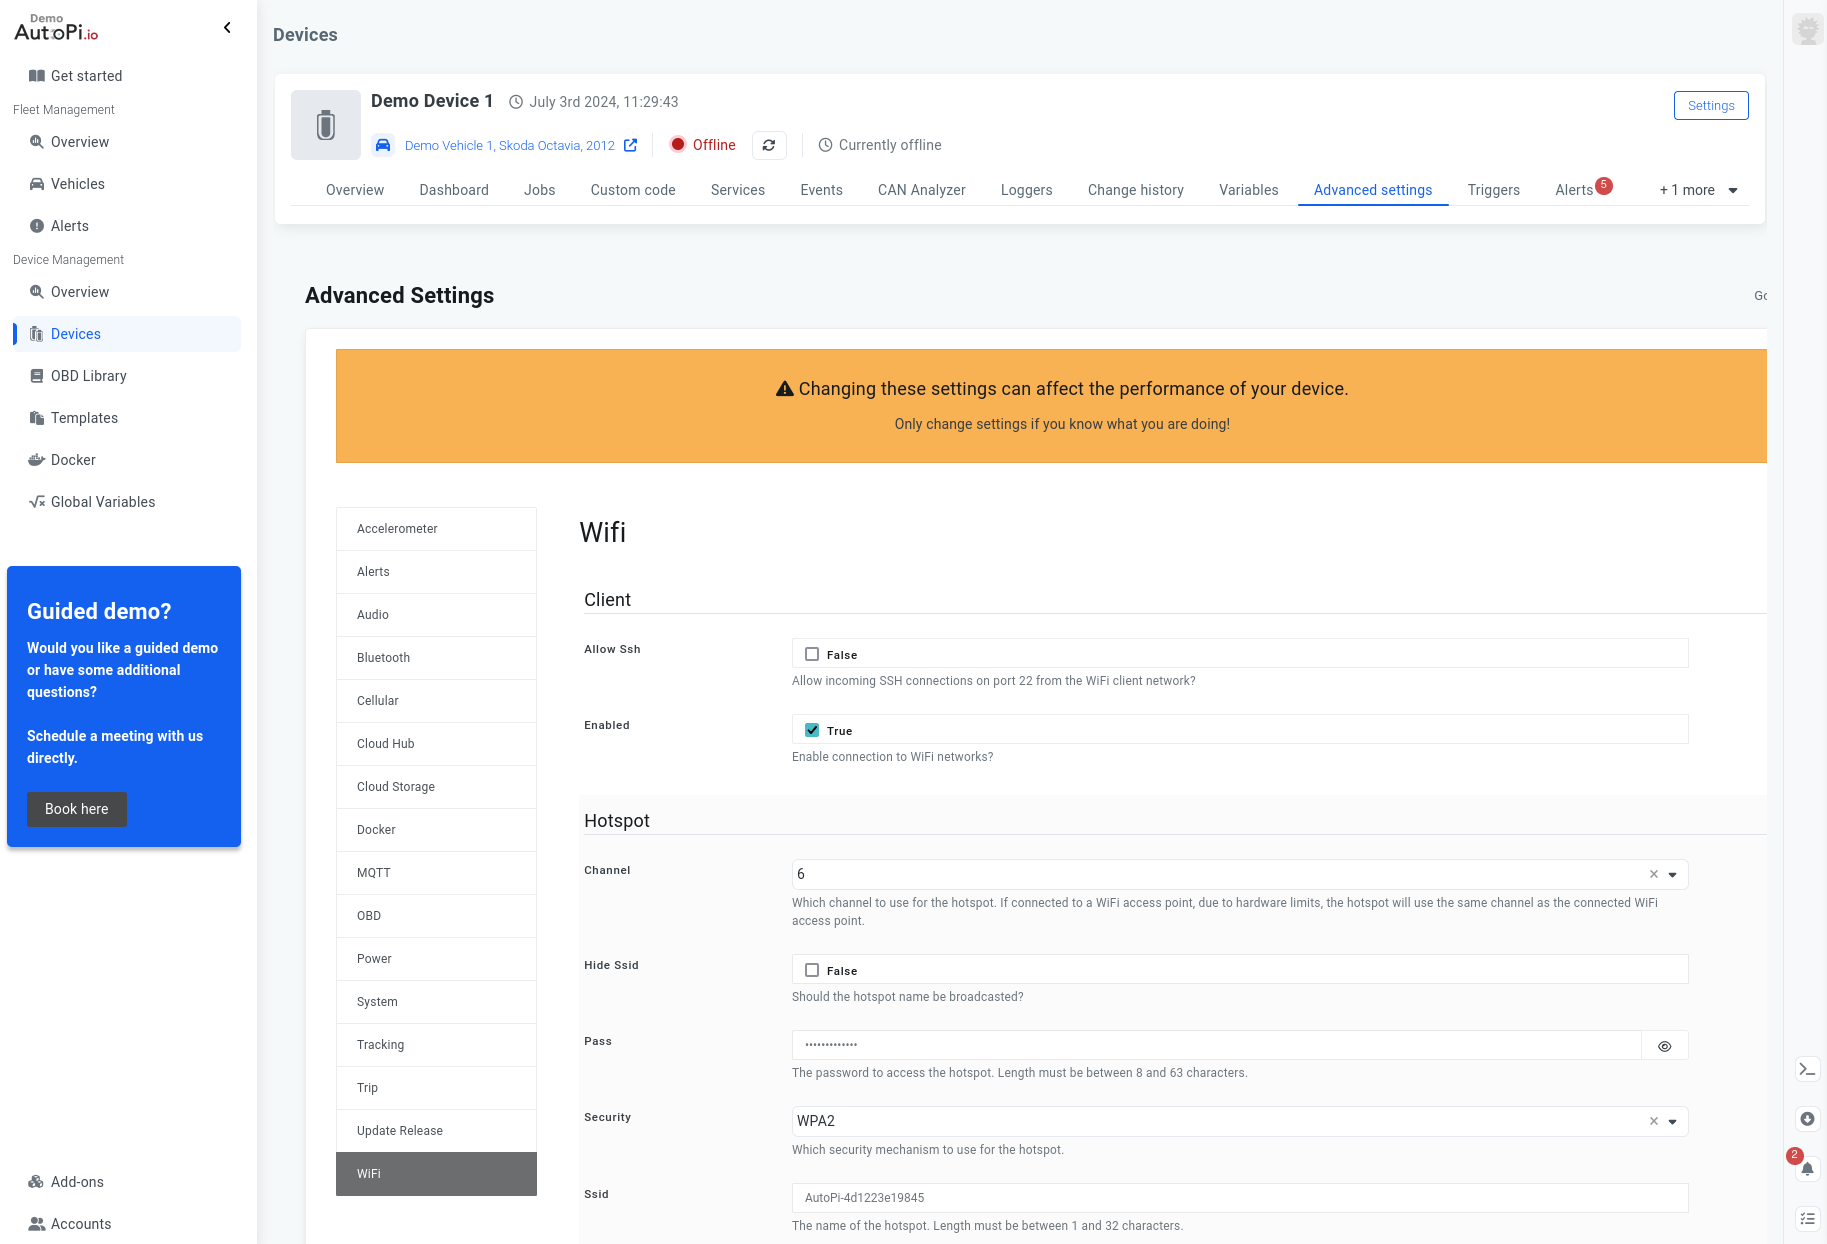
After installing your AutoPi device into the OBD port, you will need to connect it to the AutoPi Cloud. To do this, you will temporarily use the device’s Wi-Fi hotspot. The hotspot is named autopi-XXXX, where "XXXX" represents the unique ID of your device. The password for this Wi-Fi hotspot is the first 13 characters of your Device ID. You can find your Device ID either on the side of the device or in the documentation attached to your shipping email.
Additionally, you can access Wi-Fi information directly from the AutoPi Cloud. To do this, navigate to Devices > Select Your Device > Advanced Settings > Wi-Fi. Here, you will find the Wi-Fi hotspot's password and SSID credentials.
When the device is powered on, a blue light will appear on the side, indicating that it has power. When the device successfully connects to the AutoPi Cloud, a green light will be visible. If the device is not connected, the light will be flashing.
For a detailed description of the two status LEDs, please refer to the full description.
7. Connect to Local Administration#
note
If you’ve purchased the AutoPi TMU CM4 with a monthly cloud subscription, your SIM card is pre-installed in the device, and no additional action is required for SIM connectivity. The APN settings are already configured for you. Please be aware that the SIM card has a monthly data cap, so it's recommended to limit the use of the device’s hotspot for connecting your phone or notebook.
note
If you need to know the APN string for the pre-installed SIM card, it is nxt20.net.
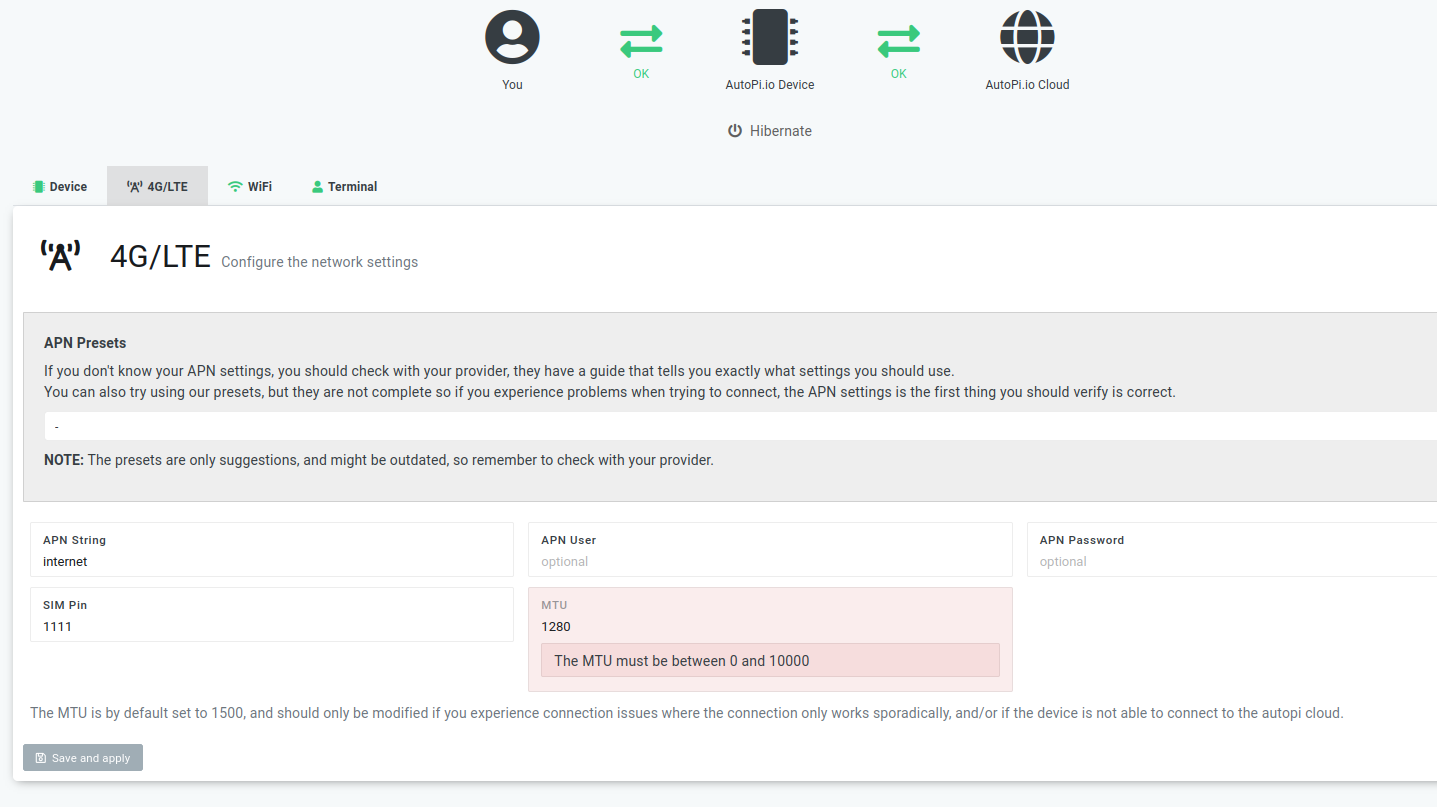
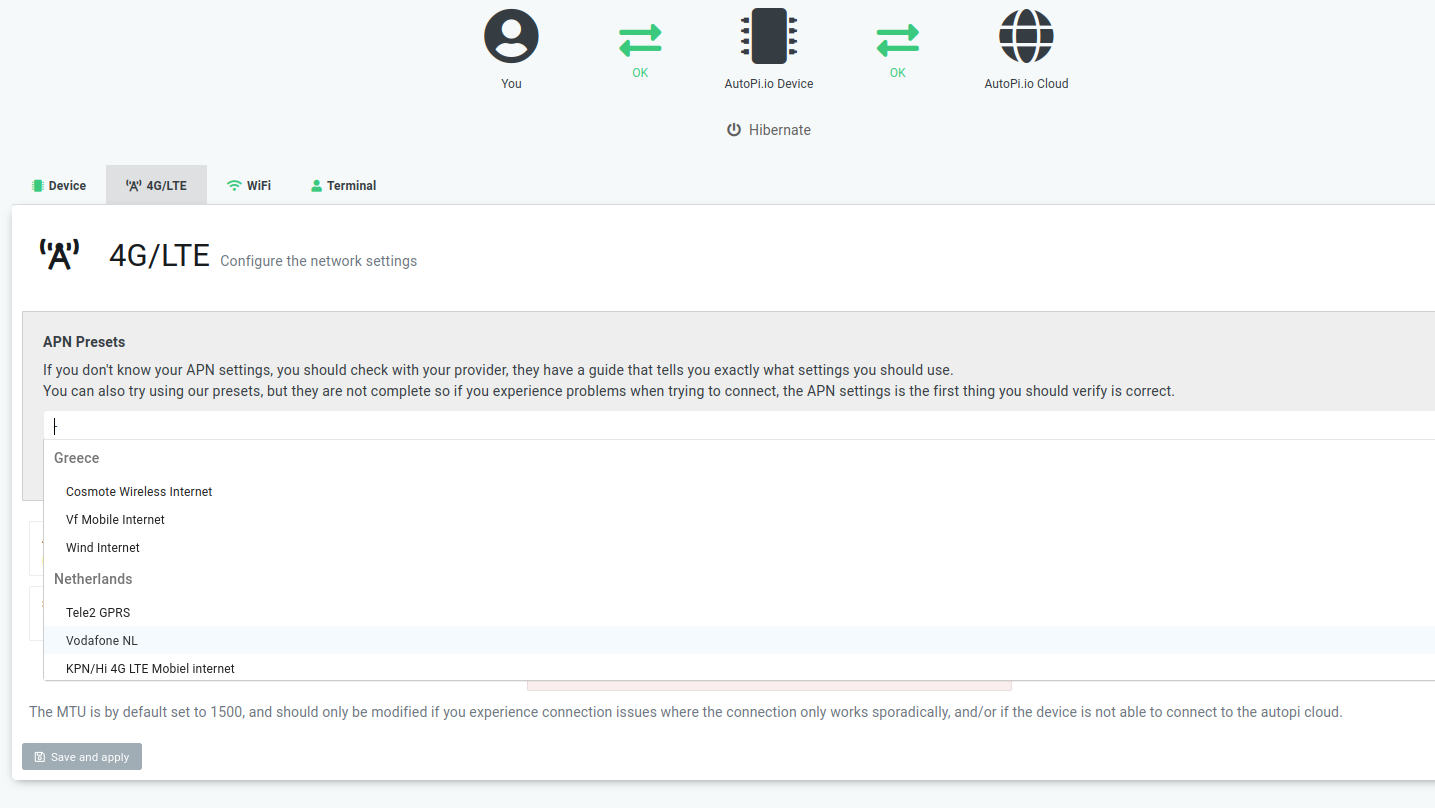
If you are using your own SIM card, you may need to configure the APN settings after connecting to the device’s Wi-Fi hotspot to ensure a seamless 4G/LTE connection. However, setting up the APN is not always necessary—it depends on your SIM provider. We suggest checking with your SIM provider directly or searching online for the correct APN settings.
Here’s how you configure the APN settings:
- Go to my.autopi.io. If you're already logged in, please log out.
- On the login page, find the “Go Local” button at the bottom left side, or alternatively, go directly to local.autopi.io.

This will connect you to the local device, and you should see a screen similar to the one shown in the image below, indicating that you're connected locally. From here, you can log in without needing a username or password.

Once the information is saved, it will be applied to the device, and you should see a notification when successfully saved.
| 4G/LTE Settings |
|---|
| APN Presets List |
|---|
8. Verify Connectivity#
To verify that you have set up your APN settings correctly, connect your phone to the AutoPi hotspot and use your browser to visit any webpage. If the page loads successfully, it means your device is online and has started uploading data to the AutoPi Cloud.
9. Finalization#
Your device is now online and connected to the AutoPi Cloud. After completing the setup, it's important to change your device's WiFi password. The default password is intended for one-time use only, and it is strongly recommended to update it afterward. You can change the password through the AutoPi Cloud by navigating to Devices > Advanced Settings > Wi-Fi > Pass.
To prevent excessive data usage, it's advisable to avoid using the device’s hotspot to connect your phone or tablet after the initial configuration is complete.
You Are All Set!
Congratulations! You've successfully set up your AutoPi device and connected it to the AutoPi Cloud. Your device is now ready to start gathering and transmitting data, enabling you to take full advantage of the powerful features AutoPi offers. Take your device for a trip to start gathering data.
note
If you are getting started with you DiY Edition please refer to this guide Setup Your TMU DIY Edition.
For older, Generation 2 devices, you can find the relevant guide here Setup Your Gen 2 Edition.
What's Next?
Now that your device is up and running, here are a few suggestions to help you get the most out of your AutoPi experience:
- Explore the AutoPi Cloud: Dive into the AutoPi Cloud platform to explore all the features available to you, such as real-time vehicle monitoring, advanced analytics, and customizable alerts.
- Check Out Our Documentation: Our documentation page is a great resource for learning more about advanced features, troubleshooting, and getting the most out of your device.
- Stay Updated: Keep an eye on our blog and newsletters for updates, tips, and new features.
Need Help?
If you encounter any issues or have questions, do not hesitate to reach out to our support team at support@autopi.io.
Thank you for choosing AutoPi. We're excited to see what you will achieve with your new device!
The AutoPi Team.