Keyfob HAT Install
Before proceeding with the install
The keyless entry solution described here only works with the AutoPi TMU CM4 and newer editions
note
Prerequesites for this guide:
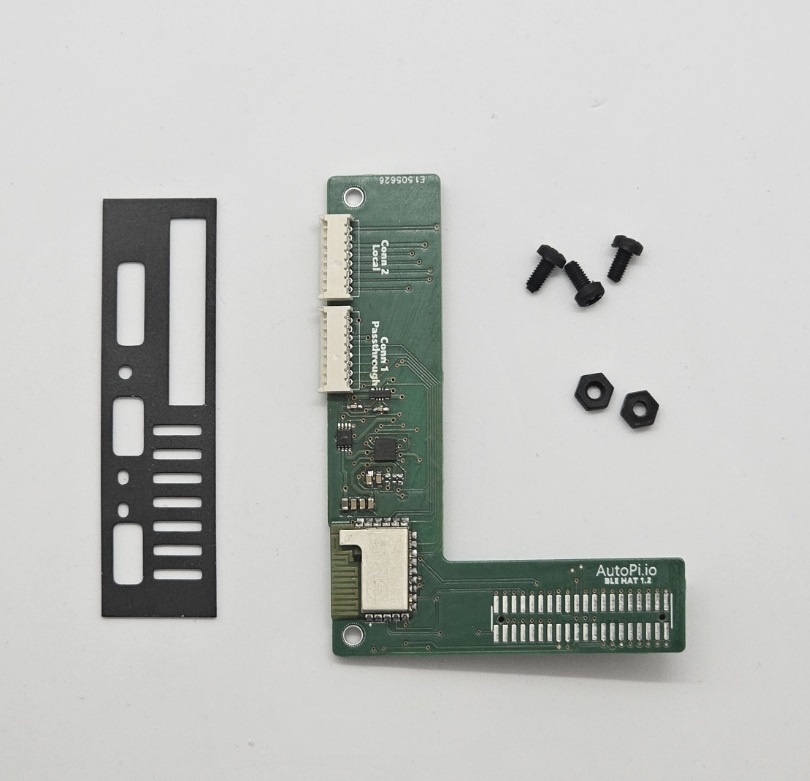
- 1x Keyless Entry BLE HAT PCB
- 1x 4mm plastic spacer
- 2x Plastic screw
- 2x 6.5 mm plastic spacer
- AutoPi BLE side shield
Step-by-Step Guide#
Step 1#
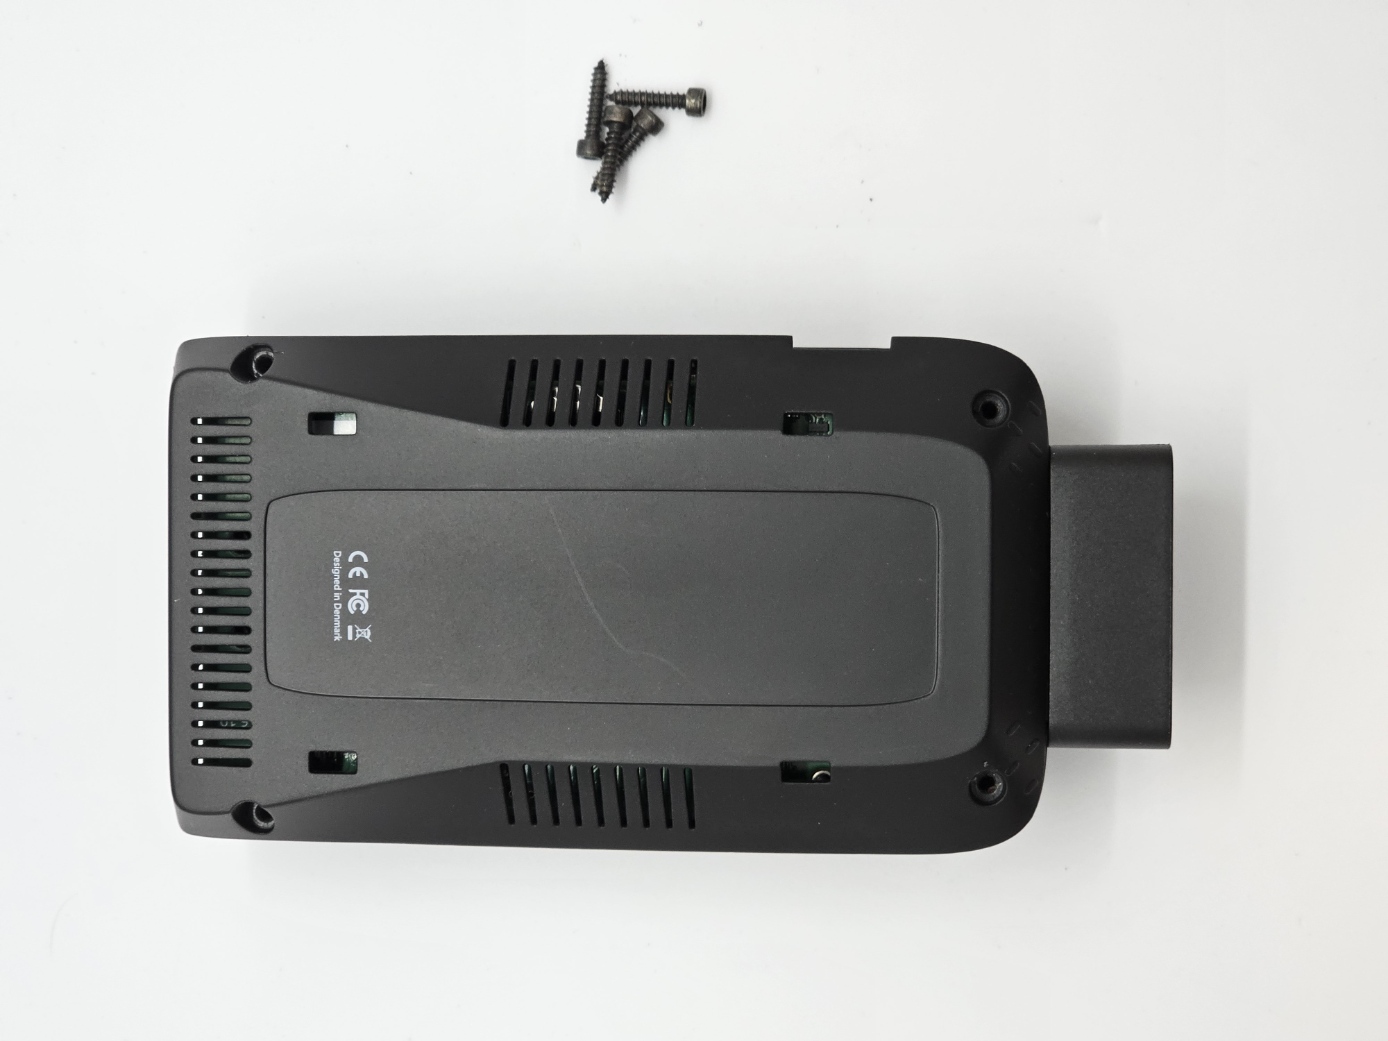
Open up the AutoPi device by unscrewing the four screws at the bottom.
Step 2#
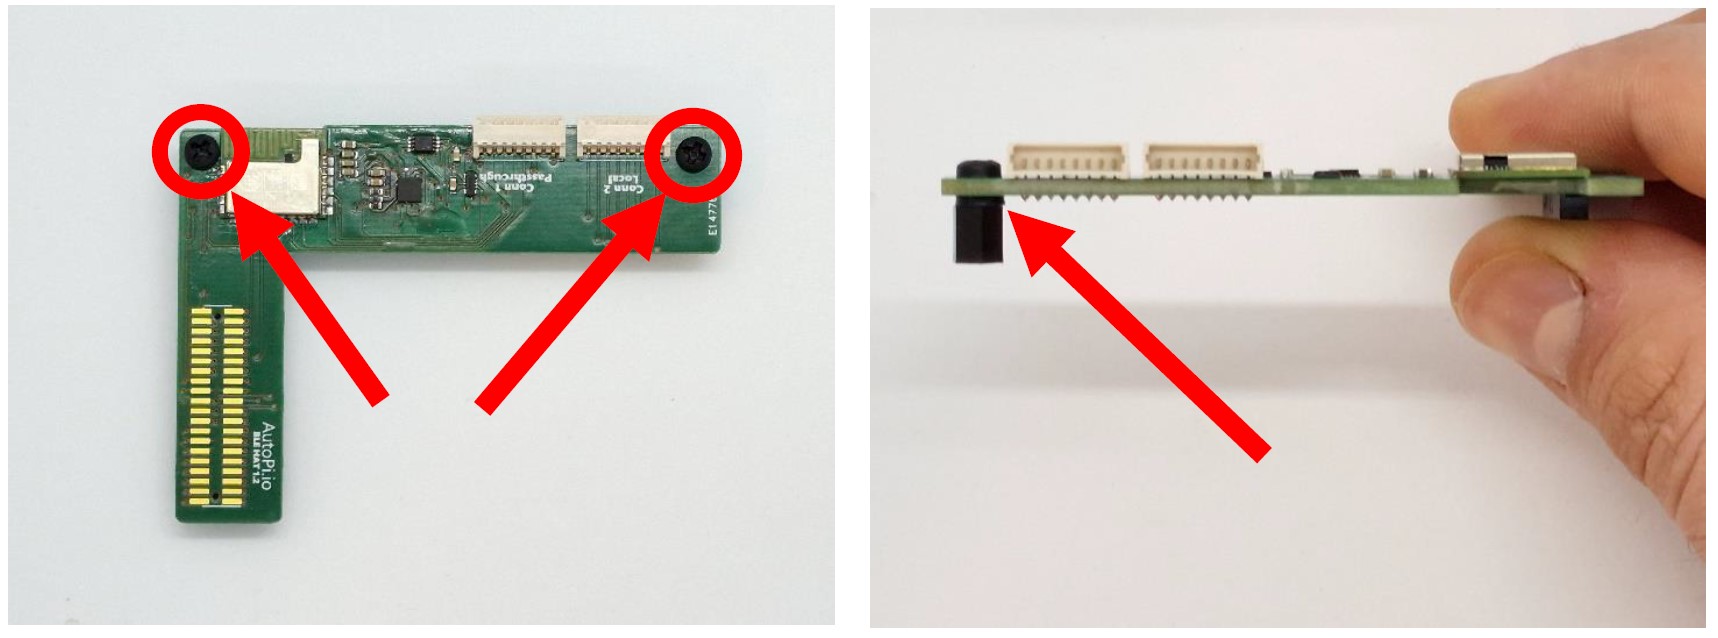
Start preparing the BLE hat by screwing one 6.5 mm spacer in each hole of the PCB as seen in the pictures.
Step 3#
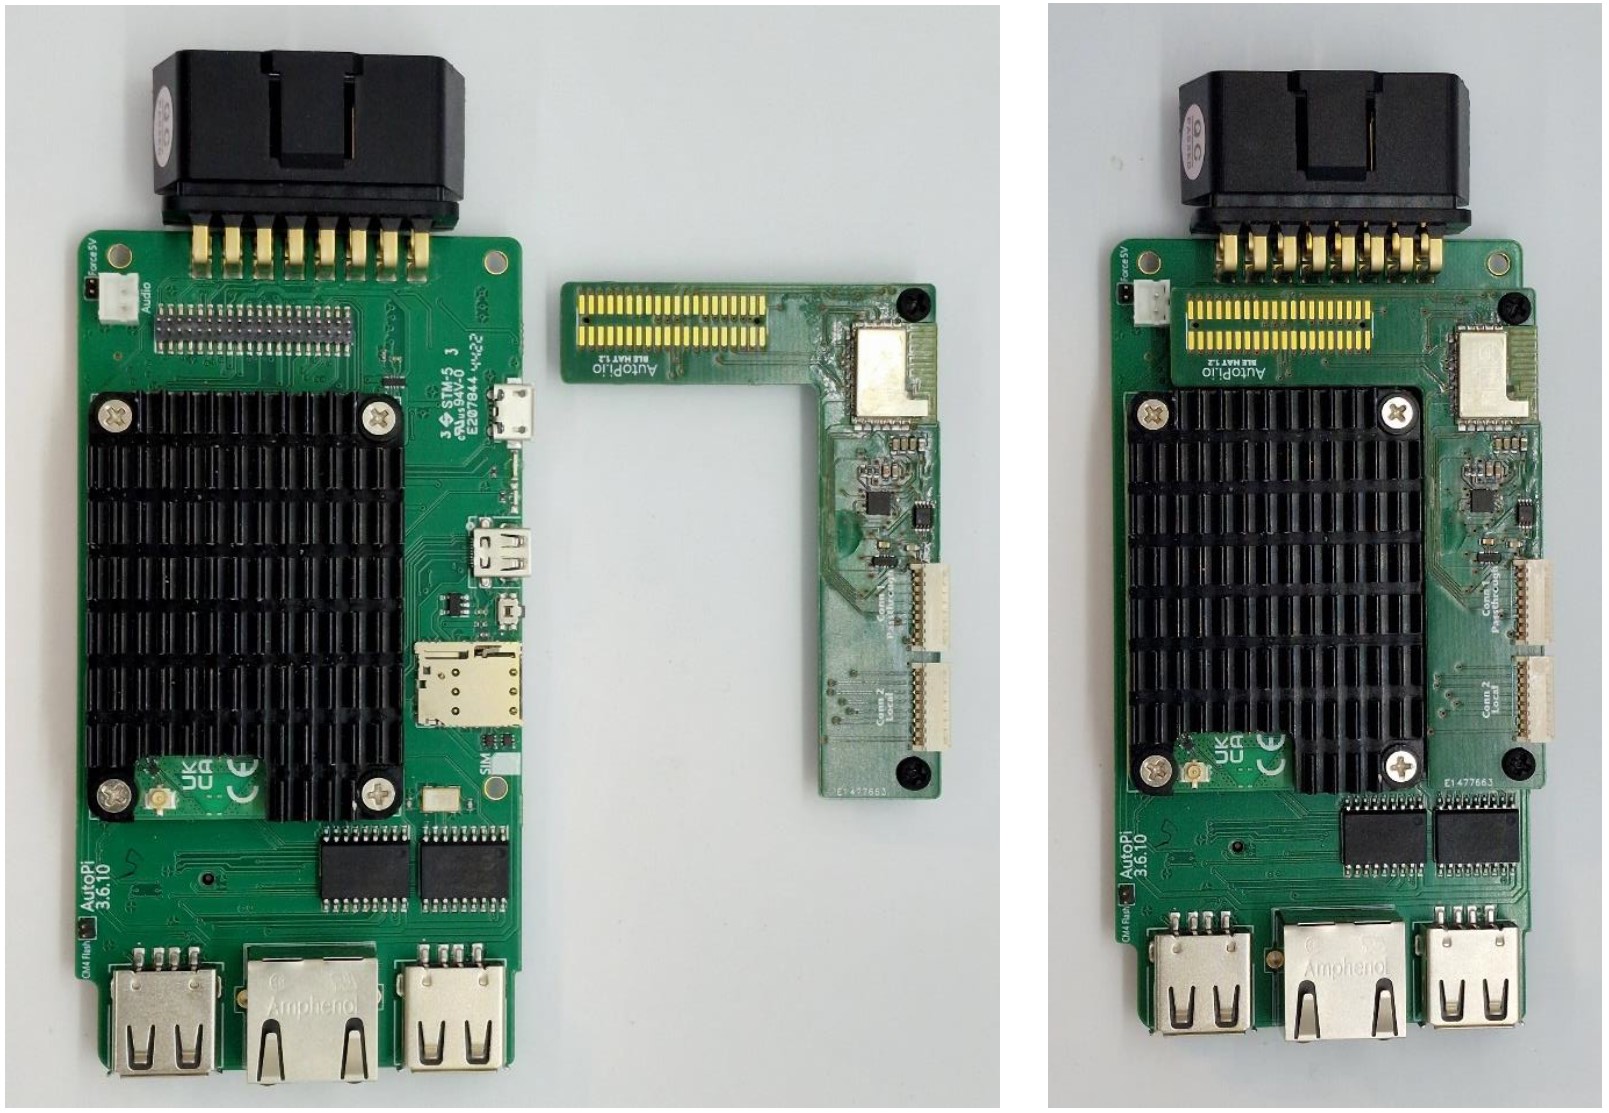
Connect the BLE hat with the AutoPi board through the 40 pin headers. Verify that the connectors are properly connected.
Step 4#
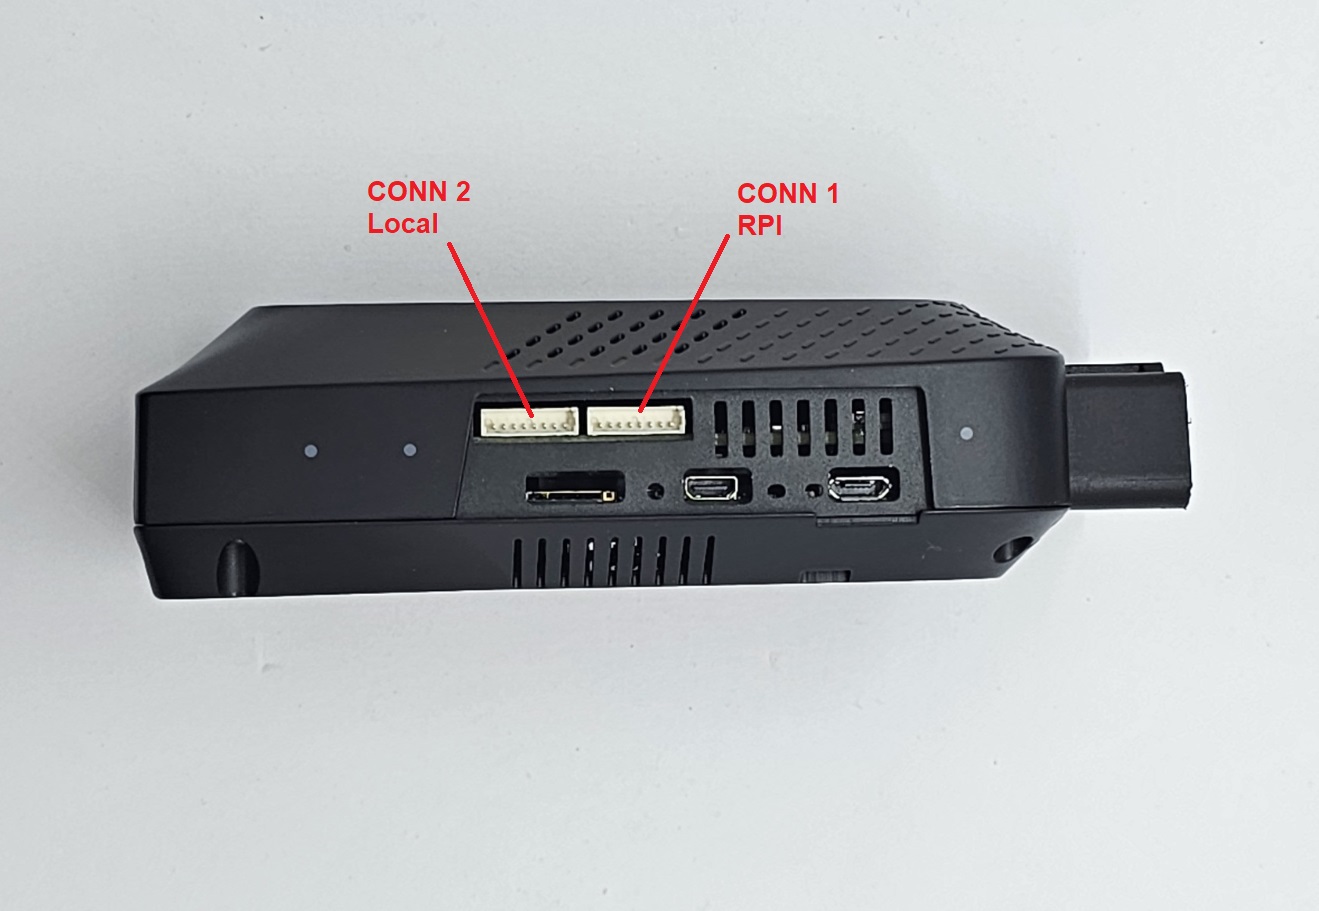
Reasemble the device using the new AutoPi BLE side shield, giving access to two new Keyfob control ports on the side.
Disscussion#
You have now successfully installed the keyless entry solution to the device.
note
In case you have any questions, don't hesitate to contact us at support@autopi.io.