Data Troubleshooting
Why Am I Not Seeing Any Data?
If you've followed the Getting Started Guide and tested your AutoPi TMU CM4 device during a drivebut no data is appearing on your AutoPi Cloud Dashboard, this guide will help you identify and resolve common issues.
Organized as a checklist, this guide outlines potential causes for missing vehicle data and offers solutions. It is specifically for the AutoPi Mini device. For AutoPi TMU CM4, please refer to this guide.
Common Causes and Solutions for Data Not Appearing on the Cloud
1. Connection Issues
One common reason for missing data is communication issues within the AutoPi Mini or between AutoPi Mini and the Cloud. The SIM card in your AutoPi Mini comes pre-installed and should function out of the box.
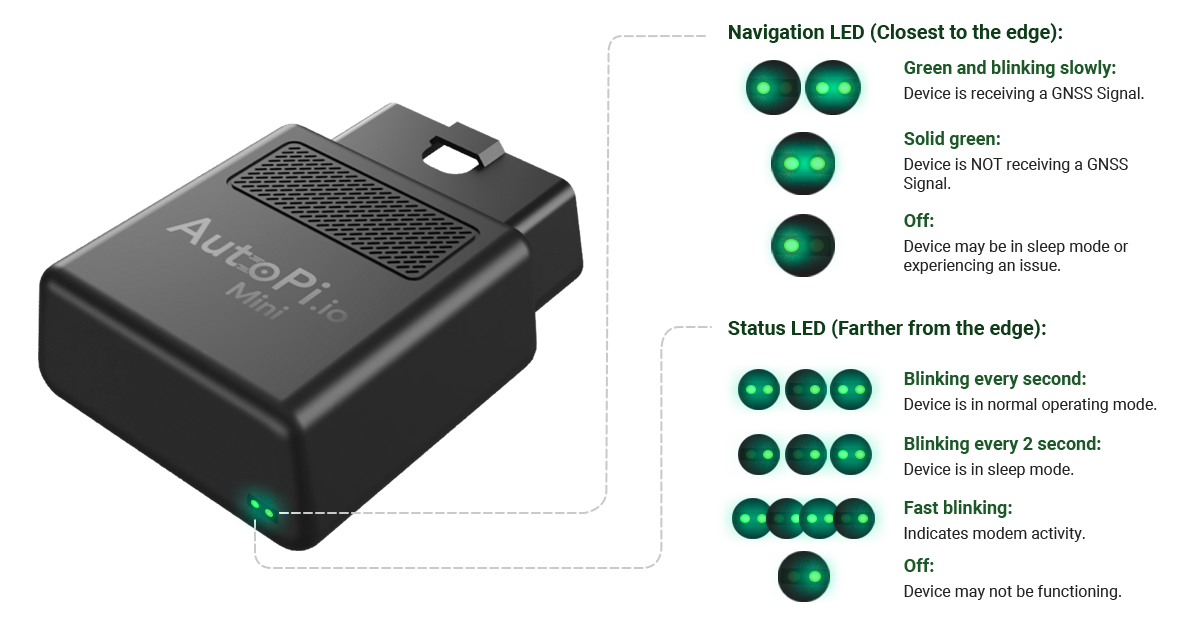
When your AutoPi Mini is connected to your vehicle's OBD-II port, check the status of the two LEDs on the device:
-
Navigation LED(closer to the edge of the device):
This LED indicates the status of the GNSS (Global Navigation Satellite System).
- Green and blinking slowly: The device is receiving a GNSS signal.
- Solid green: The device is not receiving a GNSS signal.
- Off: This may indicate the device is either in sleep mode or experiencing an issue.
-
Status LED (farther from the edge of the device):
This LED reflects the device’s operating status.
- Blinking every second: The device is in normal operating mode.
- Blinking every 2 seconds: The device is in sleep mode.
- Fast blinking: Indicates modem activity.
- Off: This could mean the device is not functioning.
If either LED is not behaving as expected, it could be a sign of connectivity or hardware issues that need attention. Try to disconnect it from the OBD-II port, then reconnect it. Wait until both lights are green and blinking.
2. Logger Creation
Another issue to why you are not seeing data on your AutoPi Cloud Dashboard could be the configuration of the loggers.
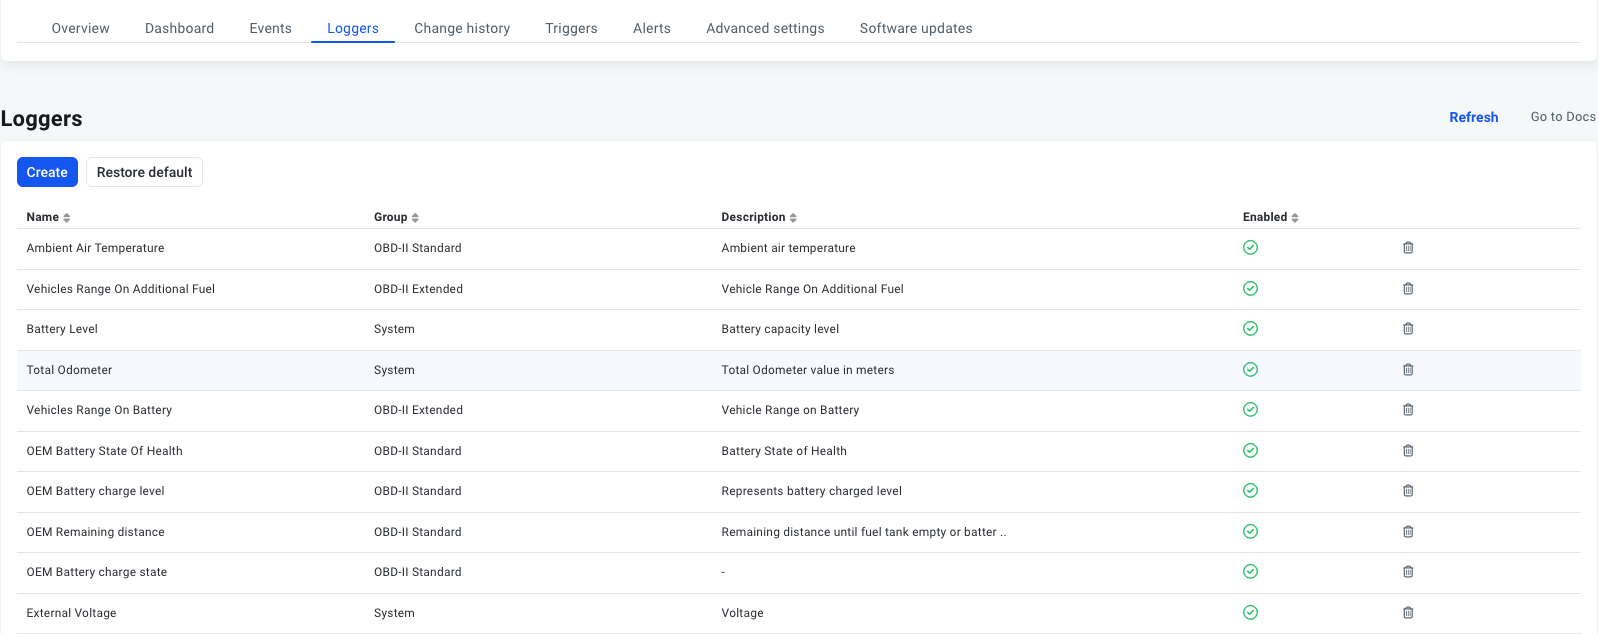
In order to view data on the AutoPi Cloud Dashboard, you must ensure that loggers are set up to collect data from your vehicle. While some loggers are created by default, they may not be suitable for your specific vehicle.
For more detailed instructions on creating loggers for the Mini, refer to our Logger Guide.
Recommendations for Logger Setup:
- Use the logger groups OBD-II Standard or System, as these are typically compatible with most vehicles.
- Once your loggers are set up, check the ‘Change History’ to ensure the changes were applied successfully.
3. Configuring Widgets
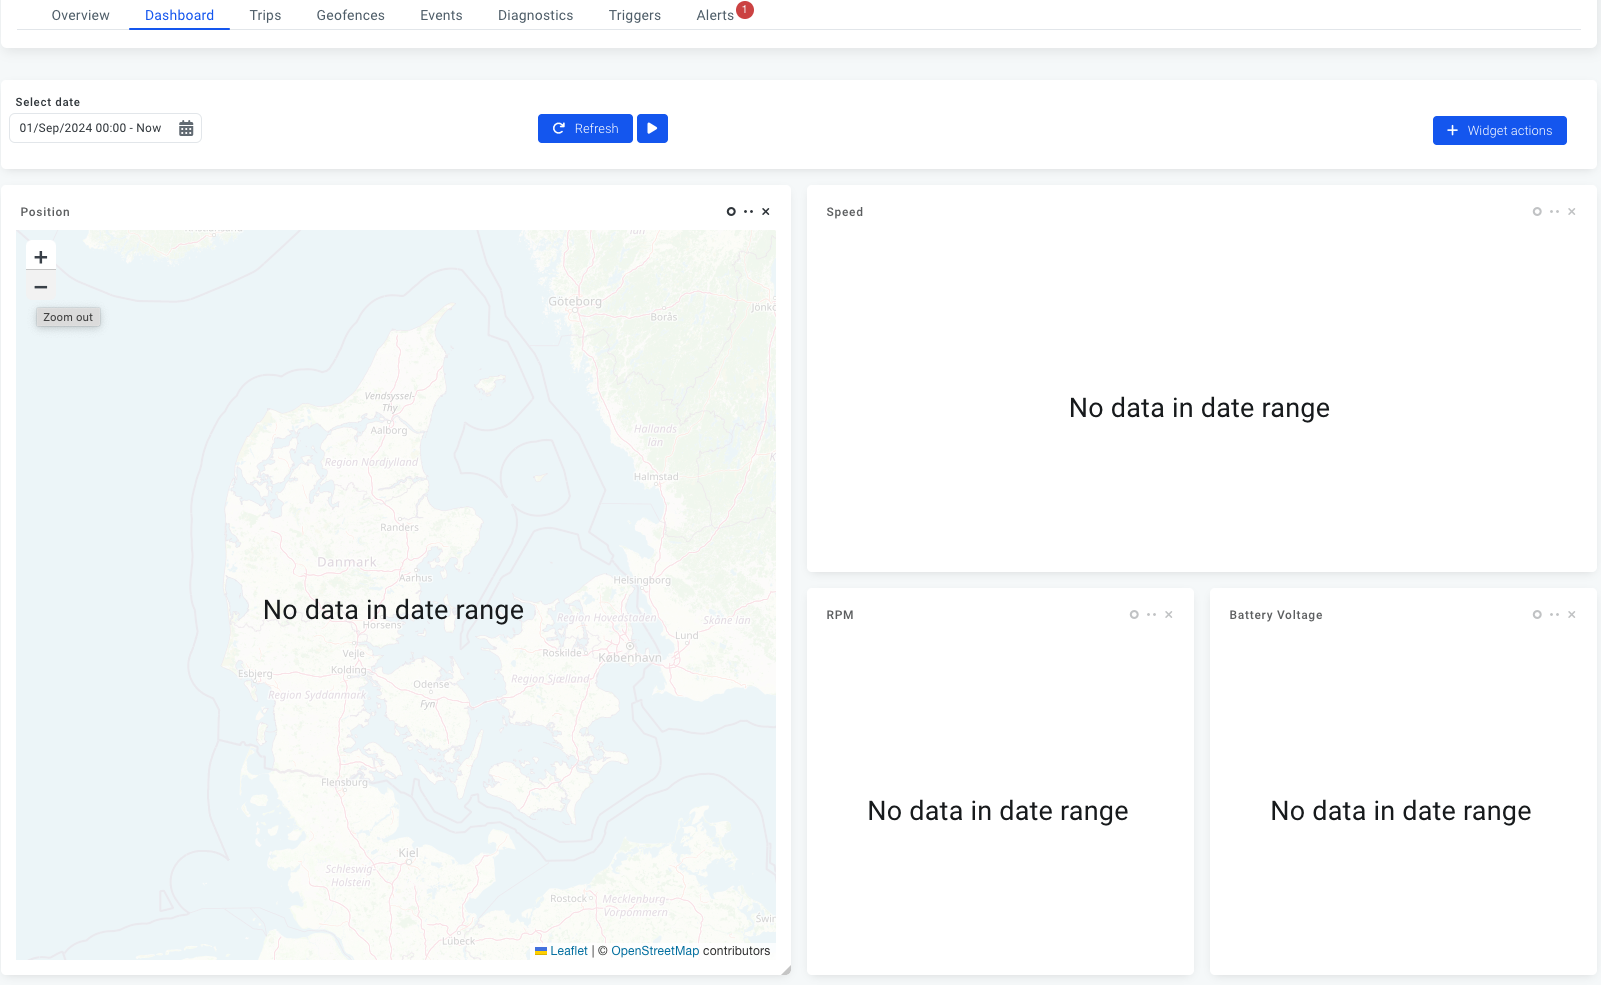
Once your loggers are in place, the data should display in widgets on the Dashboard under Vehicles > Dashboard.
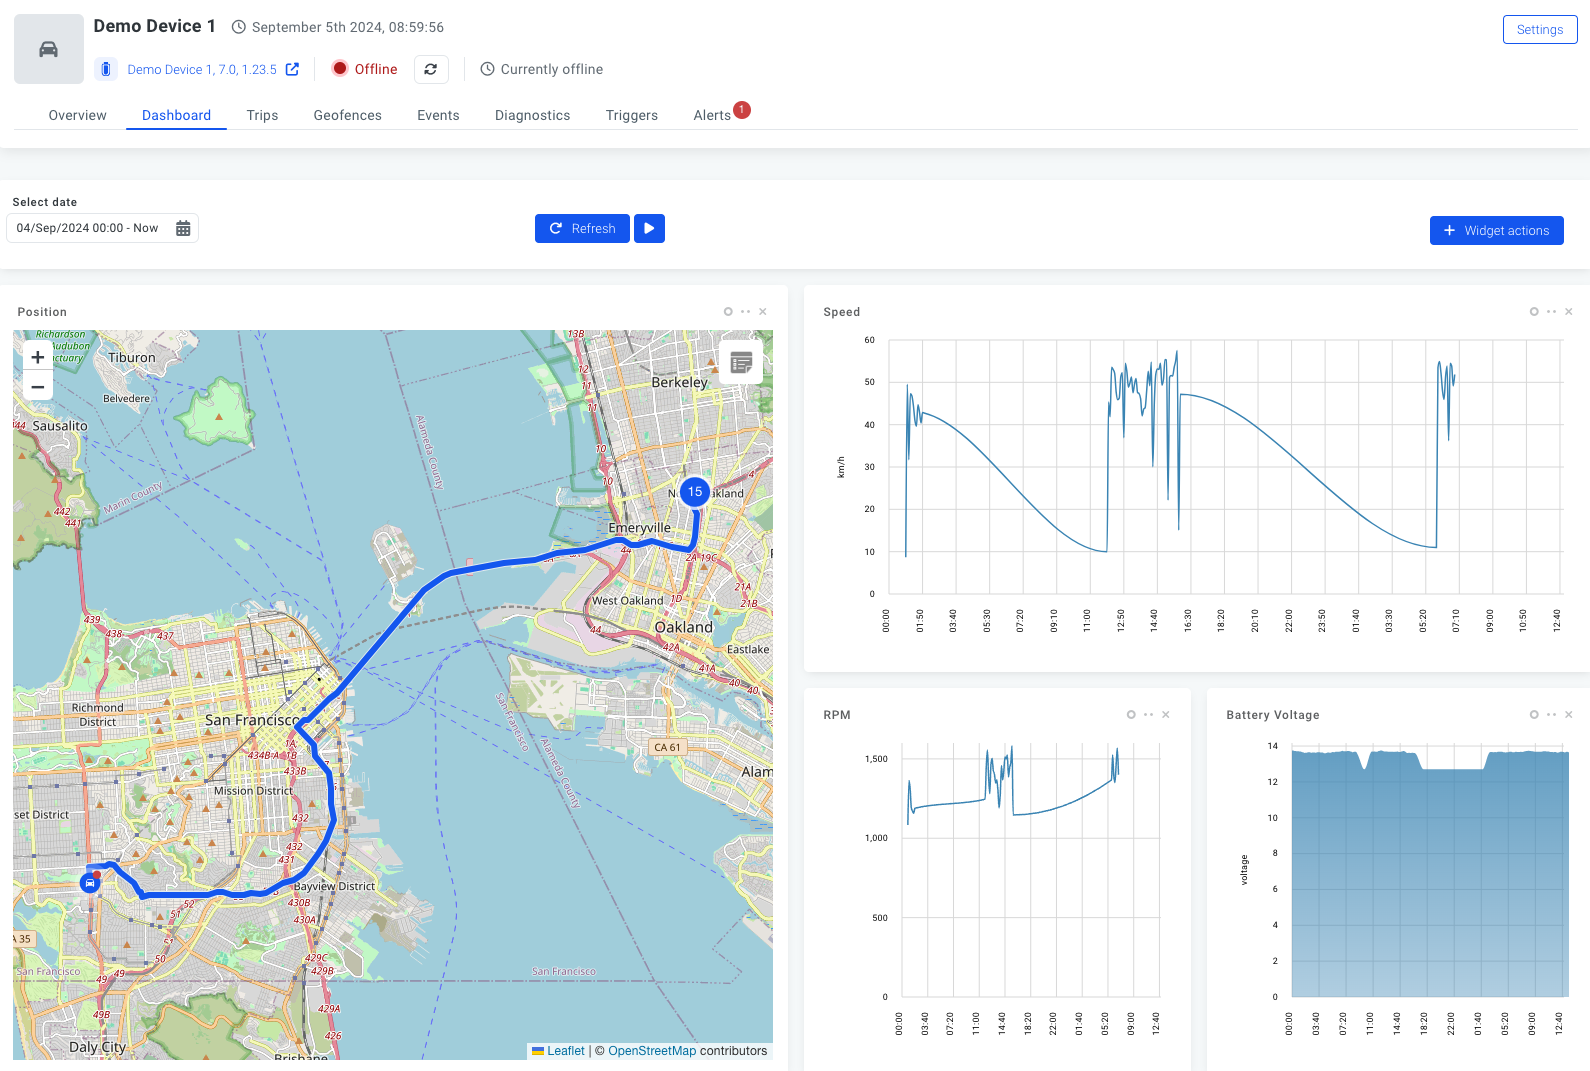
A common reason for seeing "No Data" could also be incorrect widget configuration. For the widget to display data, it must be linked to the appropriate logger. So, if you have added or edited the loggers, you will also need to make the changes in the Dashboard’s widgets.
To edit your widget:
- Click the three dots in the top right corner of the widget.
- Ensure the configuration, especially the Field section, matches the data being logged.
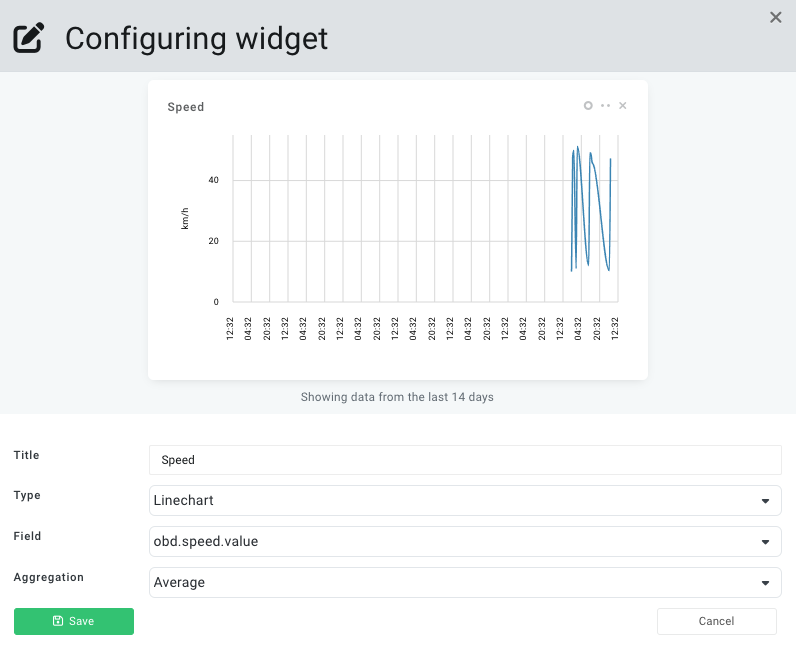
Customizing Widget Display:
- You can choose from various display formats such as graphs, line charts, and gauges.
- Set the widget to show data averages, minimums, or maximums based on your preferences.
After adjusting your widget settings, click Save. Then, refresh the widget using the circle icon in the top right corner to see if the data appears. If the data is now visible, your configuration is correct. If you've just createda new logger, it may take another vehicle trip for the device to gather the required data.
Don’t forget to save your dashboard changes by selecting Widget Actions > Save.
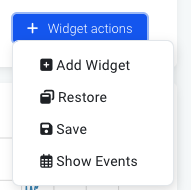
To add a new widget to your dashboard, go to Widget Actions and choose Add Widget. Remember, a logger must be set up beforehand, or the widget won't have any data to display.
When you're satisfied with your dashboard configuration, save your layout via Widget Actions to keep your settings for future sessions.
4. No data from your AutoPi mini (EV users)
If your AutoPi Mini is not sending data to the cloud and you have an electric vehicle (EV), the issue may be due to the device not being able to autodetect the VIN. Unlike internal combustion engine (ICE) vehicles, some EVs do not support automatic VIN detection, which can prevent the device from reading data properly. To resolve this, follow these steps to adjust the advanced settings for EV compatibility.
Recommended advanced settings for Electric Vehicle:
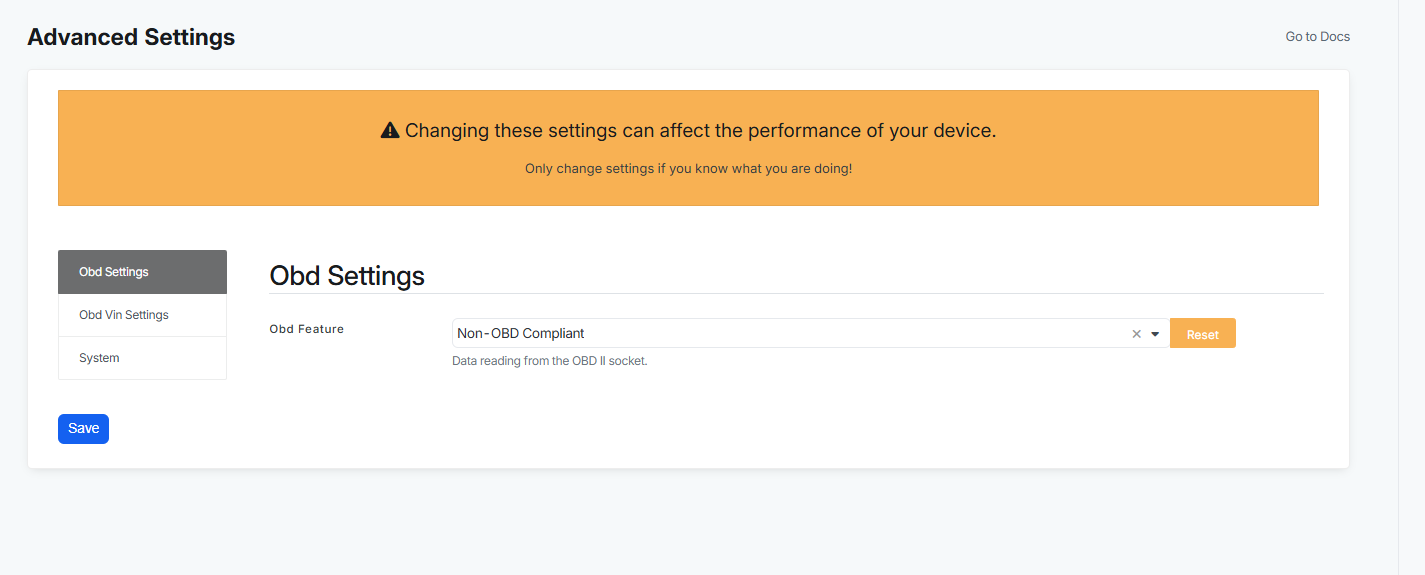
Option 1: Adjust OBD Feature, this setting ensures the device correctly communicates with your EV.
- Go to: Advanced settings → Obd Settings → Obd Feature.
- Select: Non-OBD Compliant.
- Press: Save.
Option 2: Manually enter your VIN (if not detected automatically).
- Go to: Advanced settings → Obd Vin Settings.
- Set Vin: enter your 17-character VIN (digits and capital letters).
- Pick Vin Source: select Manual.
- Press: Save.
Option 3: Set Ignition detection for EVs to properly detect when your EV is on or off.
- Go to: Advanced settings →System -> Ignition Settings.
- Select: Accelerometer.
- Press: Save.
After making these adjustments, check the 'Change History' tab to confirm that your settings were applied successfully.
 Buy AutoPi device
 Compare all AutoPi devices
 Contact our sales team