Installing 4-in-1 External Antennas
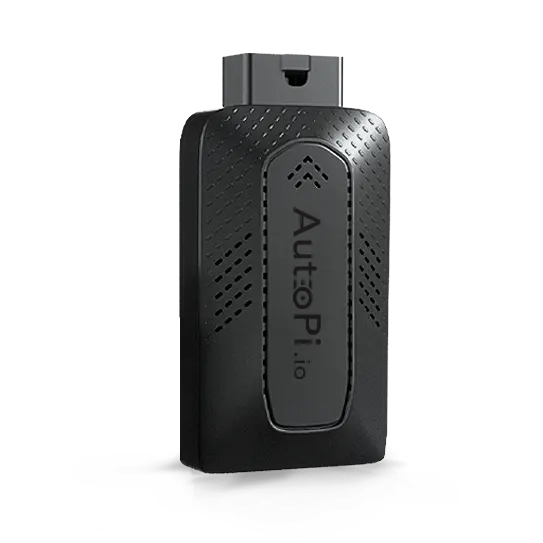
Please read the whole guide in order to have a good understanding of how all the components fit together.
You need to be careful not to tear or damange some of the cables when handling the casing of the device.
If you've purchased the 4-in-1 Antenna Kit alongside your AutoPi TMU CM4, this guide will help you through the installation process. The kit allows you to boost 4G/LTE connectivity, GPS signal strength and BLE/WiFI signal, which is especially useful if you frequently drive in areas with weak signal reception.
What's included:
- 4x SMA adapter cables (for internal installation)
- 1x 4G/LTE, GPS and BLE/WiFi combo antenna (with 3M adhesive pad)
- 1x Side shield (for 4x SMA connectors)
Pre-installed Antennas
If you opted for pre-installed antennas through our shop or by contacting our sales team, your device will arrive with the antennas already in place. All that's left to do is connect the cables to the corresponding antenna ports. Please refer to the image below for guidance.
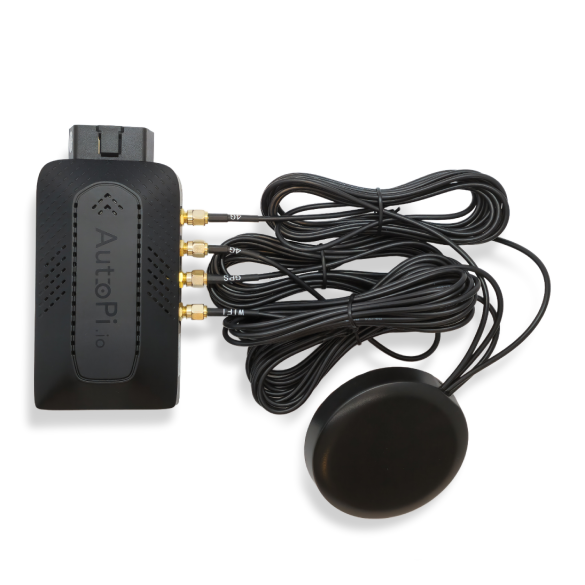
Then all you need to do is to connect the device to the vehicle’s OBD-II and place the adhesive pad on the dashboard or other suitable place.
Installing the Antennas:
If you are installing the antennas yourself, follow the Step-by-Step guide.
Step-by-Step Guide
Step 1: Take your AutoPi and flip it so you can face the bottom of the device. Unscrew the bottom cover of the device and get out the shield that was previously installed and disconnect the internal antennas.
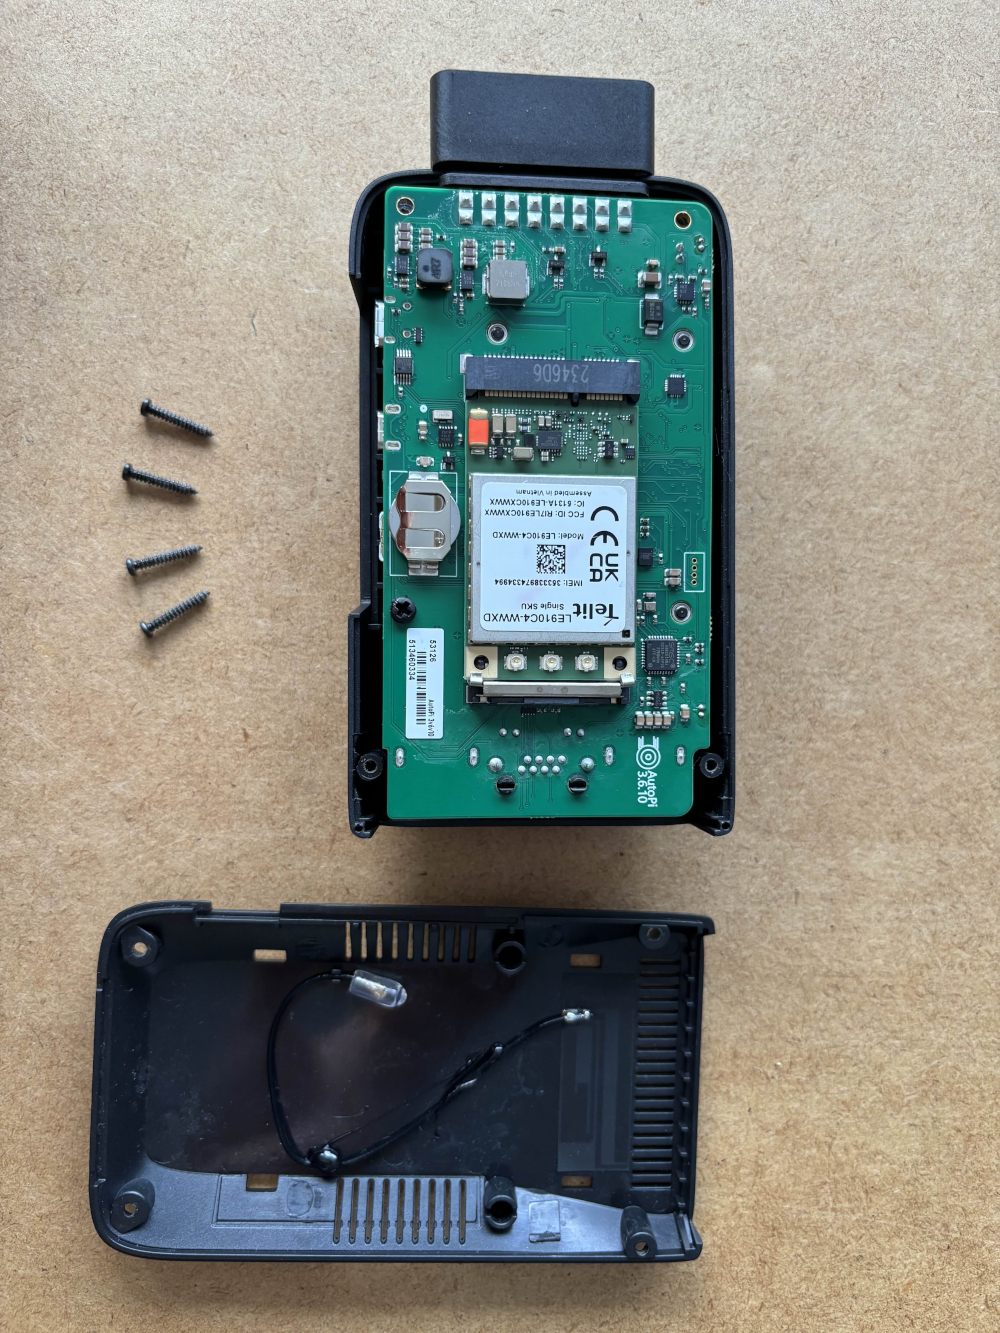
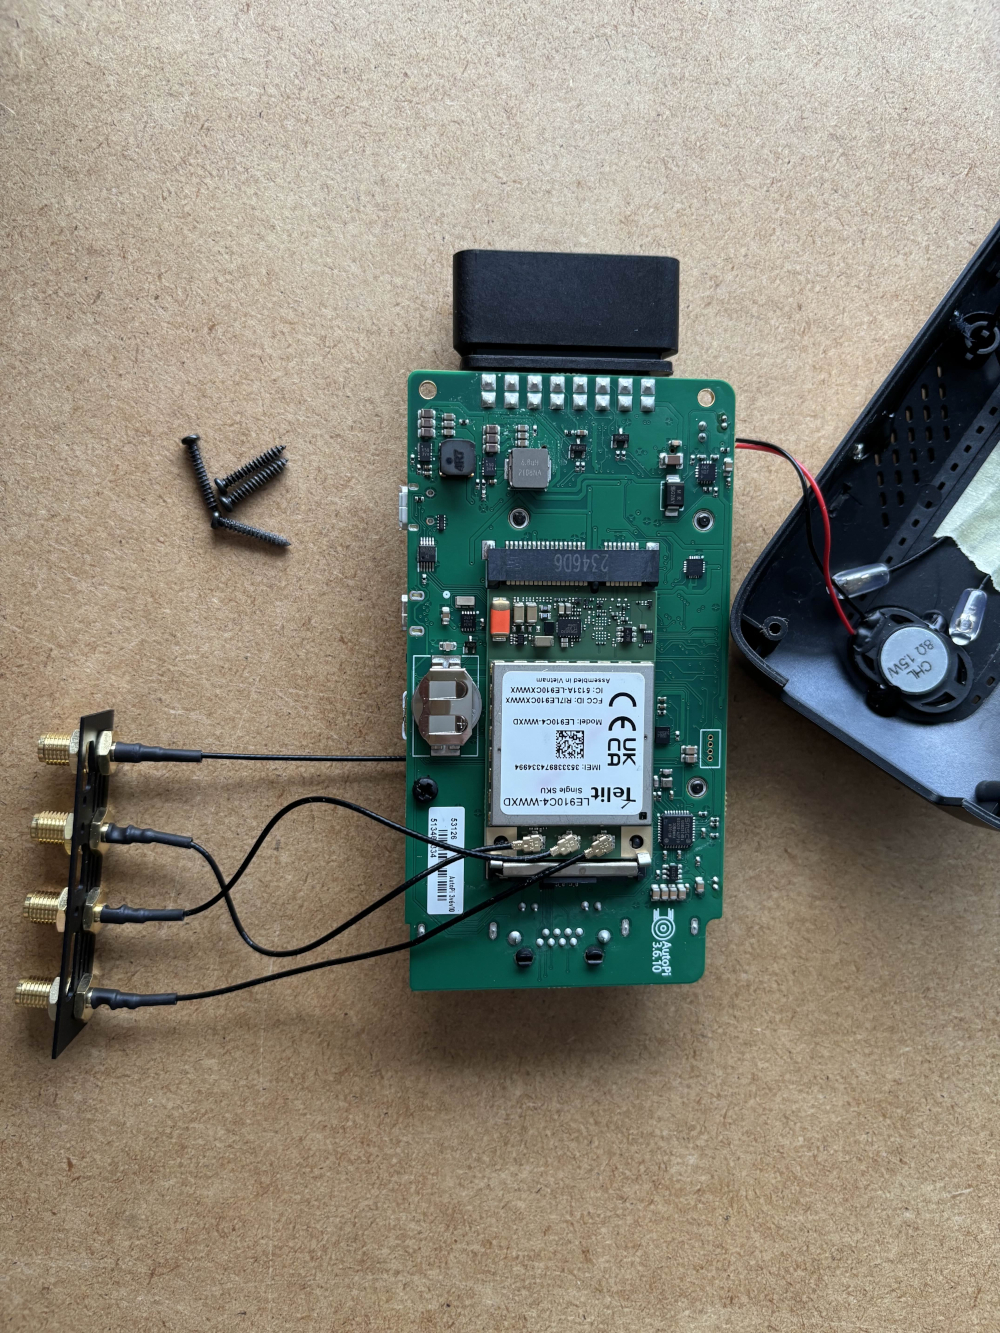
Step 2: The first antenna we need to install is the BLE/WiFI antenna. This is the left most antenna on the shield, seen from the outside. The u.Fl. connector connects to the Compute module as shown in the picture.
Step 3:
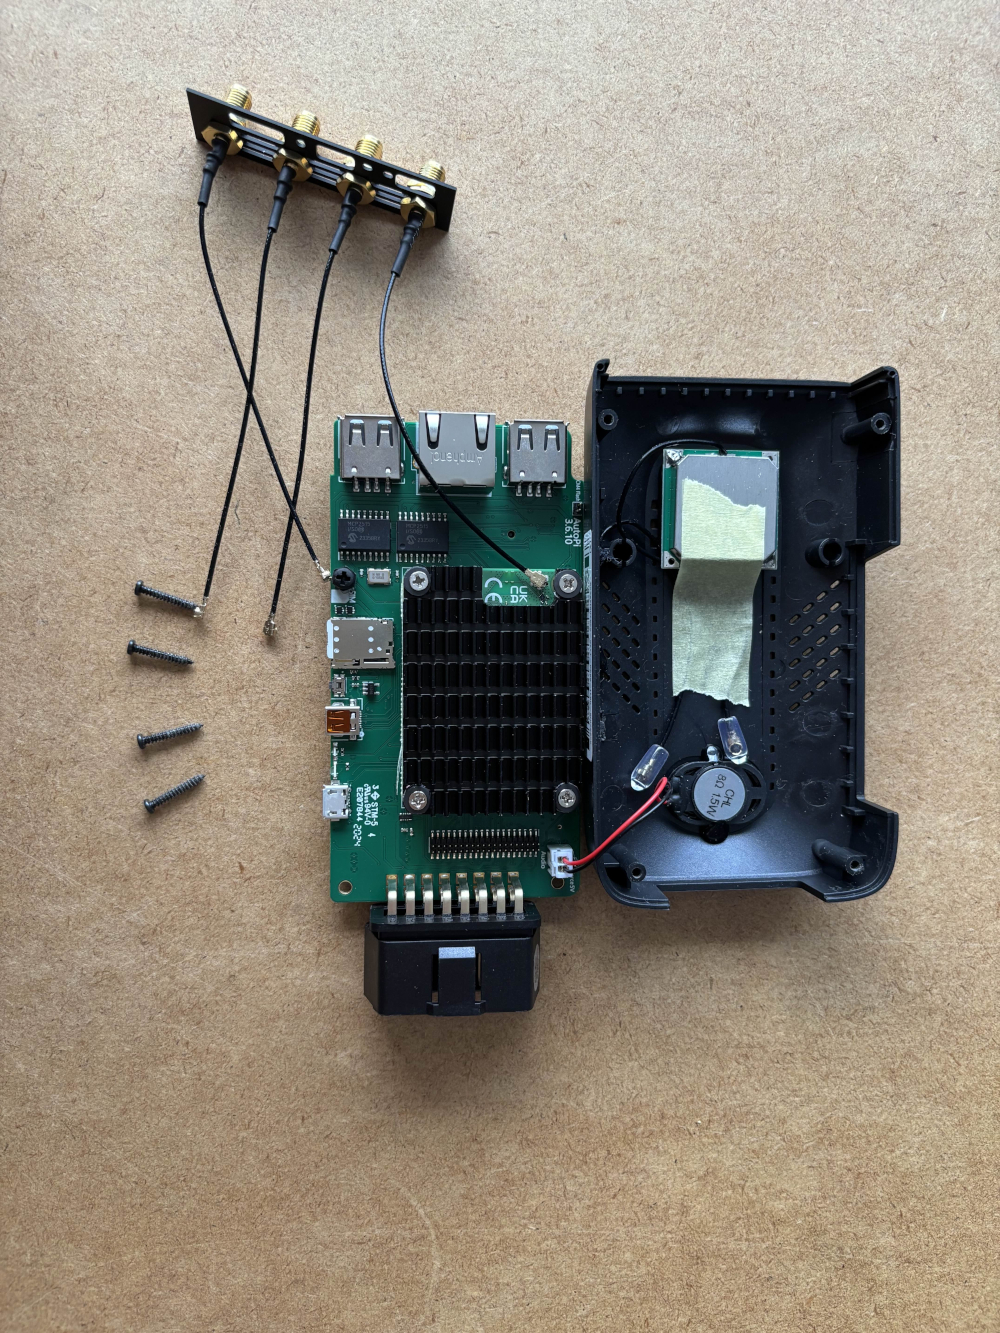
Next we need to connect the antennas to the modem. Plug in each of the antennas in their respective socket as seen in the picture bellow:
- The GPS antenna should be connected to the left side connector of the modem
- The middle antenna (Main 4G) should be connected to the middle connector of the modem
- The right antenna (Alt. 4G) should be connected to the right connector of the modem
Step 4:
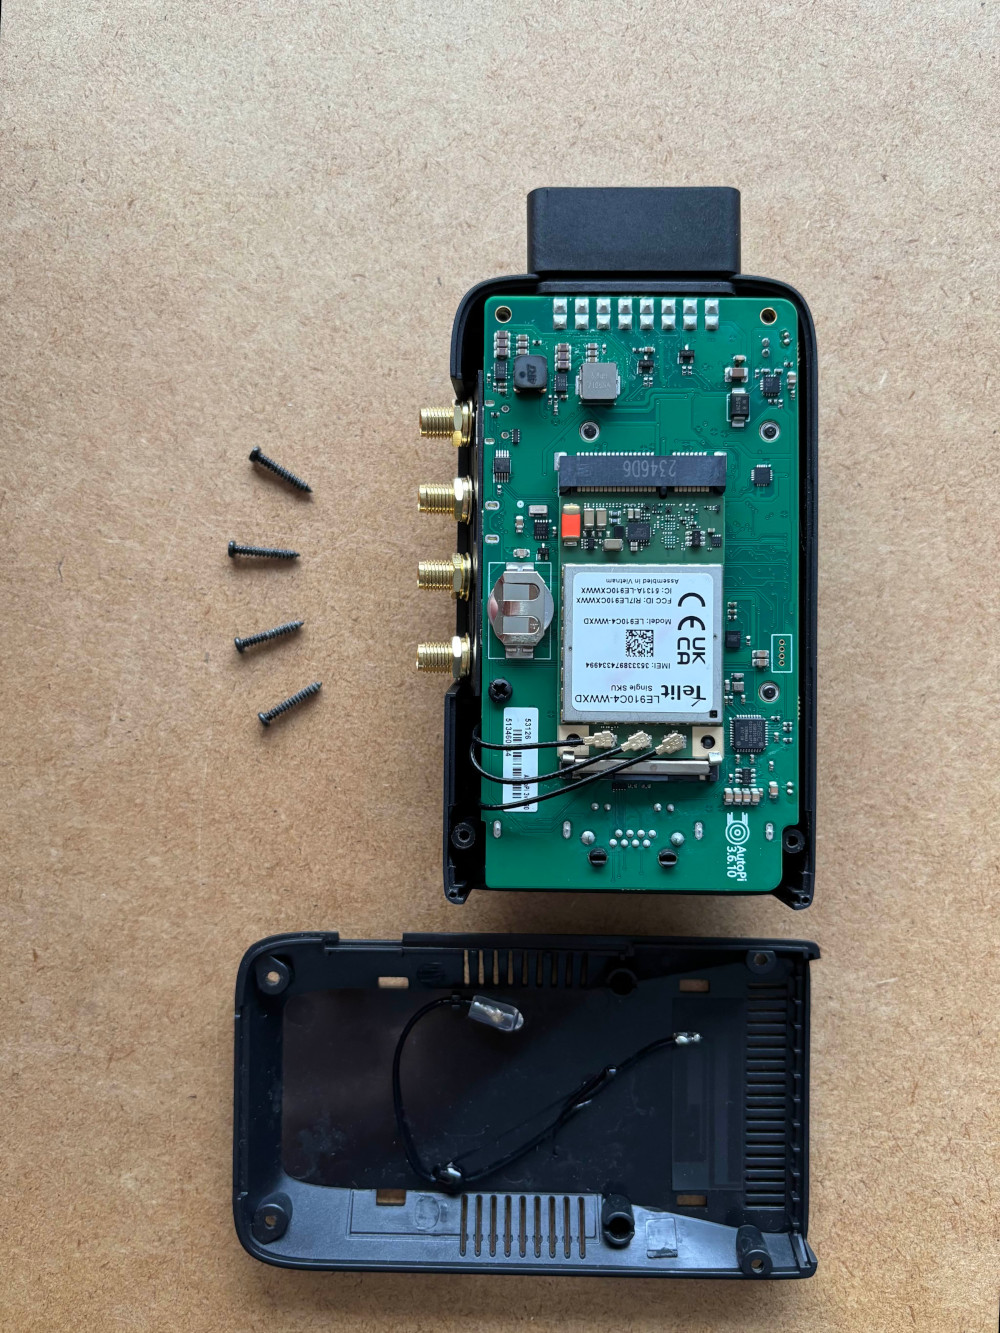
Carefully insert the new SMA shield in the side of the device.
Note:
Please make sure that the antennas are not stuck in between the casings or that they are accidentally screwed in when you put back the screws in the casing. Once installed,
don't tighten the SMA nut anymore because the cables will twist and be damaged in the interior of the device.
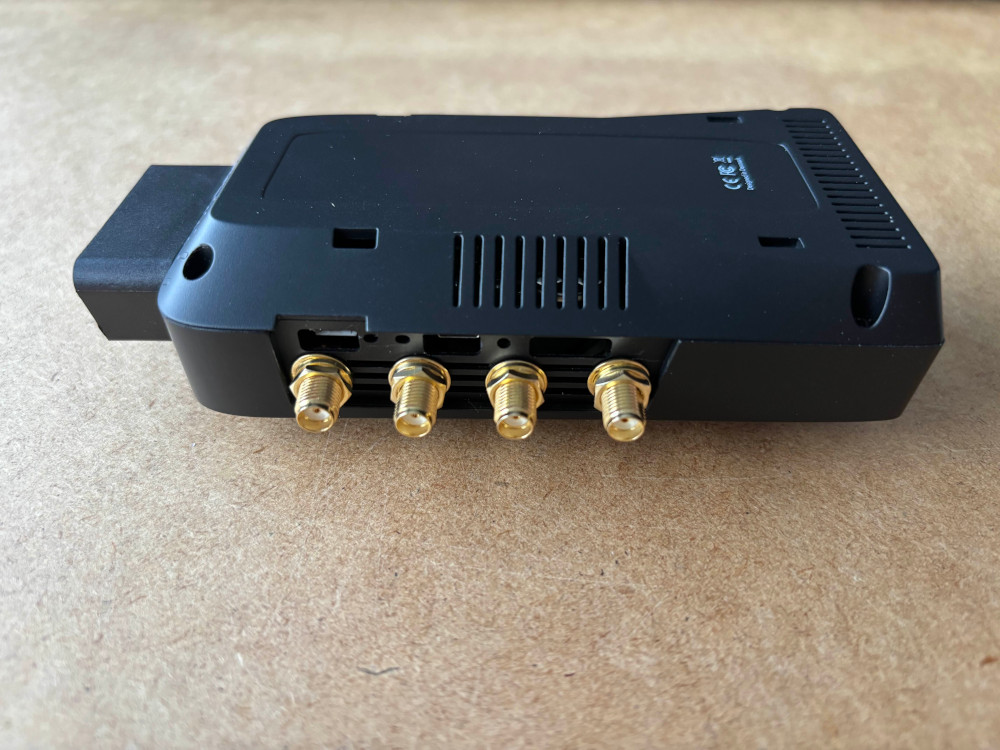
Step 5: Screw back in the four metal screws that you took out in the beginning. You don’t have to worry about where to put them as they all have the same dimensions. Check that all the components are placed in their place and that there are no spaces between the casing!
Disscussion
You have now successfully installed external antennas in your AutoPi TMU CM4 device.
 Buy AutoPi device
 Compare all AutoPi devices