Install Heatsink
This guide is applicable to the following device / devices:
TMU CM4
Before proceeding with the upgrade
Please read the whole guide in order to have a good understanding of how all the components fit together.
You need to be careful not to tear or damange some of the cables when handling the casing of the device.
Step-by-Step Guide
Step 1: Open up the bag with the heatsink and the accessories.
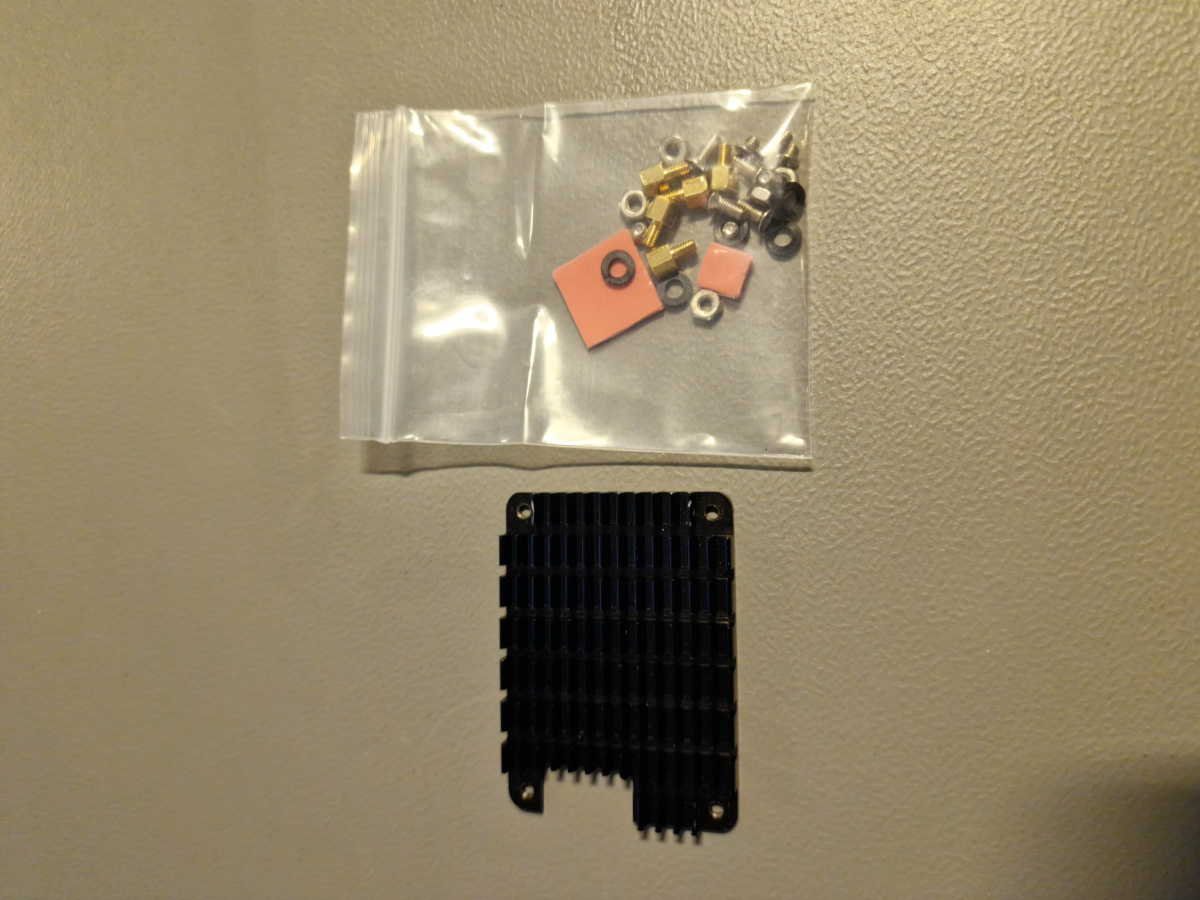
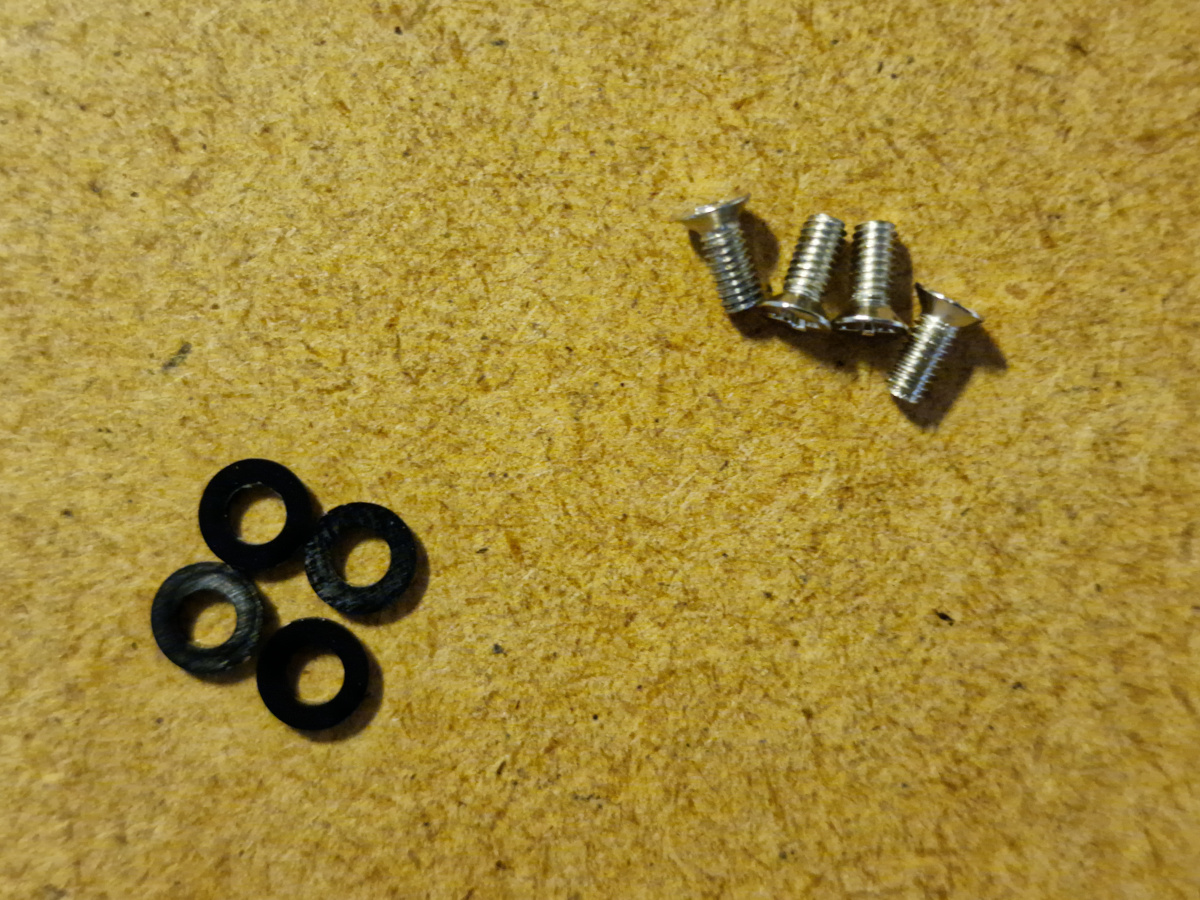
Step 2: Find the 4 metal screws and the 4 spacers.
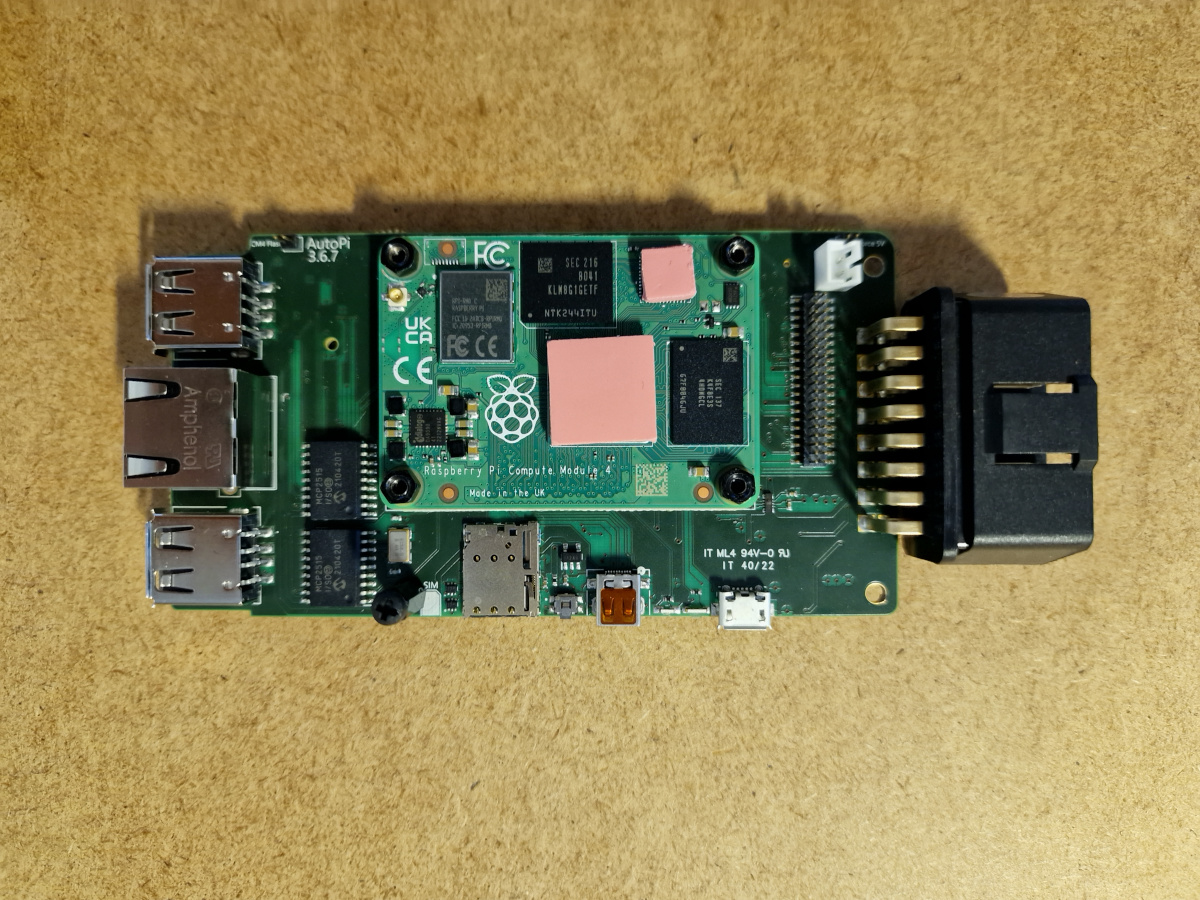
Step 3: Apply the thermal tape to the Ethernet IC and the CPU as show on the image.
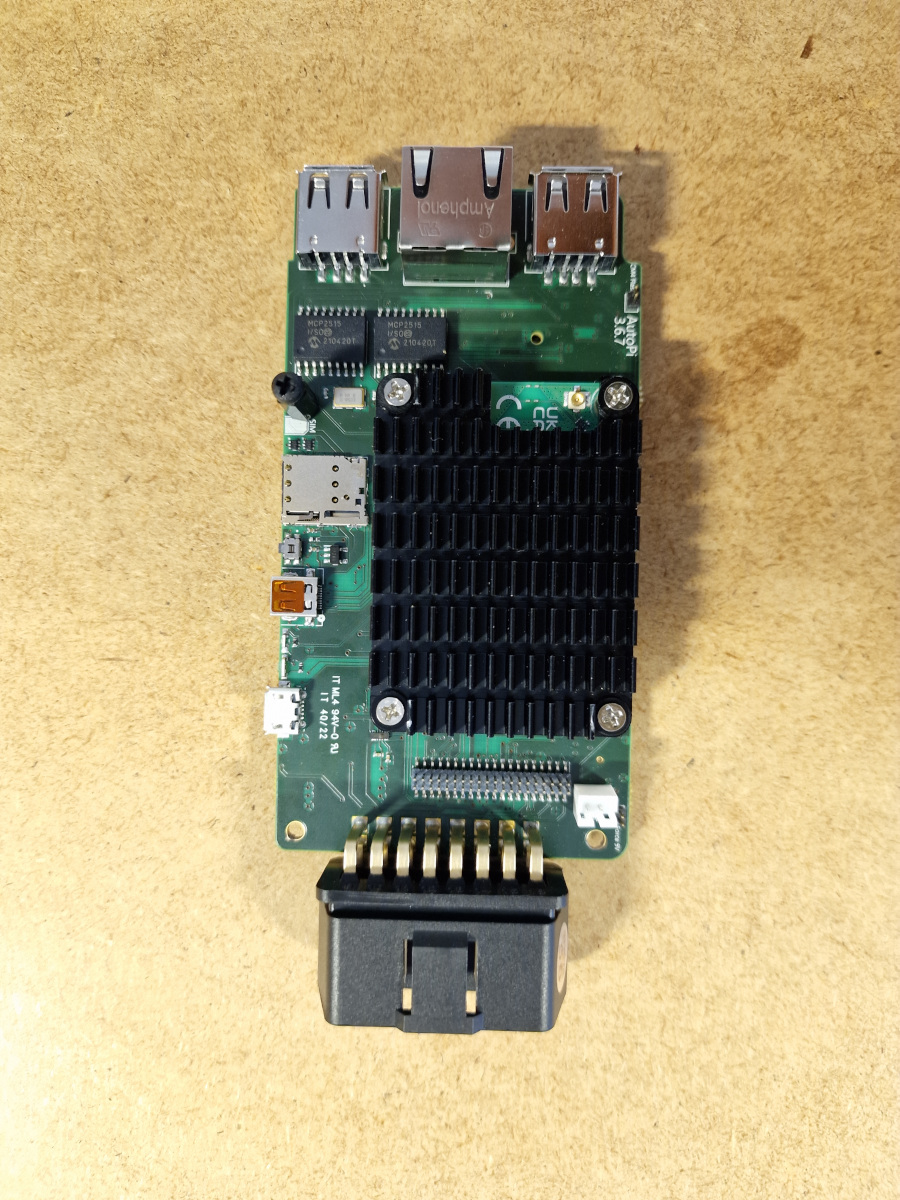
Step 4: Fix the heatsink on the thermal tape and fasten it using the metal screw. Remember to use the spacer between the screw and the heatsink.
Disscussion
You have now successfully installed a heatsink onto your AutoPi TMU CM4 device.
 Buy AutoPi device
 Compare all AutoPi devices
 Contact our sales team