Getting Started
Welcome to AutoPi!
This step-by-step guide will help you set up your AutoPi TMU CM4 4G/LTE Edition. The device comes pre-assembled with the SD card inside and requires just a few steps to complete the installation.
note
Important Notes Before You Start
The AutoPi Telematics Unit is a highly customizeable and technical device. It contains a direct interface to your car and communicates with the ECU in your car.
- Power Off the Vehicle: When inserting the device for the first time, ensure that the vehicle is powered off.
- Vehicle Must Be Parked: When working on and customizing your device, make sure your vehicle is in the parked position.
- Do Not Remove the AutoPi While Driving.
- Power Source: The device can only be powered through the OBD-II port. Powering the Raspberry Pi directly is not supported and may cause issues.
- Advanced Settings Caution: When updating the Advanced settings, ensure you understand what you are doing, as changes can affect the performance of your car and its battery.
1. Setting Up User Account#
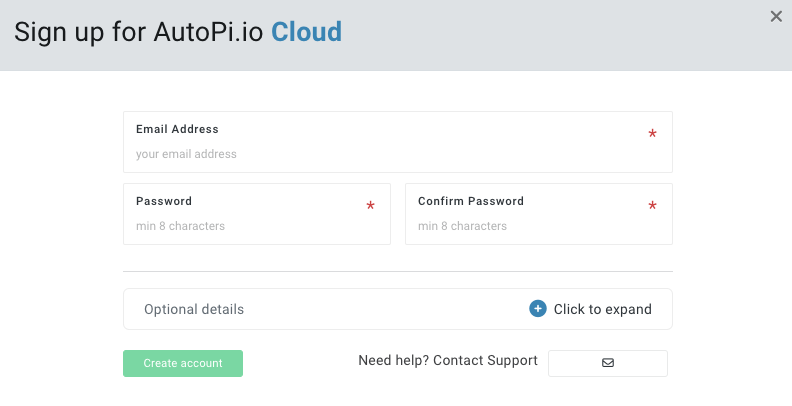
Once you have received your AutoPi device it is important to associate it with Cloud Platform. Go to my.autopi.io and click “Sign up”. In the pop-up, add the e-mail address you want to associate with your account and create a password. You can also expand the form to add additional details like your country and full name, though this can be done later. Click “Create account”.
2. Register Your Device#
After creating an account, you can access the Cloud Platform features for fleet and device management. The next step is to register your device to unlock the platform’s full potential.
To add a device to your account, follow one of these methods:
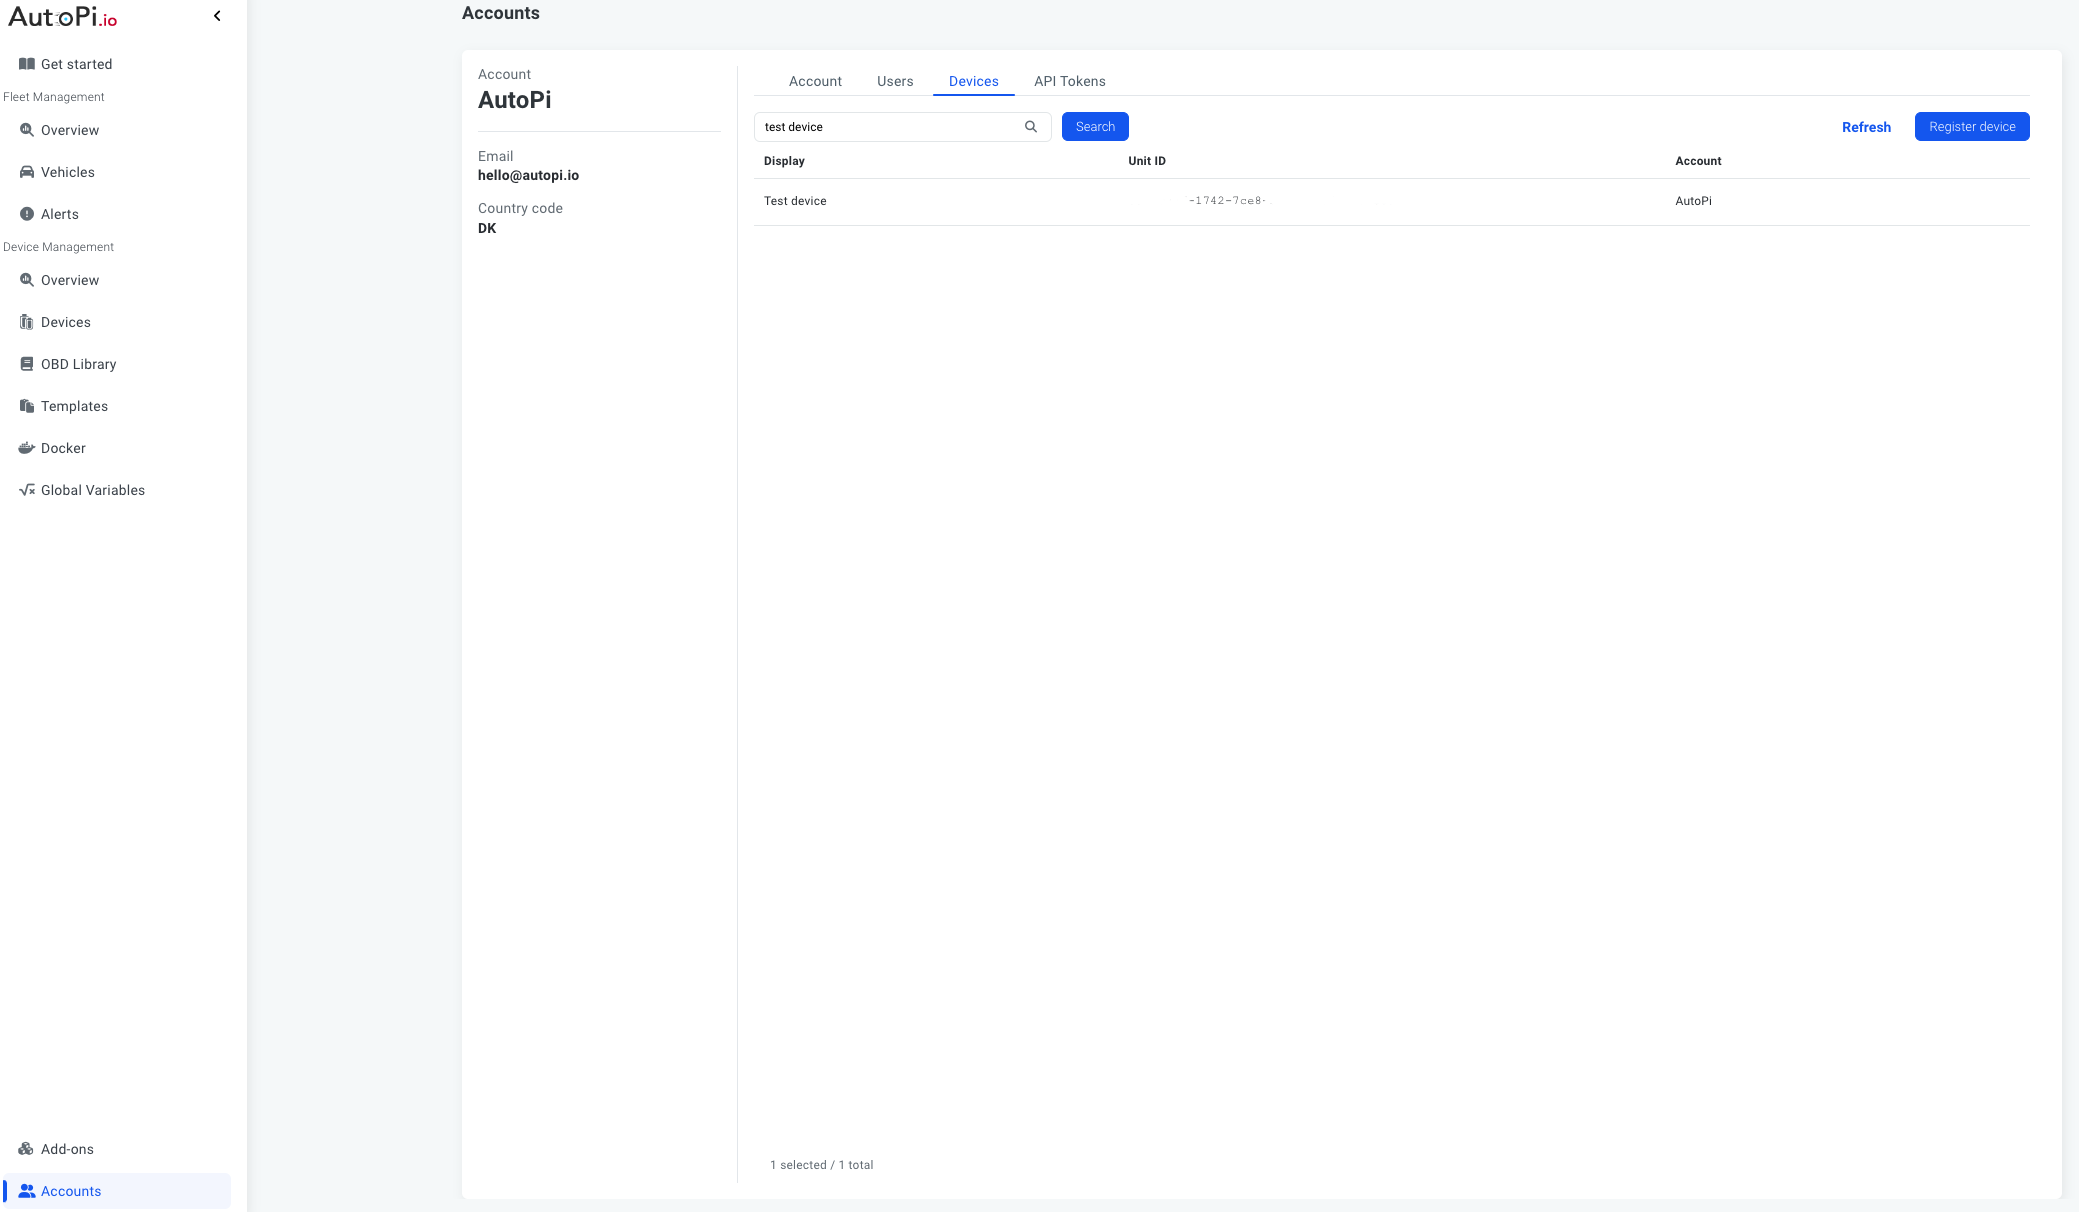
Option 1: Via the Accounts Tab
- Navigate to the “Accounts” tab at the bottom of the left side menu on the Platform.
- Select “Devices”.
- Locate and click the “Register Device” button in the upper right corner.
Option 2: Via Device Management
- See the “Device Management” section of the Platform.
- Click on “Devices”.
- Find and click the “Register Device” button in the upper right corner.
After clicking the “Register Device” button, the registration tab will appear. Enter all necessary information:
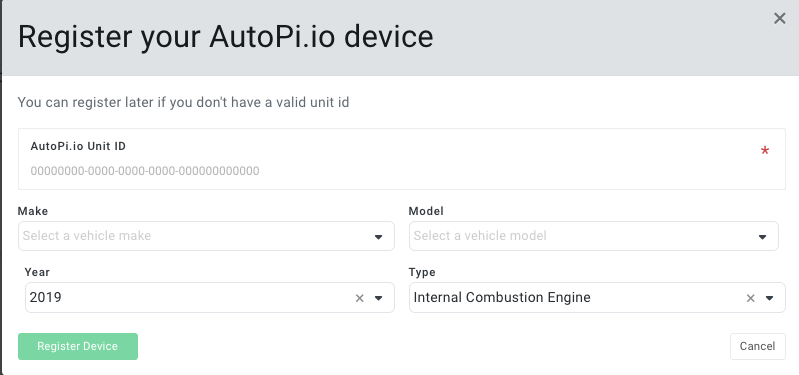
- Unit ID: This is the number on the side of your device. You can also find it in the. document attached in the email you received when the device was shipped.
- Vehicle Information: Optionally include the make, model and year of the vehicle.
- Vehicle Type: Choose the type of vehicle (ICE, Battery Electric Vehicle, Hybrid Electric Vehicle, or Plug-in Hybrid Electric Vehicle).
Once all information is entered, click the “Register Device”. Your newly registered device will now appear in the list under “Vehicles” in the Fleet Management section and under “Devices” in the Device Management section of the Platform.
3. Locate OBD Port#
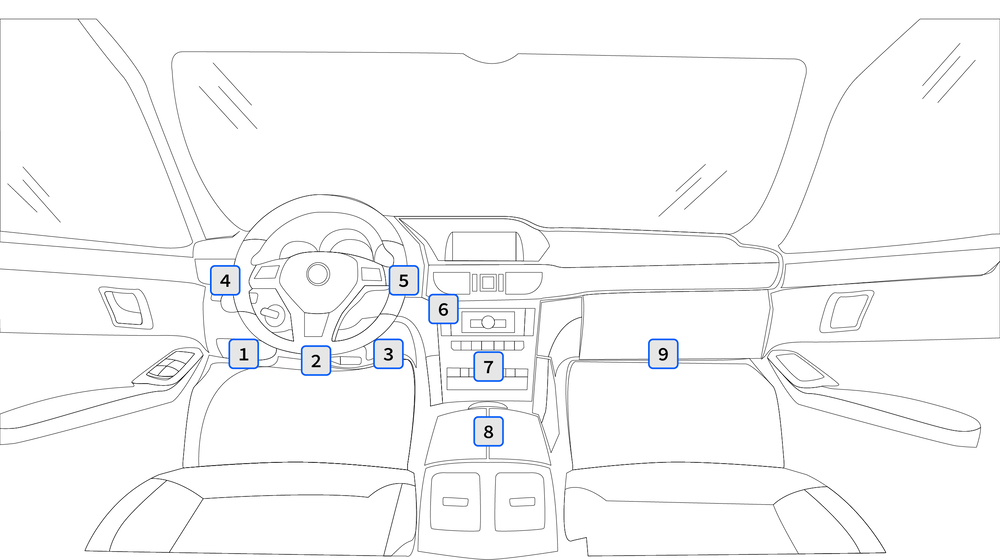
Next step is to install the device into your vehicle. Locate the OBD port in your car, it is usually found underneath the dashboard and looks something like this:
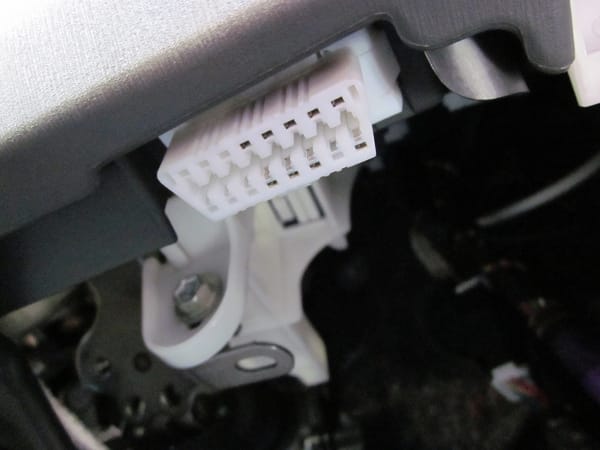
Please note that the location of the OBD port varies from make and model but is typically found in one of the locations shown below:
3. Installation#
When installing the AutoPi Mini, make sure the device is positioned with the logo facing upwards toward the sky. This is important because the GPS antenna is inside the device, and if it's not facing up, you might not get a strong GPS signal.
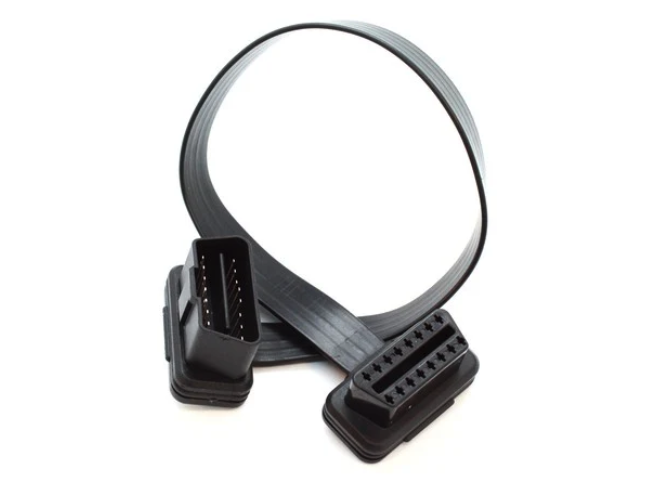
If the OBD port is in a difficult spot or gets in the way, you can buy an extension cable to place your AutoPi in a more convenient location.
This is the OBD-II extension cable:
You Are All Set!
Congratulations! You've successfully set up your AutoPi Mini device and connected it to the AutoPi Cloud. Your device is now ready to start gathering and transmitting data, enabling you to take full advantage of the powerful features AutoPi offers. Take your device for a trip to start gathering data.
Need Help?
If you encounter any issues or have questions, don't hesitate to reach out to our support team at support@autopi.io.
Thank you for choosing AutoPi. We're excited to see what you’ll achieve with your new device!
The AutoPi Team