Accounts


Welcome to the Account Management guide. This section explains how to set up and manage your AutoPi cloud environment, including accounts, customers, users, devices, and access permissions. By the end of this guide, you’ll understand how to organize your platform efficiently while ensuring secure and controlled access for all users.
AutoPi Cloud uses a multi-tenant architecture, which means multiple accounts (tenants) share the same platform and infrastructure, while all data, configurations, and user access remain securely isolated.
Account
An Account represents your organization’s main account in AutoPi Cloud. Each account can have multiple customers, and you can easily create as many as needed.
Account Owner
The account owner is typically associated with the email address used to purchase the AutoPi devices.
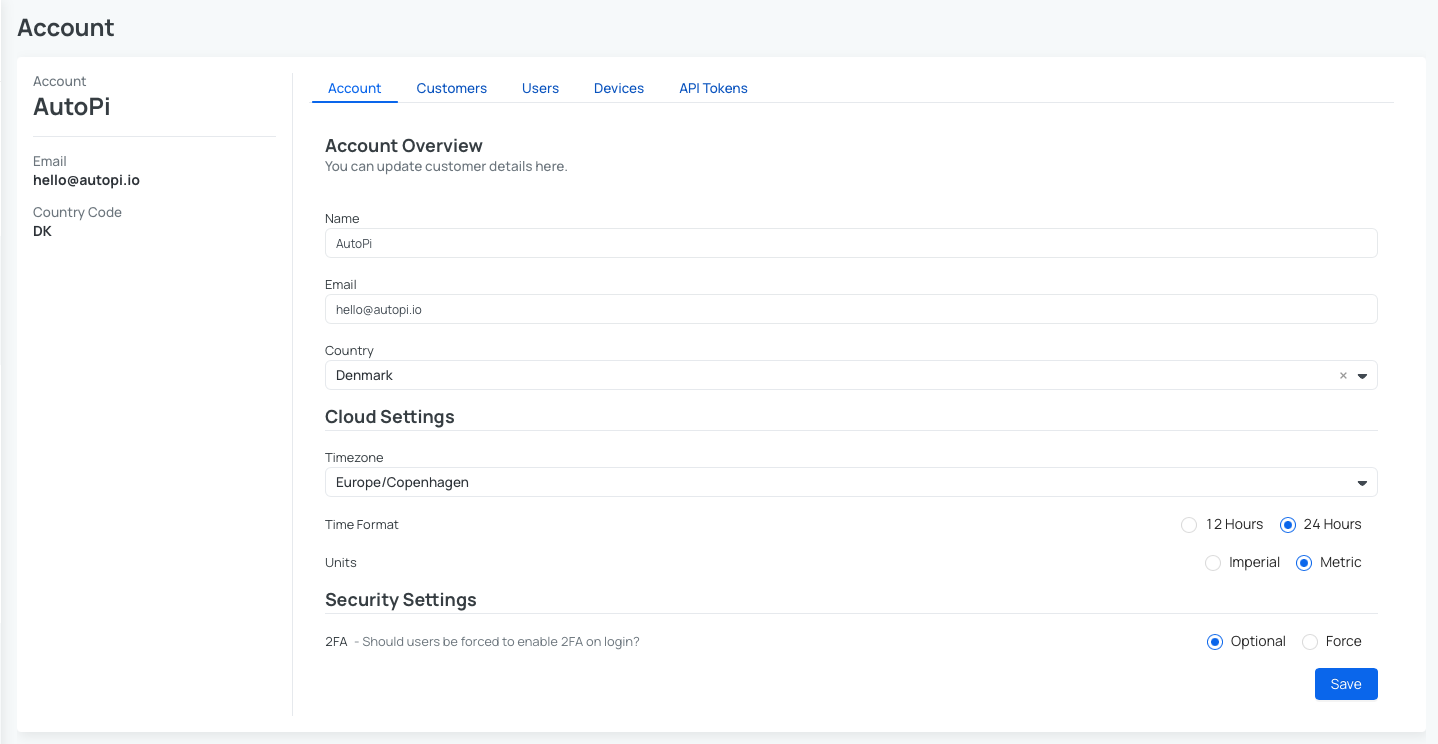
General settings for Account creation
When creating an account, you configure:
- Name, email, and country
- Cloud settings, including: Time zone, Time format and Units. These settings define how data is displayed across the platform.
Customers
Customer (Main Account) - The Customer is the top level in the hierarchy and usually represents a company. Customers are used to define the organizational structure within an account.
Example: If your company is called AutoPi, you would create a Customer named AutoPi HQ.
Nested Customer
Nested Customers (Sub-Accounts) - nested customers are sub-accounts under a main Customer. They are useful for companies with branches, departments, or divisions that need separate environments while remaining under the same main account.
The account section allows an account administrator to manage nested customers, which makes it possible to create an isolated account, assign devices and users to it, so that a customer can manage a fleet of devices, and it's own users.
It makes it possible to have a structure like this:
Customer
    users:
        |_ user admin
    accounts:
        |_ nested customer A
            users:
                |_ user A
        |_ nested customer B
            users:
                |_ user B
The permissions model follows a top down approach, and only in that direction, this means that any users created on the nested customers, will only ever be able to see the devices directly associated to that account, at most, ie. full device access for a user on a nested account will see only the devices actually associated to the account, and not devices from the parent account / top account.
So in the example above, user A can only see devices in the nested customer A
account, and the same for user B, but the admin user can see devices from both
the top account, and any nested customers.
Create customer

To create a new (nested) customer:
- Go to Accounts page and click on Customers tab.
- Click Create in the right upper corner.
- Enter the company name, main work email, and country.
- Configure cloud settings (time zone, time format, units).
- Specify the security settings.
- Confirm by clicking Create.
- A confirmation pop-up will appear once the customer is created successfully.
Assign Devices to the New Customer
Steps to assign devices to a customer:
- Click Devices under Accounts page.
- Click Manage devices in the upper-right corner.
- Choose a newly created customer.
- Now select one or more devices from the dropdown, or toggle the mode below the dropdown to input the unit id or device ids and find the desired devices.
- After you are done with choosing devices, click Process. The devices are now re-assigned to the new customer.
Create an Administrator User On the New Account
Steps to create an administrator account:
- Click the Customers tab.
- Click the customer that was created and you want to create an admin for.
- Click Users to manage the users for the customer.
- Click Create.
- Now create a new user, and remember to set the account to have
Account Administratorgroup permission, this will make the user have access to the assigned devices, and also to manage the users on the customer.
You should now have a nested customer with some devices associated, and admin user.
Users
Users are the people who log in and interact with the platform. You can create multiple users under any Customer or Nested Customer. With users, you can:
- Set permissions (groups)— decide who gets access to what.
- Assign users to locations — make sure they only see the data they need.
- Keep control — users under a Nested Customer won’t see data from the higher levels.
Creating or editing a user
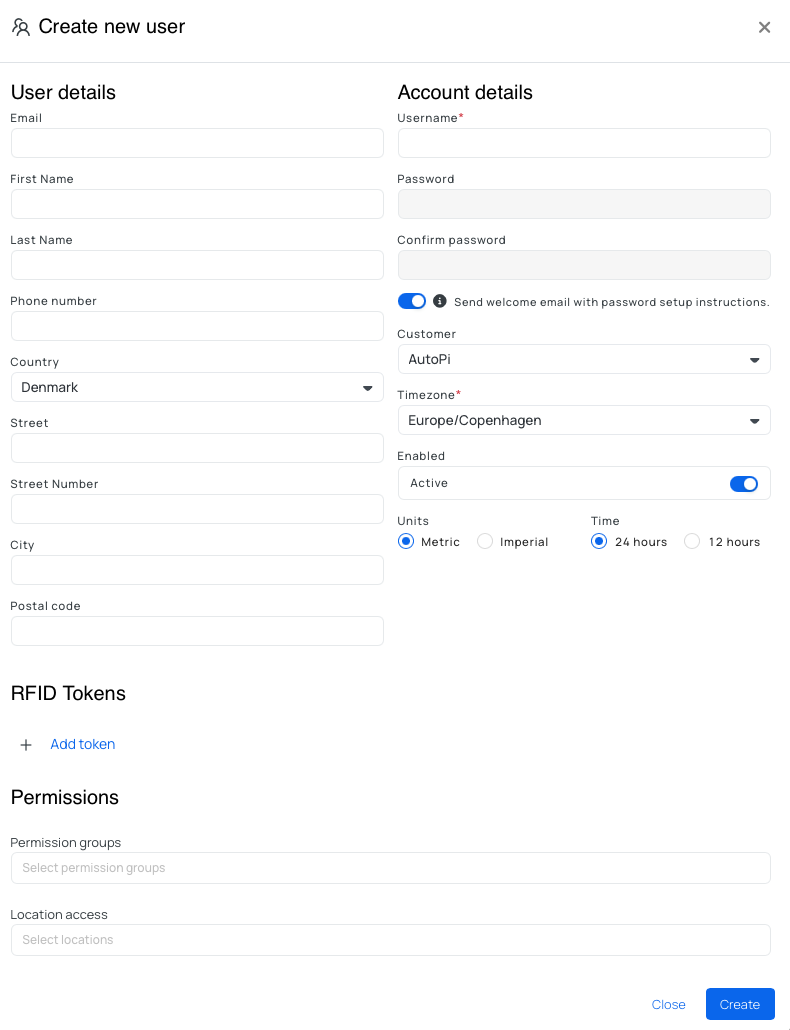
To create a user:
- Go to Users and click Create
- Enter the user’s email and username
- Choose how to handle the password:
- Send a welcome email (recommended): sends setup instructions automatically
- Set a password manually (users should change it after first login)
- Select the Customer or Nested Customer the user belongs to
- (Optional) Add additional details such as full name or phone number
- Set the user status:
- Active – user can log in (default).
- Inactive – user cannot log in.
- Click Create.
Modifying User Permissions
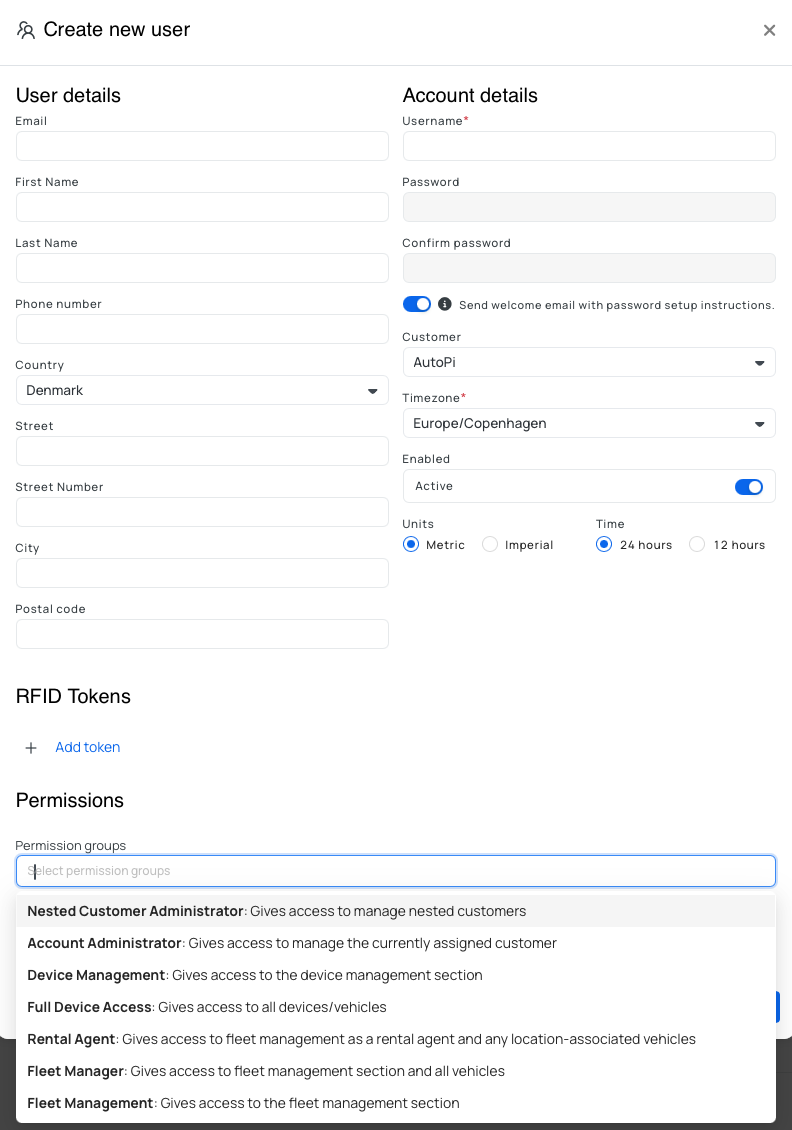
Permissions define what actions a user can perform. Users are assigned to permission groups. Available permission groups include:
1. Account Administrator - manages the assigned customer account. This permission is best for team leaders managing users.
- Can create/edit/delete users.
- Manage permission groups associated with the users.
- Access only to the Users and Accounts tabs (limited view).
2. Full Device Access - access to all devices and vehicles. This permission group needs to be paired with Device Management or Fleet Management to be fully useful. This permission is best for device specialists or fleet managers handling all vehicles.
3. Device Management - full access to the Device Management section of the cloud including Overview, Devices (no devices listed unless paired with Full Device Access), OBD Library and Templates. When combined with Full Device Access, you get the full device list and settings control. This permission is best for technicians managing devices directly.
4. Nested Customer Administrator - manages nested customers (sub-accounts). This permission is best for admins overseeing sub-branches or regional accounts. This permission works alongside:
- Fleet Manager — to create new nested customers and users.
- Account Administrator — to handle user creation.
5. Fleet Management - access to the Fleet Management section of the cloud including Overview; Vehicles - Vehicles List,Geofences, Groups; Locations; Reports; Users; Diagnostics; Alerts and Configurations - Dashboards, Fault Codes, Notification Channels, States. This permission is best for fleet managers that needs full access to their fleet.
6. Access Control Management - access to the RFID token history. This feature is an add-on and therefore if you are interested in using this, you can contact us at sales@autopi.io .
Assign Locations to Users
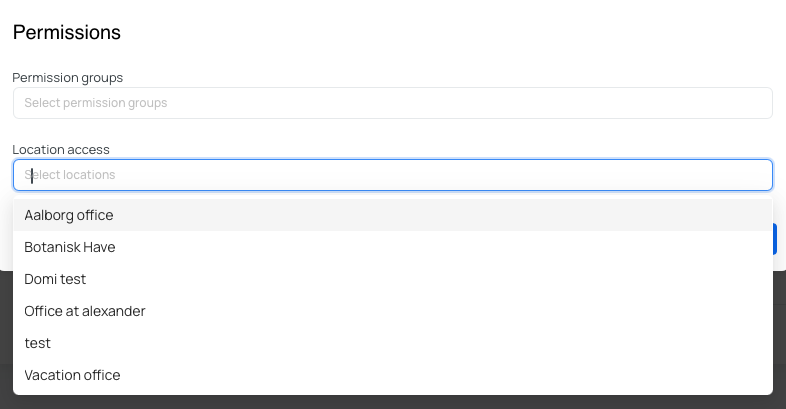
If you use Locations, users can be assigned access to one or more locations. This ensures users only see relevant data to the associated location. Learn more about Locations here: Locations
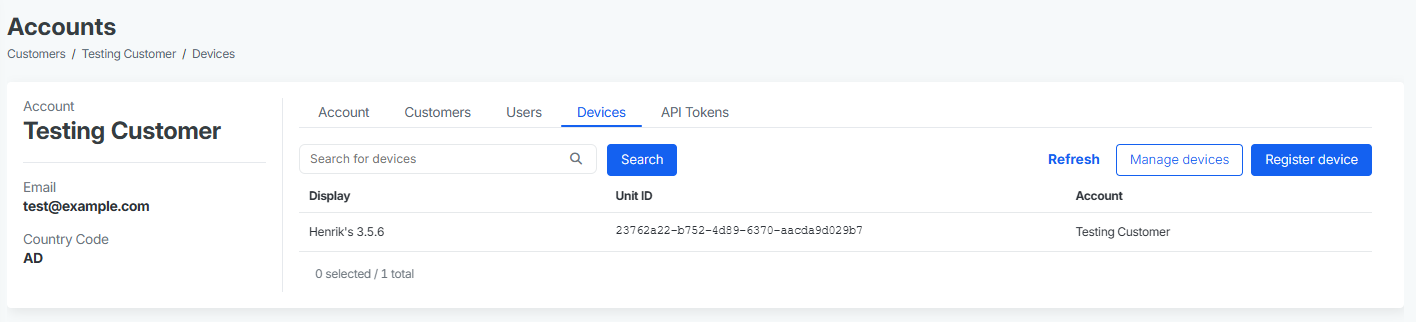
Devices
The Devices section lists all devices associated with your account. Clicking a device name opens its overview page. Key actions include:
- Register device - add a new device to the account.
- Manage devices - manage the devices within the different nested customers.
API Tokens
API Token allows the user to access the AutoPi's REST API. API tokens can be used in many ways, below are some examples:
- Getting started with REST API
- Command webhook callbacks
- Change device's settings from the REST API
- Export data from API
- Forward device data to your own server
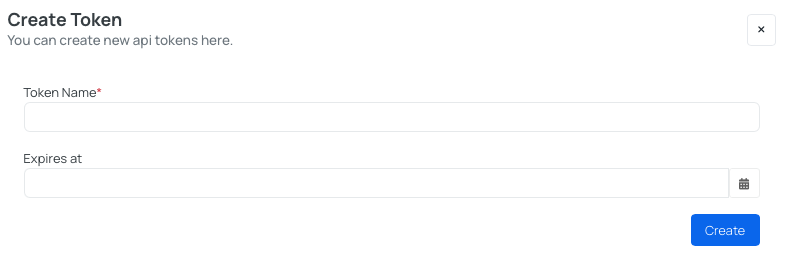
To create a token:
- Go to API Tokens tab.
- Click create.
- Enter a name.
- Select an expiration date.
- Press create.
--
Profile Settings

Profile
In your profile settings, you can:
- View your email address and username
- Adjust cloud preferences: time zone, time format and units. These settings affect how timestamps and data are displayed across the platform.
- Change your password.
Security
For enhanced security, AutoPi Cloud supports Multi-Factor Authentication (MFA):
- Use an authenticator app of your choice to protect your account.
- Users with Account Administrator permissions can enforce MFA for all users during login. This helps ensure secure access to your platform and data.
 Buy AutoPi device
 Compare all AutoPi devices
 Contact our sales team