Developer Kit
In this guide we will explore how you can get started with your AutoPi Developer Kit. We will talk about how to get the device some power, what you're able to connect to it and how to get the antennas attached.
Power
Let's start off by getting the power sorted out. Included in your developer kit, you have a power cable, one side of that power cable is a female OBD-II port and the other is a female DC connector. This is the cable we're going to use to provide power to it. On one side, plug the AutoPi device (OBD side) and on the other - your DC power supply.
You can connect the OBD side of the power cable to your device and use the DC connector to easily switch on and off the power provided to the device. It is easier than plugging and unplugging the OBD-II port.
NEVER connect a micro-USB power cable to the Raspberry Pi's power input port. The intended way for the AutoPi to receive power is through the OBD-II port. Connecting a micro-USB power cable to the Raspberry Pi will likely result in a short-cirtuit.
Connectivity
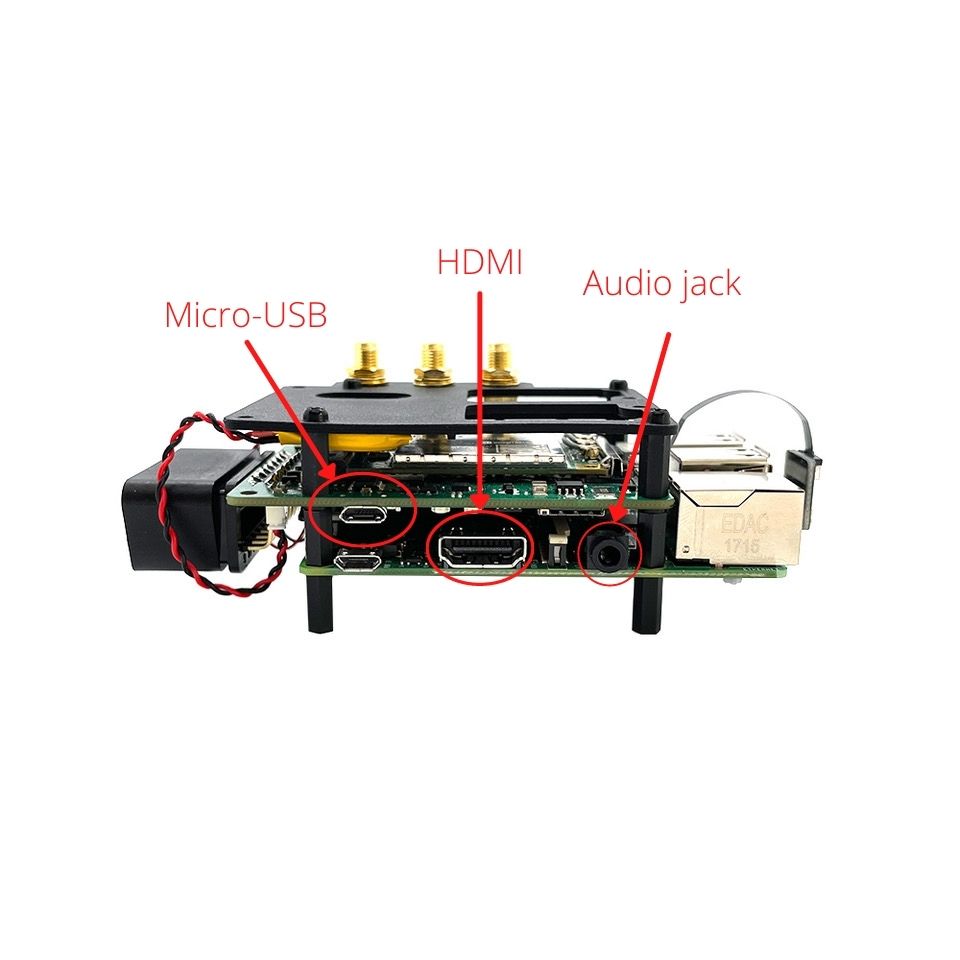
The AutoPi has three IO ports:
- Micro-USB cable, which you can use to connect any usb device to your AutoPi.
- HDMI, which you can use to connect a monitor to your AutoPi.
- Audio jack, which you can use for headphones or speakers.
Antennas
The developer kit also has included three antennas. Two of the antennas look the same, they are the antennas for 4G/LTE connectivity. The third, longer one, is the GPS antenna. Usually, we recommend to place the GPS antenna as close to a window as possible.
The GPS antenna port is located in the middle, between two 4G/LTE antenna ports. Here is an image that shows those ports.
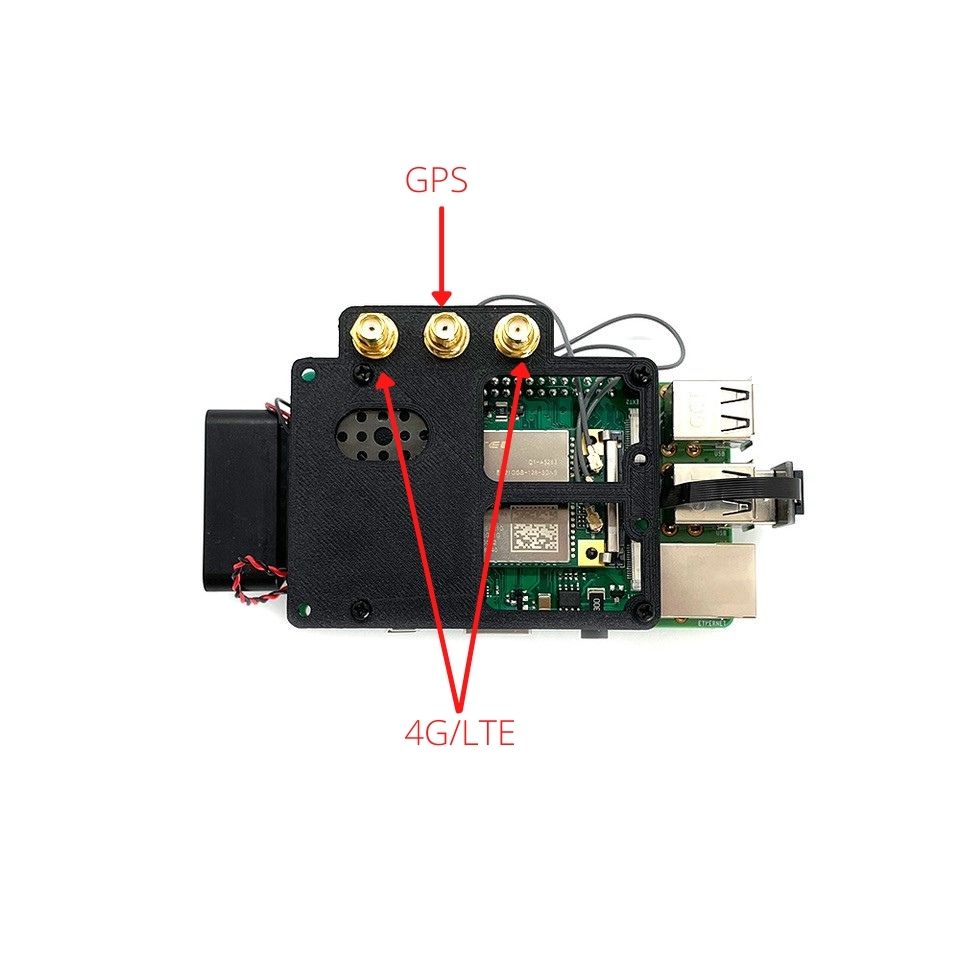
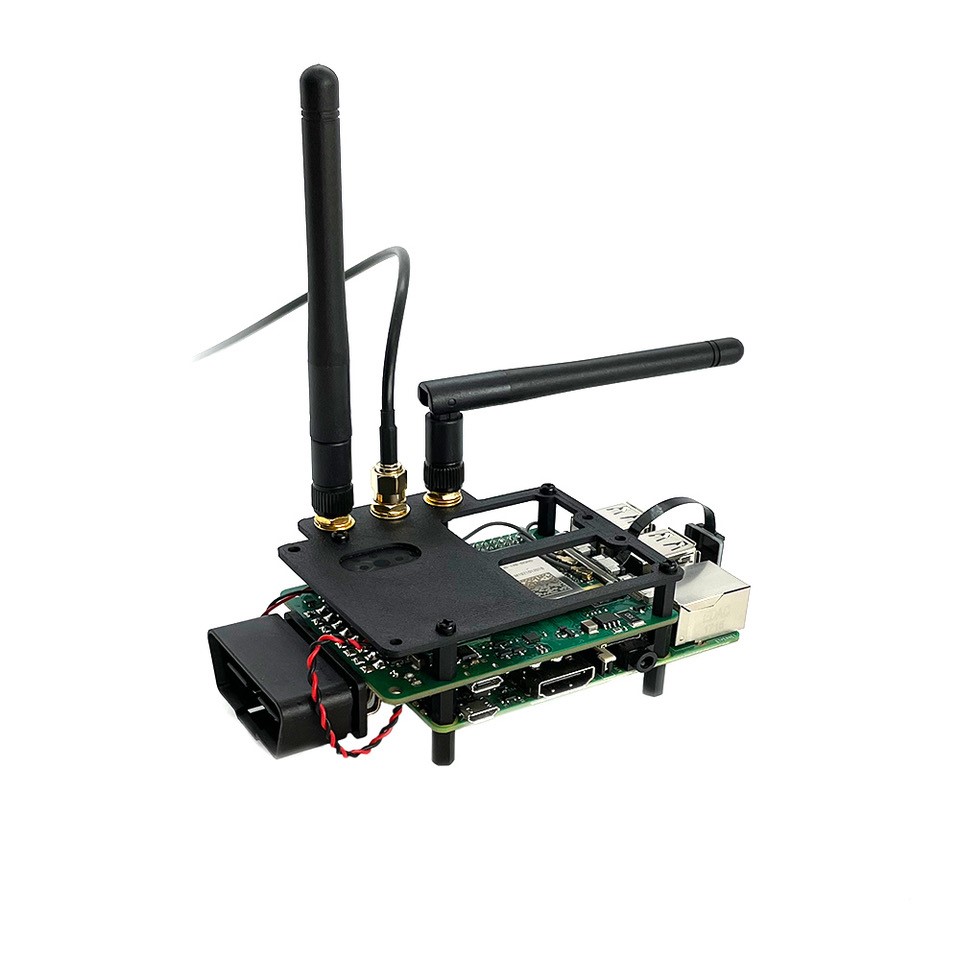
In the middle port, connect the GPS antenna. On the two ports on the side, connect the 4G/LTE antennas. After you're done, your device should look a bit like the following:
In case you have any questions, don't hesitate to contact us at support@autopi.io.
 Buy AutoPi device
 Compare all AutoPi devices