Setup your TMU DiY Edition
Congratulations on your AutoPi Device, DiY Edition! We're sure that you have some great plans on how to use the device to your liking, but of course, first, you need to set it up. This is a guide that shows the steps that need to be taken to get the device in running condition.
note
This guide is for TMU (Gen 3) DiY boards. For Gen 2 DiY boards, take a look at this guide.
Connecting the Raspberry Pi#
The steps you need to take are very simple. In this case, we are using a Raspberry Pi 3 A+, however this can work with a Raspberry Pi 3 B+ or a Raspberry Pi 4.
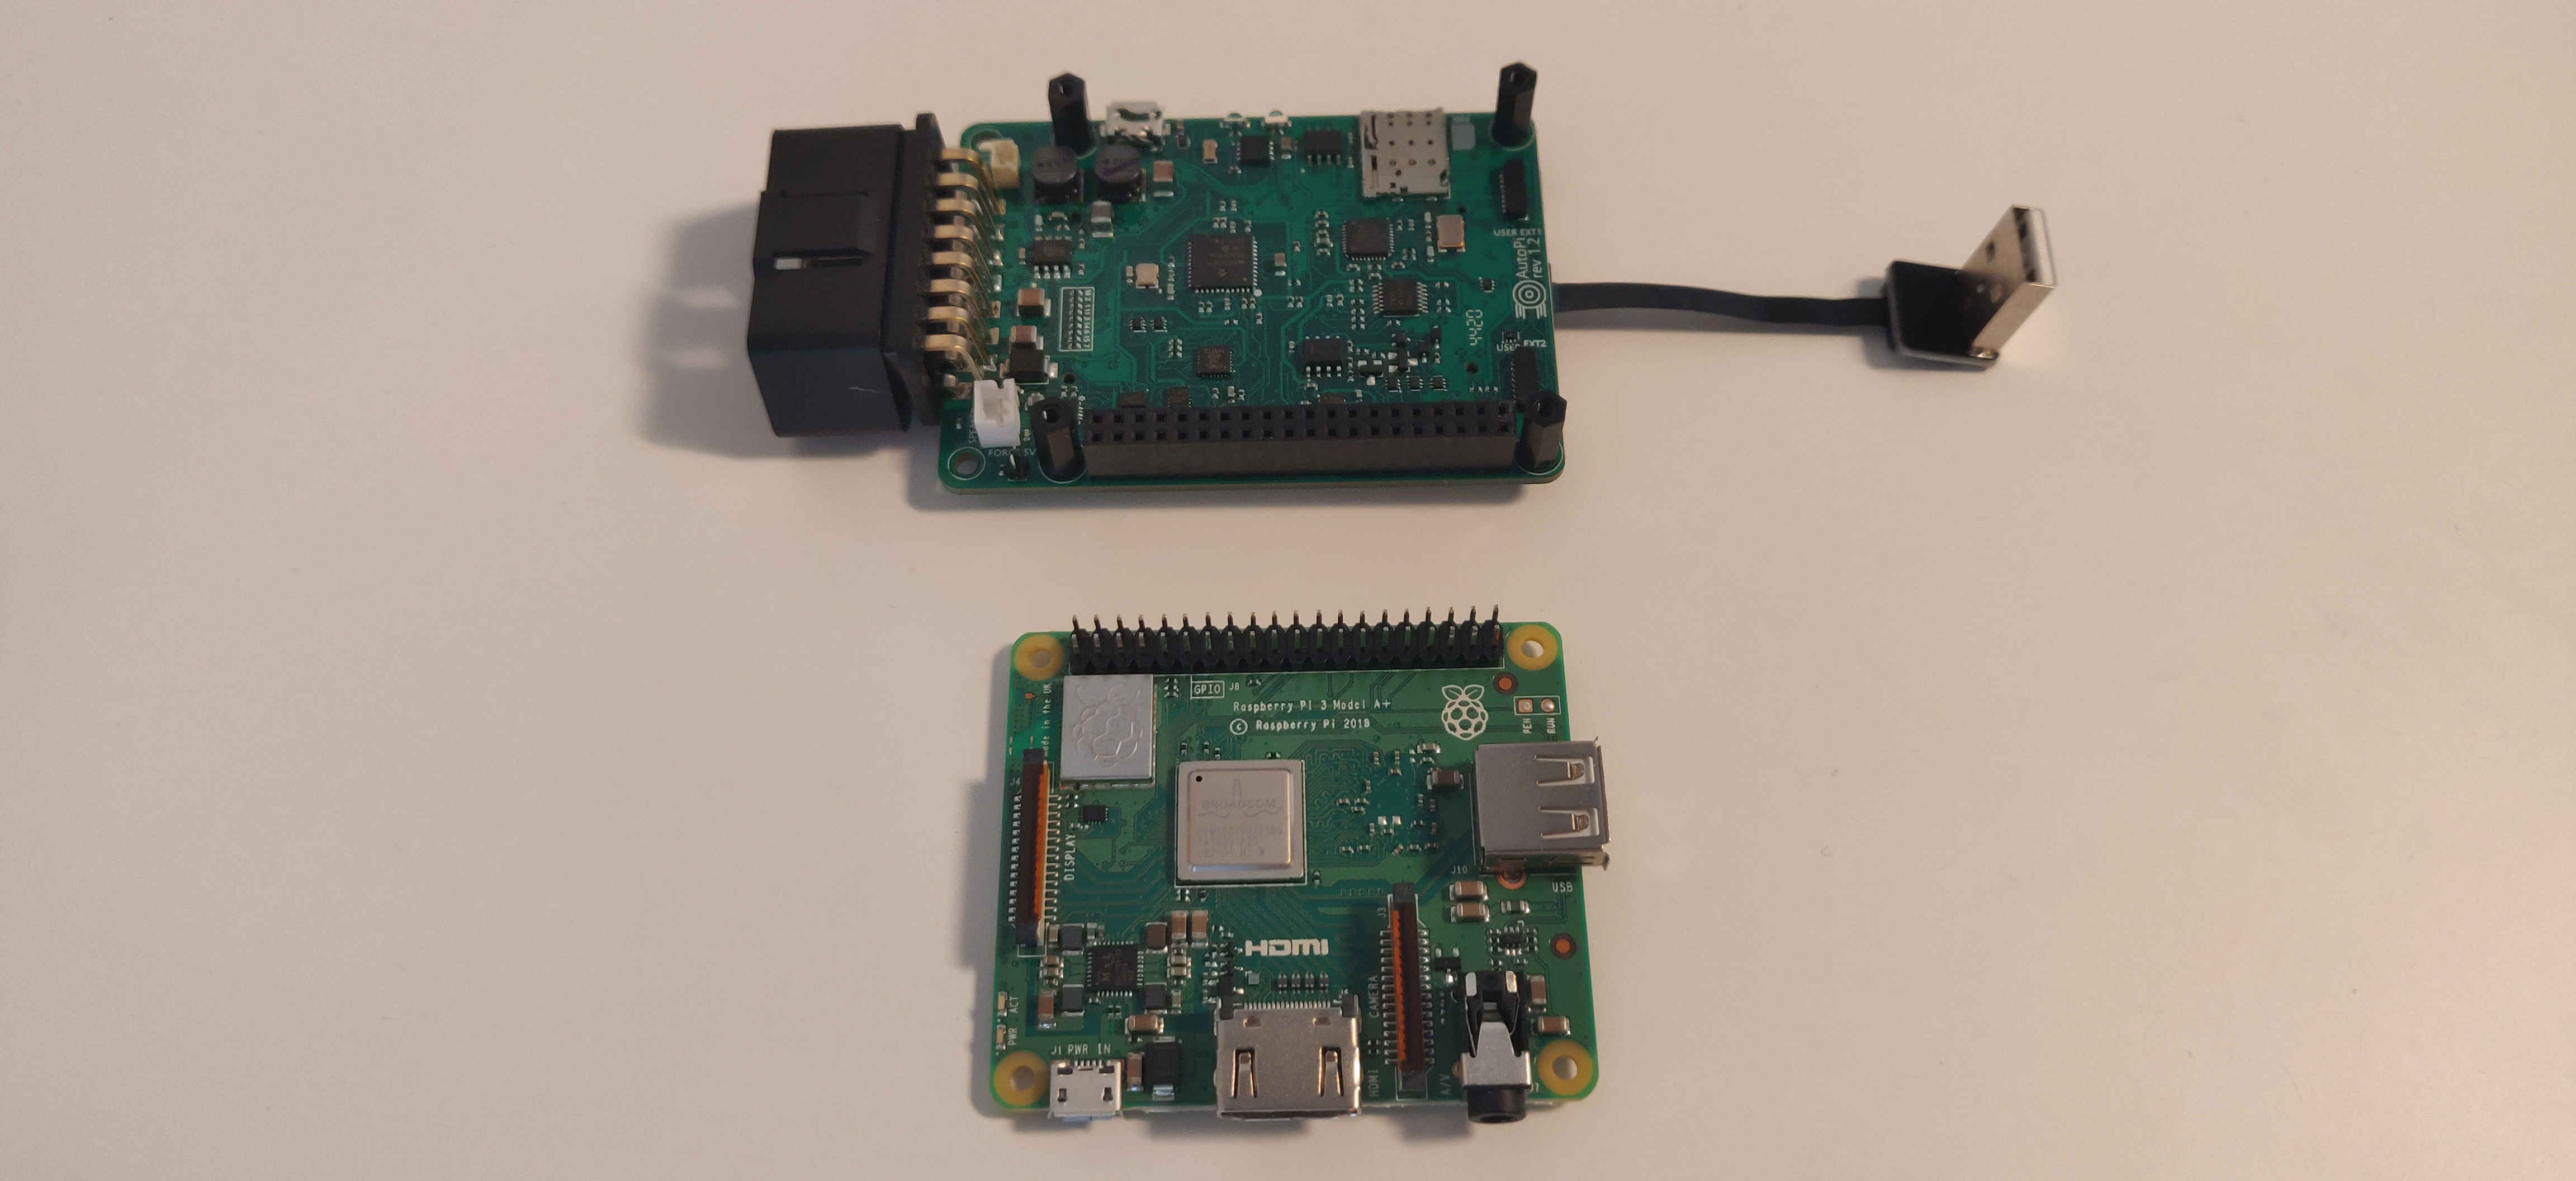
- Mount the Raspberry Pi on the AutoPi, connecting the pins of the Raspberry to the open holes in the AutoPi board.
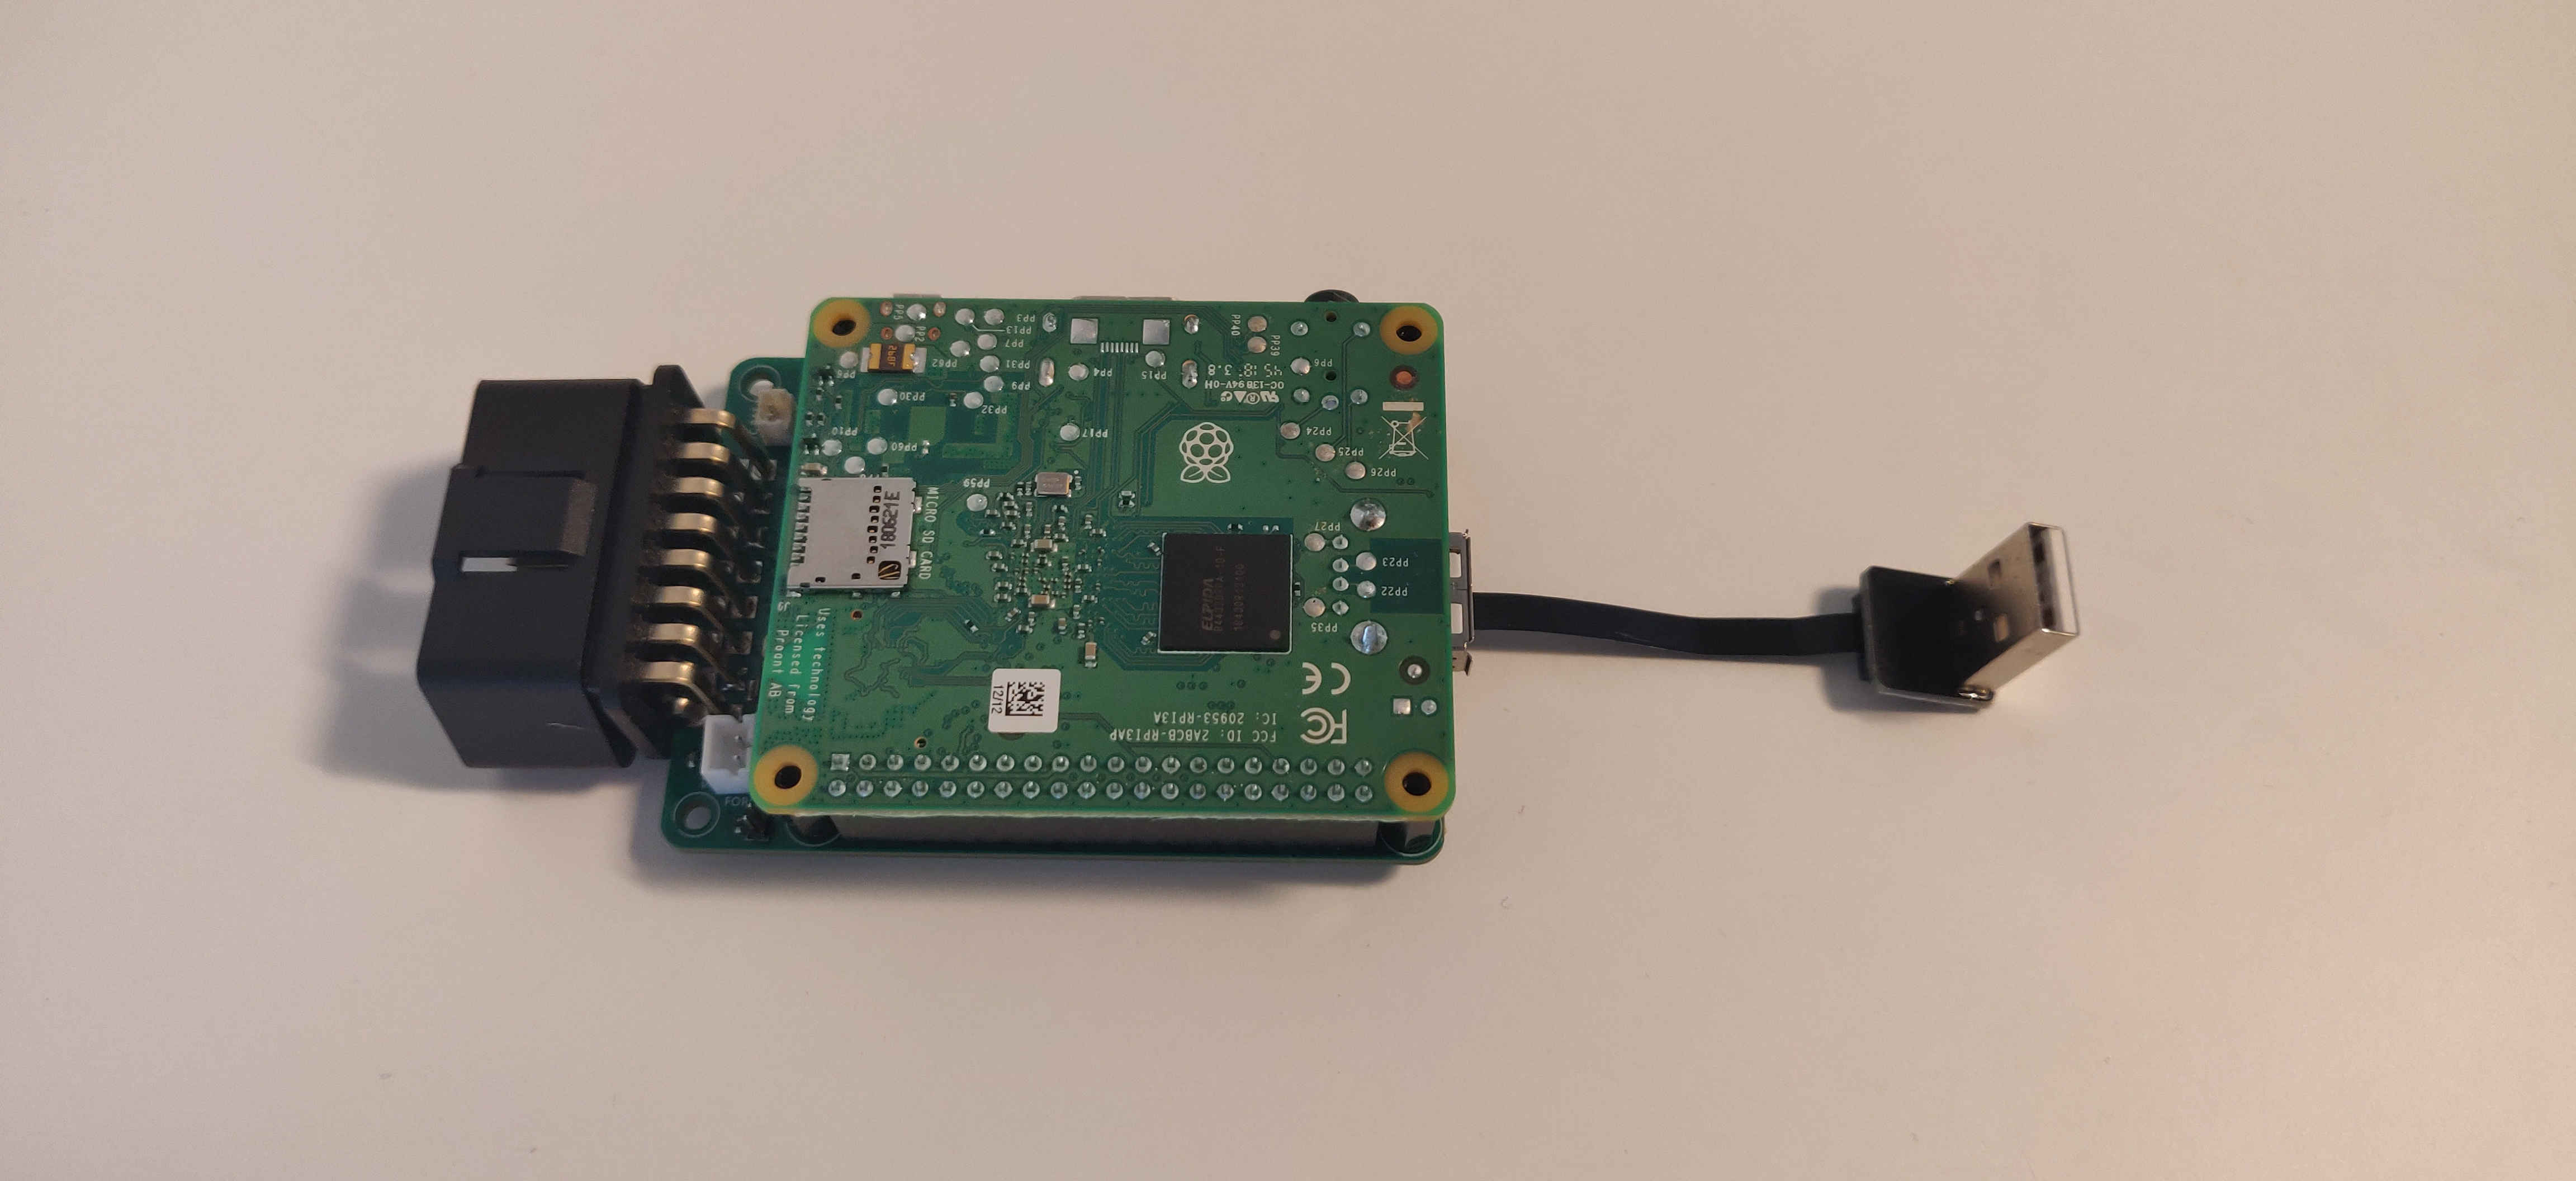
- Connect the USB cable that's attached to the AutoPi board to one of the open USB ports of your Raspberry Pi
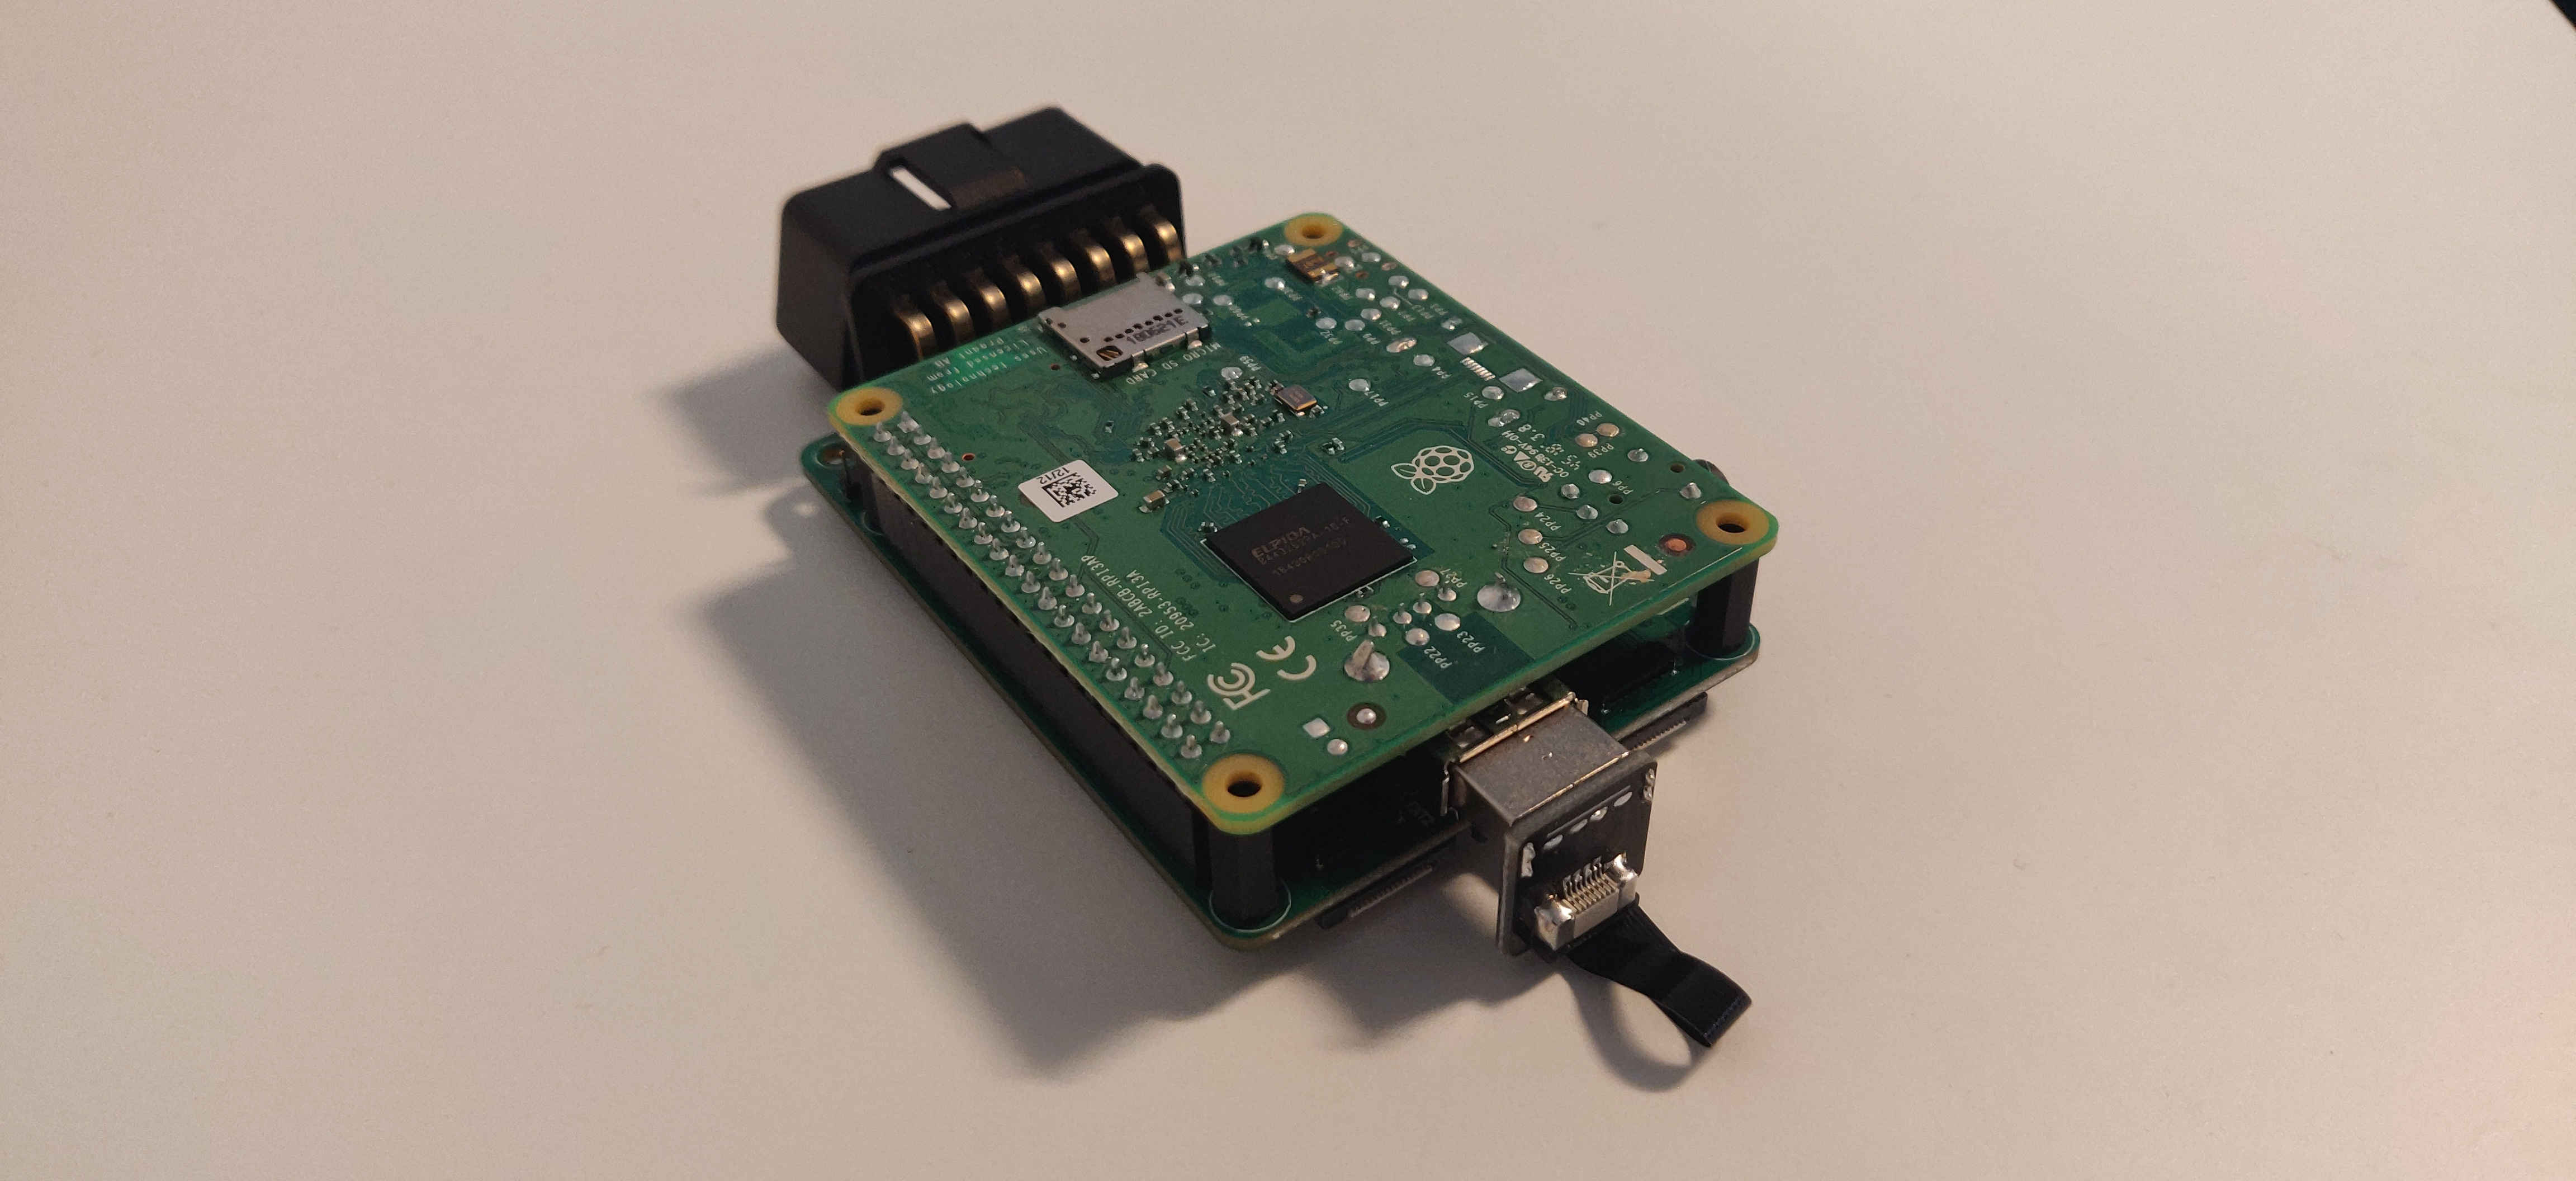
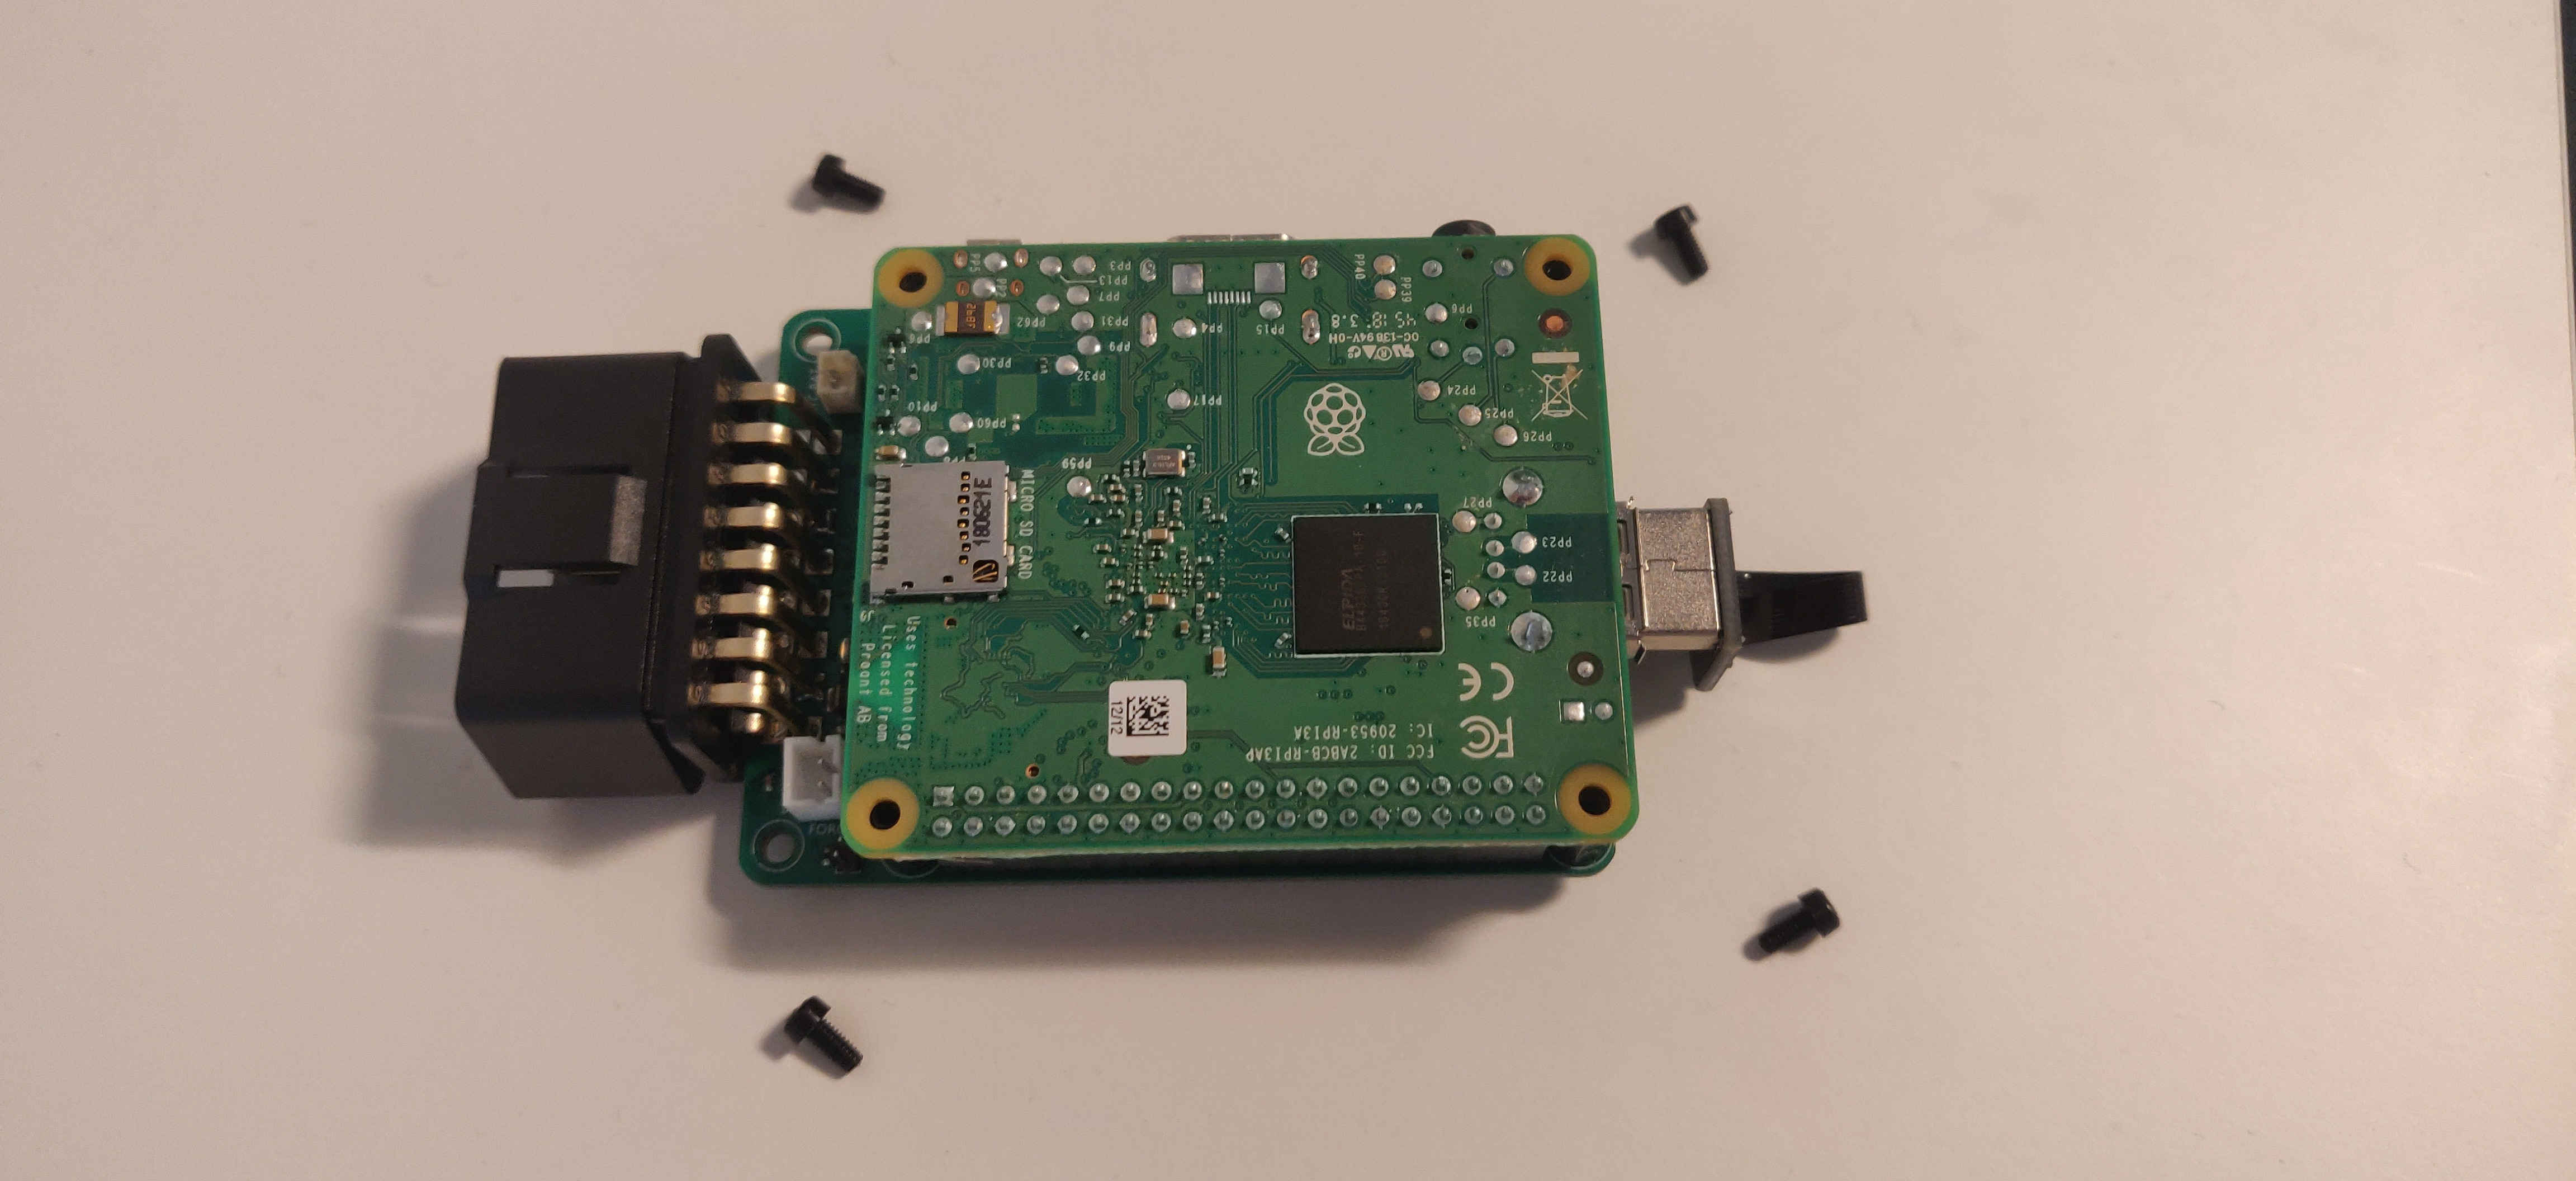
- Lastly, place the four screws to secure the two boards fastly together.
Connecting to the Cloud#
Should you want to use the AutoPi Cloud solution, you can use the image found in this link to flash an SD card. Make sure to download the correct image for your device - since you're reading this guide, you are most likely to be needing to download the TMU image, instead of the GEN 2 image.
tip
Etcher can write the compressed image directly to the SD card. We recommend using a Class 10 SD card with a minimum of 8GB storage.
Logging in to the Device#
The device is initially configured with the following credentials:
WiFi
SSID: AutoPi-Initial
Password: autopi2018
SSH
User: pi
Password: autopi2018
We highly recommend that you change those settings as soon as you are able to do so.
Getting Access to the Cloud#
To get your device on the AutoPi Cloud you need to get the unit ID of your device. You can find out
your device's ID by reading out the /etc/salt/minion_id file. Once you have that ID, you should write to
our support team (support@autopi.io) asking for it to be added to the system. Make sure that the dongle has
been online at least once before doing this.
caution
The AutoPi always needs to be powered through the OBD connector to function properly. Powering the board through the micro usb (or usb-c for RPi 4) power plug on the Raspberry Pi could damage your board. If you need to test the AutoPi in a lab environment, we encourage you to get the OBD power connector from our shop.
Get 4G and GPS Connectivity#
If you are looking to use a 4G SIM card or for GPS tracking to be enabled on your device, you will have to purchase your own modem, as one isn't included in the DiY Edition of the AutoPi. The modem that we assemble the rest of our devices with is the Quectel EG25-G mini PCIe modem. This is the modem that we also test all of our devices with and as such is the one, we recommend. However, since the modem is based on the Qualcomm chipset, other modems that are also based on the Qualcomm chipset should work as well.
Once you've purchased your modem, you will need to install it in the modem slot on the back of the
AutoPi board. Once you've done that, you will need to set one of the system settings to enable the
ec2x manager. You can do that by going over to the Advanced Settings > System page and looking
for the Setup > Mpcie > Module setting. There you can select the ec2x option which will install
the driver for the modem.
Discussion#
If you'd like to discuss this topic with us or other fellow community members, you can do so on our community page dedicated for this guide: Getting started with your DiY Edition.